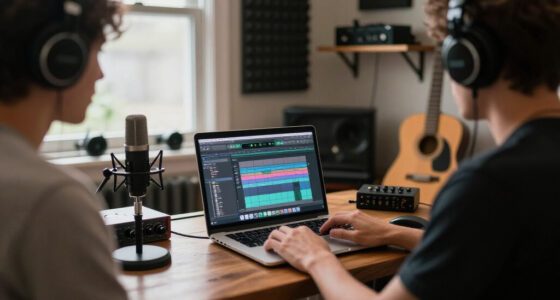


Choose a studio microphone, connect it to your recording setup, and capture a test take with a clean signal. This guide is for beginners recording vocals or instruments at home or in a small studio. Plan for about 30-60 minutes, including room setup and sound checks.

Get audio and creator gear delivered free with Prime
- Fast, free delivery on millions of items
- Prime Video, Amazon Music and more included
- Member-only deals all year

Audigo Wireless Microphone with Recording Studio App for iOS and Android
- ✔ Recording: 24-bit/48 kHz stereo
- ✔ Connectivity: Bluetooth 5.2 and Wi-Fi
- ✔ Connector: USB Type-C

FIFINE T669 Studio Condenser USB Microphone for Recording Podcasting
- ✔ Connectivity: USB
- ✔ Pickup pattern: Unidirectional cardioid
- ✔ Frequency range: 20 Hz–20 kHz

FIFINE AmpliGame AM8 USB/XLR Dynamic Microphone for Gaming Streaming
- ✔ Connectivity: USB and XLR
- ✔ Pickup pattern: Unidirectional cardioid
- ✔ Frequency response: 50 Hz–16 kHz
Difficulty: Beginner | Time: 30-60 minutes
What You’ll Need
Tools & Materials:
- Microphone suited to the source, such as a large-diaphragm condenser for vocals or a dynamic microphone for loud sources
- Audio interface with a microphone input and a preamp
- XLR microphone cable
- Microphone stand and clip or shock mount
- Headphones
- Recording software on a computer
- Pop filter for close vocal recording
Knowledge:
- Basic ability to connect an audio interface and select an input in recording software
- Ability to record and play back a short test
Check that the microphone, cable, interface, and computer use compatible connections. Place the recording setup near a power outlet and leave enough cable slack to prevent pulling the stand or connector. A quiet, soft-furnished room is usually a better starting point than an untreated, echoing space.
Audigo Wireless Microphone with Recording Studio App for iOS and Android
For a studio workflow built around a phone or tablet, Audigo takes the top spot because recording, multitracking, and basic mixing can happen in one compact system. Its 24-bit/48 kHz stereo capture and adjustable stereo width offer more spatial flexibility than the mono FIFINE microphones. Bluetooth and Wi-Fi connect it to supported mobile devices, and the magnetic base makes it easier to place on a stand or tripod without building a desktop rig first.That convenience comes with a specific commitment: the companion app is central to using the microphone, so buyers who prefer a computer, interface, or conventional DAW-first setup may find it restrictive. The included app offers useful mixing and effects, but some advanced features and cloud storage require Studio+. Its stated battery life is up to six hours, which also makes it less suited to extended sessions without a charging plan. Compared with the T669’s always-wired desktop setup, Audigo is more portable and stereo-capable, but relies more heavily on software and a mobile device.
Pros:
- 24-bit/48 kHz stereo recording with adjustable width
- Wireless connection to compatible iOS and Android devices
- App supports multitrack recording and basic mixing tools
- Compact body and magnetic mount simplify placement
Cons:
- Core workflow depends on a compatible phone or tablet
- Advanced effects and cloud storage require a paid subscription
- Up to six hours of recording may constrain long sessions
Best for: Mobile creators recording stereo music, voice, or video audio directly to a compatible iPhone, iPad, or Android device.
Not ideal for: Buyers who need an XLR connection, a computer-first studio chain, or long sessions without managing battery life.
Bottom line: We recommend Audigo when mobile stereo recording and an integrated app matter more than a conventional computer or XLR studio chain.
“We recommend Audigo when mobile stereo recording and an integrated app matter more than a conventional computer or XLR studio chain.”
FIFINE T669 Studio Condenser USB Microphone for Recording Podcasting
The FIFINE T669 is the easiest pick for a fixed desktop voice setup. It connects by USB and comes with a steel boom arm, shock mount, and double pop filter, so buyers get the core positioning and plosive-control accessories in the package. Its cardioid condenser capsule is designed to focus on sound in front of the mic, which suits spoken-word recording when we can place the microphone close and speak toward it.Compared with the AM8, the T669 is less adaptable to a changing studio: it has USB output only, so it cannot connect directly to an XLR interface or mixer. It is also a condenser microphone, which means room noise and reflections may matter more than they would in a less controlled recording space. The boom arm helps with positioning, but the kit is still designed around a desk and computer rather than mobile capture. Choose it over Audigo when a wired, arm-mounted voice setup is the priority; choose the AM8 if adding XLR to the recording chain is important.
Pros:
- USB plug-and-play connection without separate audio hardware
- Cardioid condenser design focuses on sound from the front
- Includes steel boom arm, shock mount, and double pop filter
- Detachable 8.2-foot USB cable supports flexible desk placement
Cons:
- USB-only connection limits integration with XLR interfaces and mixers
- Not compatible with Xbox consoles
- Condenser capture may pick up room sound in untreated spaces
Best for: New podcasters, voice-over creators, and home recordists who want a ready-to-position USB microphone kit for a laptop or desktop.
Not ideal for: Buyers seeking stereo or wireless capture, an XLR upgrade path, or a microphone for a noisy, untreated room.
Bottom line: We favor the T669 for a simple, accessory-complete desktop voice setup when USB connectivity is enough.
“We favor the T669 for a simple, accessory-complete desktop voice setup when USB connectivity is enough.”
FIFINE AmpliGame AM8 USB/XLR Dynamic Microphone for Gaming Streaming
The AM8 stands out when we want to keep a future interface option open. Its USB connection serves a direct computer setup, and its XLR output can connect to a compatible audio interface, mixer, or sound card. That makes it more adaptable than the USB-only T669 as a studio setup evolves. The dynamic cardioid design, headphone monitoring jack, and onboard gain and monitoring-volume controls support close-mic voice recording without requiring every adjustment to happen in software.Those controls and its RGB lighting are most relevant in USB mode; the lighting and function keys are disabled over XLR. Buyers also need to provide an XLR cable for that connection. Compared with Audigo, the AM8 is a wired, mono desktop microphone rather than a portable stereo recorder; compared with the T669, it offers a more flexible connection path but does not include the same complete boom-arm and pop-filter package in the listed details. Its 50 Hz–16 kHz response is narrower on paper than the T669’s stated range, so buyers focused on those specifications should weigh the intended voice workflow rather than assume the numbers alone determine suitability.
Pros:
- USB and XLR connections accommodate different studio setups
- Dynamic cardioid design is suited to close, front-facing voice capture
- Headphone jack and volume control enable direct monitoring
- Built-in mute control includes an LED indicator
Cons:
- XLR cable is not included
- RGB lighting and function keys are unavailable over XLR
- Listed package details do not include the T669’s full arm and pop-filter kit
Best for: Home recordists and streamers who want USB now, XLR compatibility for an interface or mixer later, and direct headphone monitoring.
Not ideal for: Buyers who need a stereo mobile recorder, a full boom-arm accessory kit, or USB features and lighting while using XLR.
Bottom line: We recommend the AM8 for buyers who value a dynamic USB microphone today and a direct XLR route into a more traditional studio chain.
“We recommend the AM8 for buyers who value a dynamic USB microphone today and a direct XLR route into a more traditional studio chain.”
As an Amazon Associate we earn from qualifying purchases.
Before You Start
Turn off phantom power before connecting or disconnecting an XLR microphone. Many condenser microphones need 48 V phantom power; most dynamic microphones do not. Check the microphone manual if you are unsure. Set interface gain low before the first sound check, and put on headphones so playback does not feed back into the microphone.
Choose the microphone based on the source, the room, and the available equipment. Condenser microphones capture fine detail and can also pick up room noise. Dynamic microphones are often a practical choice for loud sources or less controlled rooms. Neither type automatically produces a better recording; placement and a clean signal matter more.
Step-by-Step Instructions
Step 1: Choose a microphone for the source
Identify what you will record and choose a microphone that suits both the sound and room. For a lead vocal in a quiet room, a condenser microphone is a common choice. For a loud guitar cabinet, brass instrument, or voice in a noisy space, consider a dynamic microphone. Check the microphone’s pickup pattern: a cardioid pattern captures sound mainly from the front and reduces some sound from behind.
Tip: Do not buy a microphone based only on its price or type. Confirm that your interface has a compatible microphone input and enough gain for your chosen model.
Check: You have selected a microphone that can connect to your interface and is suitable for the source and recording space.
Step 2: Prepare the recording space
Choose the quietest room available, close windows, silence fans or appliances if safe to do so, and move the microphone away from computer fans. Add soft furnishings such as curtains or a rug to reduce reflections. Avoid placing the microphone in a corner, where bass can build up. Keep the performer and microphone away from hard, bare walls when possible.
Tip: Listen for hum, traffic, HVAC noise, and room echo before recording. A blanket or curtain can reduce reflections, but do not cover equipment that needs ventilation.
Check: A short test recording sounds free of prominent room echo and steady background noise.
Step 3: Mount the microphone securely
Attach the microphone to its clip or shock mount and tighten it on a stable stand. Aim the microphone’s front toward the source; on many side-address microphones, the front is marked with a logo or indicator. Position the stand so the performer can stay comfortable without touching it. Keep the microphone cable clear of feet and moving stands.
Tip: Use a shock mount if handling or floor vibrations are reaching the microphone. Do not overtighten a clip or force a microphone into a mount that does not fit.
Check: The microphone stays in position when lightly bumped at the stand, and the cable hangs without pulling on the connector.
Step 4: Connect the microphone safely
Turn the interface’s phantom power off and lower its input gain. Connect one end of the XLR cable to the microphone and the other to the interface’s microphone input. Connect the interface to the computer, open your recording software, and select the interface as the input device. If the microphone requires 48 V, switch phantom power on only after the cable is connected.
Tip: Wait a few seconds after switching phantom power on before recording. Turn phantom power off and lower the gain before unplugging the microphone.
Check: The interface and software show an input signal when the performer makes a sound, with no crackling or intermittent connection.
Step 5: Set the microphone position
Start with the microphone about 15-30 cm from a vocalist, with the capsule near mouth height. Place a pop filter between the performer and microphone, leaving a few centimeters between the filter and capsule. For an instrument, begin around 20-40 cm away and point the microphone toward the desired sound area. Listen and adjust the distance or angle in small increments.
Tip: A microphone aimed directly at the mouth can emphasize sharp consonants and breath. Angle it slightly off-axis if those sounds are distracting. Greater distance captures more room sound; closer placement captures more direct sound and proximity effect on many directional microphones.
Check: The performer can maintain a steady position, and the microphone captures the intended source without obvious popping or excessive room sound.
Step 6: Set input gain with a test take
Ask the performer to deliver the loudest expected passage or play the instrument at its recording volume. Raise the interface gain until the software meter shows a healthy signal, leaving headroom. Aim for peaks around -12 to -6 dBFS in the recording software, and keep the meter out of the red. If the interface clips, lower the gain and repeat the test.
Tip: Do not compensate for a weak recording by turning the headphone volume up while ignoring the input meter. Headphone level and recording gain are separate controls.
Check: The loudest test peaks stay below 0 dBFS, with no clipping indicator or harsh distortion.
Step 7: Record and review a short sample
Record 10-20 seconds of typical performance, including a loud section. Stop and listen through headphones. Check for clipping, pops, hiss, hum, room echo, and unwanted handling noise. If you hear a problem, change one thing at a time—such as microphone angle, distance, room position, or gain—and record another sample.
Tip: Keep the test recording at the same performance level you expect for the main take. A quiet test will not reveal clipping that occurs during a louder passage.
Check: The sample sounds clear and natural at a comfortable listening level, and the waveform or meter shows no clipped peaks.
Step 8: Save the setup and record
Save the recording session, confirm the track is armed on the correct input, and note the microphone position and gain setting. Ask the performer to avoid touching the stand or cable during takes. Record the full take, then play it back before moving the microphone or changing the room setup.
Tip: If you need to repeat a take, keep the stand and microphone position unchanged so the sound remains consistent.
Check: The session contains a clearly labeled track with an intact take and a level that does not clip.
Common Mistakes to Avoid
- Turning the preamp gain up until the meter clips. — Set gain using the loudest expected passage and keep peaks below 0 dBFS, preferably around -12 to -6 dBFS.
- Pointing the wrong side of a side-address microphone at the source. — Check the microphone markings or manual to identify its front before positioning it.
- Placing the microphone too close without a pop filter. — Start 15-30 cm from a vocalist, add a pop filter, and listen for plosives before recording a full take.
- Switching phantom power on or off while connecting the microphone. — Lower the gain and switch phantom power off before connecting or disconnecting the XLR cable.
Troubleshooting
Problem: The recording software shows no input signal.
Solution: Confirm that the interface is selected as the software input, the track uses the connected input, the cable is fully seated, and the track is armed. If using a condenser microphone, connect it first and then enable phantom power if required.
Problem: The signal is distorted or the meter reaches the red.
Solution: Lower the interface preamp gain and repeat the loud test passage. Check for a separate pad switch on the microphone or interface if the source is very loud.
Problem: The recording has pops on words with strong P or B sounds.
Solution: Place a pop filter between the performer and microphone, increase the distance slightly, or angle the microphone a little off-axis. Record another sample to check the result.
Problem: The take contains hum, hiss, or room echo.
Solution: Move the microphone away from power supplies and computer fans, check cable connections, and listen to a sample with the room quiet. Reduce reflections with soft furnishings or move the setup to a quieter room.
What Success Looks Like
Your microphone is mounted securely, connected to the correct interface input, and positioned toward the source. A test take sounds clear through headphones, with no distracting pops, hum, or distortion. The loudest peaks remain below 0 dBFS, the recording software captures the intended track, and you can repeat the setup consistently.
Next Steps
Save a copy of the session and back up the audio files. Write down the microphone, distance, angle, and gain settings that worked so you can recreate them. After recording, lower gain and switch phantom power off before disconnecting a condenser microphone. Store the microphone in its case in a dry place, and ask an audio technician for help if persistent electrical noise or hardware faults remain.
Frequently Asked Questions
Do I need a condenser microphone for studio vocals?
No. A condenser is a common choice for detailed vocal recording, but a dynamic microphone can work well, especially in a noisy room. Choose based on the sound, room, and equipment you have.
Should I turn on 48 V phantom power?
Turn it on only if the microphone requires it, as many condenser microphones do. Check the manual if uncertain, and connect the XLR cable before enabling phantom power.
How far should the microphone be from a singer?
Start about 15-30 cm away with a pop filter in place. Move closer for a more direct sound or farther away for more room sound, then record samples to compare.
What recording level should I aim for?
Set the loudest expected peaks around -12 to -6 dBFS in the recording software. Keep peaks below 0 dBFS to avoid digital clipping.
Evergreen bestsellers Picks

Ninja AF101 4-Quart Air Fryer, 4-in-1, Grey

KitchenAid 3-Piece Pasta Roller and Cutter Set for Stand Mixers

Hisense 40-Inch QD4SR Series Hi-QLED FHD Roku Smart TV
As an affiliate, we earn on qualifying purchases.