
TL;DR
For streaming, a dynamic microphone like the Shure MV7 or Rode PodMic usually beats a condenser in untreated rooms because it ignores echo instead of recording it. USB is fine to start; XLR pays off only when you upgrade to an interface and mixer. Spend as much on your room and positioning as you do on the mic itself.
Your viewers will forgive 720p video. They will click away from bad audio in about eight seconds. That’s the uncomfortable math every streamer learns eventually — the webcam matters less than the microphone, and most people discover this six months too late, after wondering why average watch time never climbs.

Get audio and creator gear delivered free with Prime
- Fast, free delivery on millions of items
- Prime Video, Amazon Music and more included
- Member-only deals all year
Here’s a concrete example of how this plays out: imagine two streamers with identical $150 budgets. One buys a sensitive condenser mic and plugs it into a bare-walled bedroom; the other buys a $99 dynamic mic, a $30 boom arm, and a $20 rug. The second streamer sounds dramatically better on day one — not because of brand loyalty or luck, but because the microphone type matched the room. That’s the decision that actually matters, and it’s the one nobody explains at checkout.
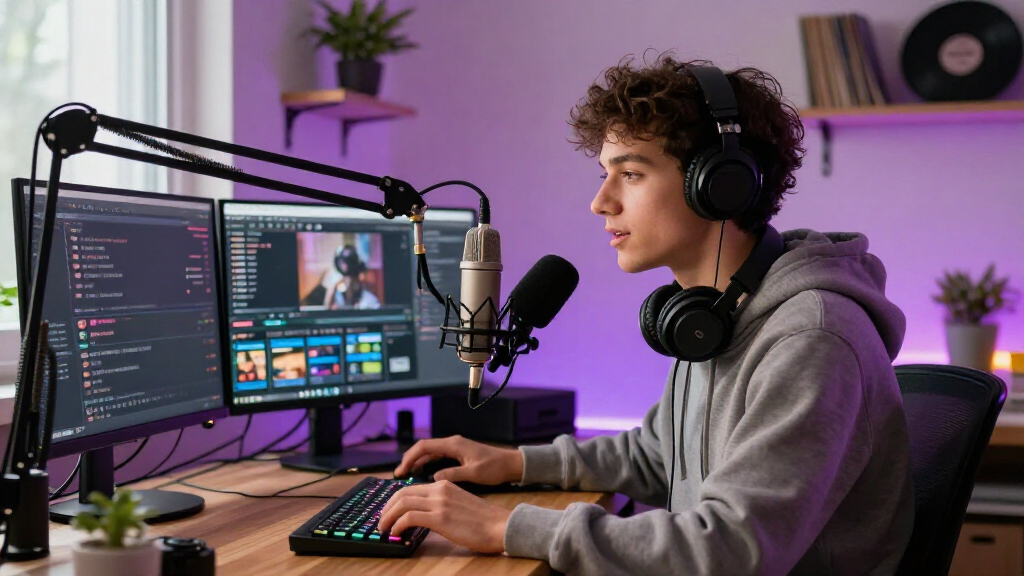
This guide walks you through that decision: condenser vs dynamic, USB vs XLR, and how much you really need to spend. No audiophile jargon, just what works in a real bedroom or spare-room studio. I’ll use specific mics and real prices throughout, because “it depends” helps nobody when you’re staring at a product page at midnight.
A dynamic mic (Rode PodMic, Shure MV7) beats a condenser in untreated rooms because it rejects echo and keyboard noise at the source.
Dynamics need you 2-4 inches from the capsule — budget for a boom arm, not just a mic.
Start USB; the Shure MV7’s dual USB/XLR outputs let you upgrade to an interface later without replacing the mic.
Free OBS filters (noise gate at close-when-silent, 2:1 compression, gain peaking at -12 dB) outperform a $200 hardware upgrade.
Clap-test your room before buying: if it rings, spend on rugs, curtains, and foam before spending on a better microphone.
Why Your Room Decides Your Mic (Before Your Budget Does)
A studio microphone for streaming is only as good as the room it sits in. A $400 condenser in an echoey bedroom with bare walls will sound worse than a $100 dynamic in the same space — because condensers hear everything, including the reflections bouncing off your drywall.
Here’s the quick version of how sound behaves in your space. Your voice hits the mic directly, but it also hits your desk, your window, and the wall behind you, then reflects back into the mic 10-30 milliseconds later. Your brain ignores that. A microphone doesn’t. That smeared, “recorded in a bathroom” quality you hear on beginner streams? That’s the room, not the gear.
Test it right now: clap once, loudly, from your streaming chair. If you hear a sharp metallic ring or a tail that lingers, you have reflections to deal with.
- Cheap fixes first: a rug under your desk, curtains over the window, a bookshelf on the wall behind you
- Next tier: acoustic foam panels behind and beside the mic position (about $40-60 for a 12-pack)
- Free fix: stream in a closet or a corner stuffed with soft stuff — genuinely works
Your mic choice should be a response to your room, not a reaction to a price tag.
Products Worth Considering

Jackery HomePower 3000 Portable Power Station, 3072Wh

Samsung Galaxy Tab A11+ Kids Edition, 128GB, Royal Blue
Bose QuietComfort Wireless Noise Cancelling Headphones, Sandstone
As an affiliate, we earn on qualifying purchases.
Condenser vs Dynamic: The One Choice That Changes Everything
Condenser mics are sensitive and detailed; dynamic mics are selective and forgiving. That single difference explains almost every streaming audio problem you’ve ever heard.
A large-diaphragm condenser like the Audio-Technica AT2020 captures the full sparkle of your voice — and your ceiling fan, your mechanical keyboard, and your neighbor’s dog. A dynamic mic like the Shure MV7 or Rode PodMic has a tighter pickup pattern, so it mostly just hears what’s directly in front of it.
| Factor | Condenser (e.g., AT2020, Blue Yeti) | Dynamic (e.g., MV7, PodMic, SM58) |
|---|---|---|
| Room sensitivity | High — needs treatment | Low — forgiving |
| Keyboard noise | Picks up everything | Rejects most of it |
| Distance requirement | Works at 8-12 inches | Needs 2-4 inches |
| Detail and airiness | Excellent | Good, warmer tone |
| Best room type | Treated studio | Bedroom, office, anywhere |
Real-world example: a friend of mine streamed with a Blue Yeti for a year, constantly apologizing for echo and clacks. He switched to a Rode PodMic ($99) on a boom arm, and chat immediately asked what expensive upgrade he’d bought. He’d spent less money.
The catch with dynamics: you have to eat the mic. Two to four inches, consistently. If you lean back in your chair mid-game, your volume drops. A boom arm solves this — get one.
USB vs XLR: Skip the Interface Until You Actually Need It
USB microphones connect straight to your computer and sound great for streaming; XLR microphones require an audio interface but scale better as you grow. Most streamers should start USB and upgrade later — but understanding why saves you from a very common expensive mistake.
Here’s what’s actually happening under the hood. A microphone produces a tiny, quiet analog signal. Something has to amplify it and convert it to digital before your computer can use it. A USB mic like the Elgato Wave:3 ($149) or Shure MV7 USB ($249) handles both jobs internally with built-in circuitry that’s tuned specifically for that capsule — plug in, select it in OBS, done. An XLR mic outsources those jobs to a separate box, like the Focusrite Scarlett 2i2 (~$160) or a mixer like the GoXLR Mini (~$200), which powers the mic and converts the signal.
The implication of that split matters for your wallet. With USB, the conversion quality is baked in and you can never change it — if the preamp hisses at high gain, you’re stuck. With XLR, the mic and the electronics are separate purchases, which is both the weakness (higher total cost, more cables, one more thing to troubleshoot at 2 AM before a stream) and the strength: you can pair an SM7B with a better preamp years from now without touching the mic itself.
So when does XLR actually pay off? Three concrete scenarios: (1) you want a physical fader and mute button you can hit by feel mid-game without alt-tabbing — the difference between muting in half a second and apologizing to chat for the cough you broadcast; (2) you need zero-latency monitoring of yourself plus game audio through hardware, not software; (3) you’re adding a co-host or guest mic, which requires extra inputs a single USB mic can’t give you. If none of those describe you, XLR is paying interest on a loan you haven’t taken out.
One specific pick worth knowing: the Shure MV7 is both. It has USB and XLR outputs, so you can start USB today and plug into an interface next year without buying a new mic. That flexibility is why it’s become the default streaming recommendation — it’s the only mainstream mic that lets you defer the decision instead of making it twice.
If you can’t name a specific feature you need from XLR, you don’t need XLR yet.
Three Setups That Work, From $80 to $400
These three matched bundles cover 95% of streamers. Match your budget and room, and stop researching.
- Budget ($80-130): Rode PodMic + basic boom arm. Dynamic, tank-built, ignores messy rooms. Add a cheap foam windscreen and you’re done.
- Mid-range ($250-350): Shure MV7 (USB/XLR) + boom arm + pop filter. The set-and-forget option — onboard headphone monitoring, touch controls, room-filling sound quality.
- Growth ($400+): Shure SM7B or MV7 via XLR + GoXLR Mini or Scarlett 2i2. Hardware mute buttons, fader control, and room to add a second mic later.
Notice what’s missing: the $150 condenser tier. That’s deliberate. In an untreated room, that price range buys you sensitivity you can’t use yet. Earn the condenser — treat the room first, then graduate to something like an AT2035 or a Rode NT1.
5 Minutes of Settings That Beat a $200 Upgrade
Placement and software tuning improve streaming audio more than any gear upgrade. Do these four things before you spend another dollar.
- Get close: 2-4 inches from the mic, slightly off-axis (talk past the capsule, not into it) to tame plosives. Think of it like talking across someone’s shoulder at a loud party instead of shouting into their ear — the plosive bursts of air from “p” and “b” sounds miss the capsule entirely.
- Set gain low: Aim for peaks around -12 dB in OBS. Quiet is fixable; clipping is not. The logic: if you set gain so your normal voice peaks near 0 dB, the first time you laugh or get excited in a game, the signal distorts digitally — and that crackle is permanently baked into the stream. Headroom is insurance for the moment you scream at a jump scare.
- Add a noise gate: In OBS or your interface software, set the gate to close when you stop talking. A gate is essentially a doorman: signal above the threshold gets through, anything quieter — keyboard clatter, chair creaks, your dog’s nails on hardwood — gets the door shut in its face.
- Light compression: A 2:1 ratio evens out your shouting and whispering so viewers stop riding their volume knob. At 2:1, a sound twice as loud as your target comes out only slightly louder — your excited callouts and your calm between-round commentary end up in the same comfortable range.
According to streamers who’ve A/B tested it in community forums, gate plus compression alone is the most common “why do you sound so good now” upgrade — and it’s free in OBS filters. A practical way to verify: record a two-minute test with the filters off, then on, and listen on your phone earbuds — the difference is usually bigger than swapping to a mic $200 more expensive.
Also: wear closed-back headphones, not speakers. Speaker audio bleeding into your mic is the single most common beginner mistake, and no filter fully removes it — a noise gate can’t distinguish your game’s soundtrack from your voice once both are in the signal.
Frequently Asked Questions
Is a condenser mic bad for streaming?
No, but it’s the wrong tool for most untreated rooms. Condensers like the AT2020 capture wonderful detail — plus your fan, keyboard, and wall reflections. If your space is treated with panels and soft surfaces, a condenser sounds fantastic. In a normal bedroom, a dynamic mic sounds cleaner with zero treatment.
Do I need an audio interface for streaming?
Not at first. USB mics like the Elgato Wave:3 or Shure MV7 plug straight in and sound great. You need an interface (Scarlett 2i2, GoXLR Mini) only when you want hardware faders, extra inputs, or an XLR-only mic like the SM7B.
What’s the best streaming microphone under $150?
The Rode PodMic at $99, paired with a $30 boom arm. It’s dynamic, built like a tank, and ignores room noise. Add a foam windscreen and you have a setup that competes with mics twice its price in typical home rooms.
How far should I sit from my streaming mic?
For dynamic mics, 2-4 inches, speaking slightly past the capsule rather than directly into it. Condensers work at 8-12 inches. Consistency matters more than the exact number — if your distance changes, your volume does too.
Is a pop filter necessary?
For close-up dynamic mics, yes — or at minimum a foam windscreen. Plosive pops (the thump on “p” and “b” sounds) get dramatically worse at 2 inches. A $10 foam cover or $15 pop filter solves it completely.
Conclusion
Buy the microphone your room deserves, not the one your favorite YouTuber uses. For most streamers that means a dynamic mic on a boom arm, close to your mouth, with a noise gate doing the boring work in OBS — the $99-to-$250 range covers it.
Want the fastest test of whether your current audio is holding you back? Record 30 seconds, play it back on your phone through earbuds, and compare it to a streamer you admire. If the gap is echo and clatter, you now know exactly what to fix — and it probably isn’t the microphone.