EQ
Automation in Audio Mixing: The Benefits of Developed Changes to Effects, Volume, Pan and Other Parameters
Mix automation is the process of recording adjustments to parameters across the timeline of a mix. Automation can be applied to several parameters of your mix, but the most common are gain and effects. For example, you might automate the level of a kick drum so that it cuts through the mix during the chorus, or automate the delay time of a vocal so that it creates an echoey effect during the bridge.
Applying automation can give your mix a more dynamic feel and help ensure that each element is balanced and well-suited for its role in the song. When used judiciously, automation can be a powerful tool for creating professional-sounding mixes.
Analog Legacy
In the analog era, engineers would mix the audio by hand, adjusting the faders in real-time as the music was being recorded to tape. However, this process was often imprecise and difficult to repeat. To solve this problem, mix console designers developed motorized faders that could be programmed to make the changes automatically. This allowed engineers to create mixes that were more consistent and sounded better.
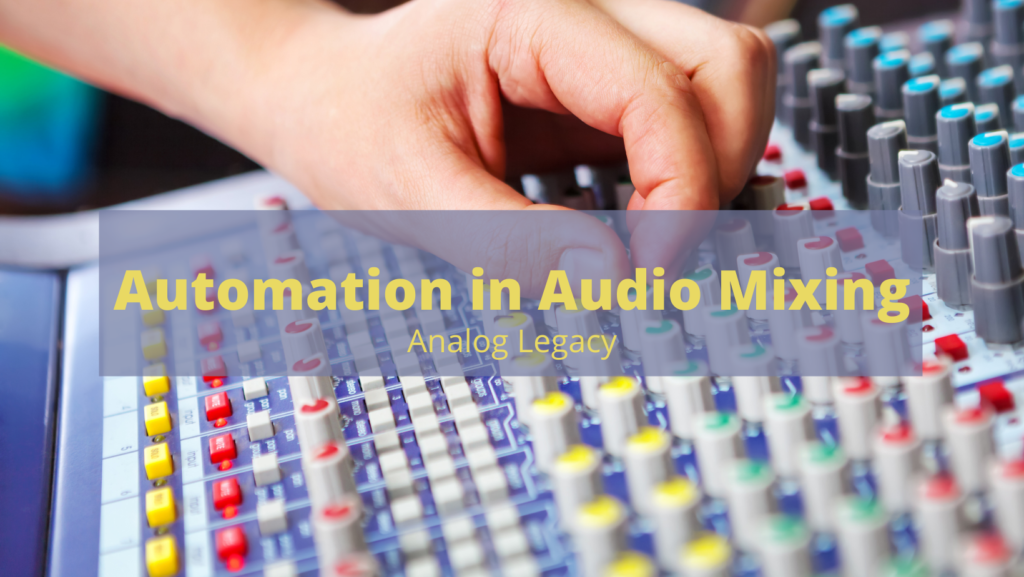
Over time, the technology has continued to evolve, and today’s digital consoles offer even more features and capabilities. But at its core, the mixing process still relies on the same basic principle of level control. By carefully balancing the levels of each track, engineers can create a finished product that sounds polished and professional.
Mix Engineer Automates Various Parameters
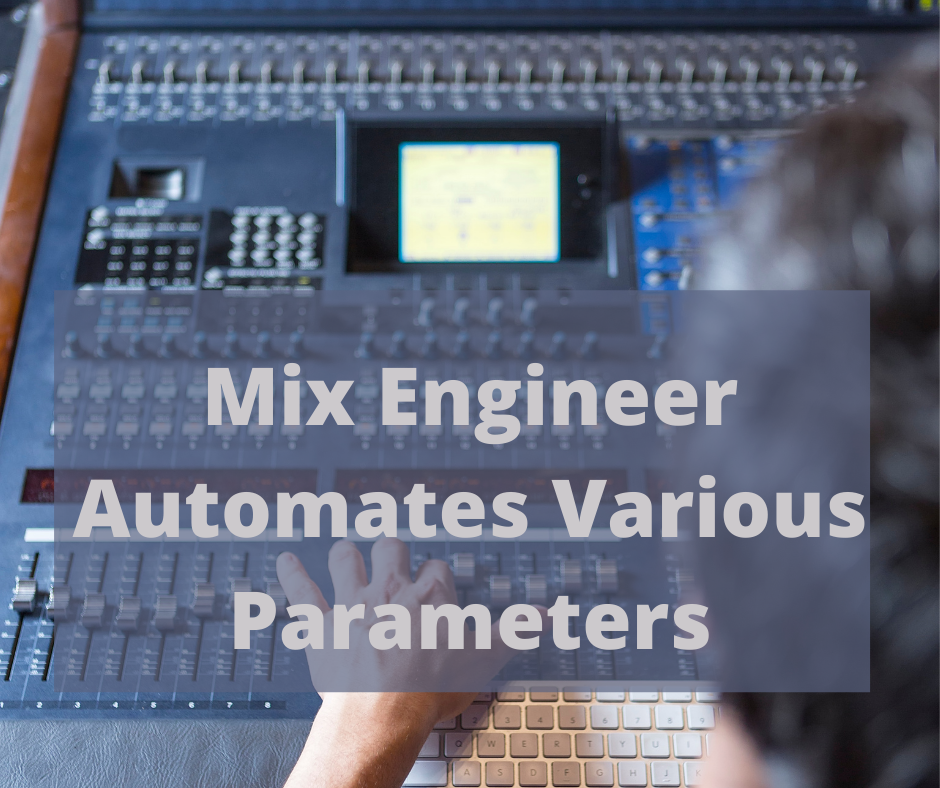
In the past, automating a process in the Digital Audio Workstation (DAW) meant using a simple on/off switch to trigger an audio event. This was often done with a foot pedal, but it was also possible to use midi devices or even the computer keyboard.
Today’s DAW automation is an extension of those ideas, but with many more possibilities. It is now possible to automate almost any parameter in a DAW, from volume levels and panning to plugin settings and much more. This gives producers and engineers a lot more control over their sound, and it also makes it possible to create sounds that would be impossible to achieve with traditional methods.
As DAW automation continues to evolve, it is likely that even more creative possibilities will be opened up for those who are willing to experiment.
The ability to automate various parameters in an audio mix can be a tremendous help in elevating a static mix and breathing life into it. Automation allows for the introduction of movement, transitions, and creative spark.
Automation in Audio Mixing
In the modern world of music production, there are a seemingly endless array of tools available to help you get the sound you want. One of the most powerful tools in your arsenal is automation.
Automation allows you to make detailed adjustments to the level, panning, effects, and other parameters of a track and can be used to create everything from subtle nuance to radical sonic transformations. In this article, we’ll take a brief look at some of the automation techniques that can be used to improve the overall mix and character of a track. By making use of these techniques, you’ll be able to take your productions to the next level.
In music production, automation is a powerful tool that can help to elevate a track and add interesting movement and transitions. Automation allows the user to create predefined changes to a variety of parameters within a DAW, including effects, volume, panning, and more.
This can be especially useful in creating a more dynamic mix, which can add energy and keep the listener engaged. Additionally, automation can be used to add creative flair to a track, such as Slowly fading in reverb over the course of verses building up to the chorus. Automation can be a helpful tool in both the mixing and creative stages of music production. when used judiciously, it can help take a track to the next level.
Automation in Audio Mixing
Automation is a powerful tool that can help you to save time and improve the quality of your mixes. When used in music production, automation refers to having a DAW (Digital Audio Workstation) perform tasks automatically over time.
The most popular use of automation in mixing is to adjust the volume of a track. This can be done by using a volume envelope, which allows you to set the overall level of the track as well as how the level changes over time. Automation can also be used to control other parameters such as panning, EQ, and effects send levels.
By automating these controls, you can make subtle or dramatic changes to the sound of a track without having to stop the recording and make manual adjustments.
In addition, automation can be used to create special effects, such as fades and reverses. Automation is a flexible and powerful tool that can help you to save time and produce better mixes.
Automate Before Mixing
One of the most important things to keep in mind when automating is that it’s best to do it before you start mixing. This is because automation is a destructive process, meaning that once you’ve automated a parameter, you can’t go back and change it without affecting the rest of the mix.
For this reason, it’s important to get all of your automation in place before you start mixing, so that you can make changes and try different things without having to worry about ruining the mix.
Additionally, it’s a good idea to automate as much as possible in the arrangement stage, so that you have more freedom when it comes time to mix. Automation can be a helpful tool in both the arrangement and mixing stages of music production.
When used judiciously, it can help take a track to the next level.
By automating various parameters in your audio mix, you can elevate a static mix and breathe life into it. Automation allows for the introduction of movement, transitions, and creative spark.
Before embarking on any project, it is important to take a moment to assess what needs to be done and develop a plan of action. The same is true when mixing a song; take a few minutes to automate the levels of your tracks before diving in and making any drastic changes.
By doing so, you will get a better sense of how the different elements of the song work together and can make more informed decisions about where to add or subtract effects.
Automating during the mix can also help to create a more polished and professional-sounding final product. So, before you hit the record button, take a moment to automate your levels and get your mix started on the right foot.
Automate Volume Refinement and Adjustment
The master fader on a mixing console is used to control the overall level of the audio output. In some cases, a stereo pair of faders may be used. This allows the engineer to fade the audio in and out as needed.
Automation can also be used to control the level of the master fader. This allows for fades to be applied to the entire mix. The use of the master fader is essential in achieving a professional-sounding mix. Without it, the audio would sound chaotic and unfocused. The master fader allows the engineer to take control of the mix and create a polished final product.
Now in a DAW this is way easier. Automation is a powerful tool that can be used in a variety of ways to improve the sound quality of an audio recording. One notable usage of automation is in volume refinement and adjustment.
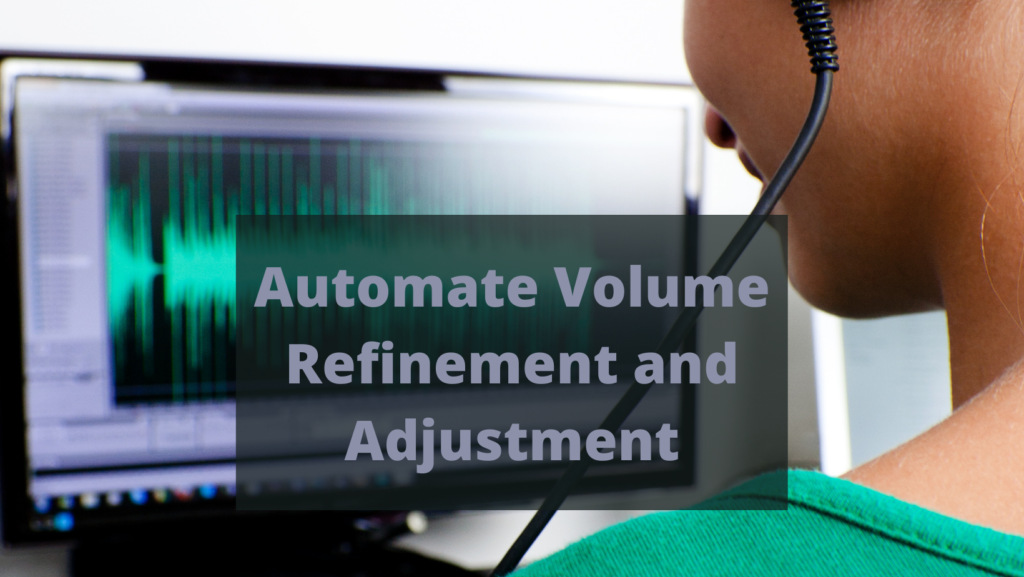
The volume of an audio clip can be automated to emphasize certain sections and to create dynamic variation in the volume range.
Vocals and other pre-recorded tracks can also be balanced with the help of volume automation as quieter parts can be made louder and vice versa. This allows for a more polished and professional-sounding recording. In addition, automation can be used to automate other aspects of the sound mix, such as EQ, reverb, and panning. When used judiciously, automation can greatly improve the overall quality of an audio recording.
Sweep Automation
In audio engineering, the term “panning” refers to the placement of a sound in the stereo field. By adjusting the panning of a sound, we can control its perceived position within the mix. For example, if we pan a sound all the way to the left, it will appear to be coming from the left speaker.
If we pan it all the way to the right, it will appear to be coming from the right speaker. Panning can be used to create a wide variety of stereo effects, from simple room ambiance to complex spatial textures.
In addition to regular panning controls, many digital audio workstations also offer automation features that allow sounds to be panned dynamically over time. This can create some really cool effects, like making a sound seem to move from left to right across the stereo field.
Automate Panning
When it comes to creating a professional sounding mix, there are a number of important factors to consider. One of the most important is panning, which refers to the way audio is distributed within the stereo field. By carefully placing different elements of a track in different parts of the stereo spectrum, you can create a sense of space and depth in your mix.
Additionally, panning can also be automated to add movement and interest. For instance, you could automate a drum pattern so that it slowly pans from left to right, or add subtle movement to an ambient pad layer to create a sense of width and space. When used tastefully, automation panning can be a powerful tool for adding life and interest to your mixes.
Automating panning can be a great tool to give space in a mix, or create dramatic effects of sounds moving from left to right. To automate panning, select “Pan” and plot the points in the track just like you would above.
When you do this, you can create some really cool effects that will add more dimension and interest to your music. Try automation panning the next time you are working on a track, and see how it can help to take your music to the next level!
Automate Effects Parameters
When it comes to effects, it’s important to use them sparingly and with purpose. Reverb and delay can add a lot of depth and character to a track, but too much of either can quickly make a mix sound cluttered and muddy. Instead of using effects as a crutch, try to focus on creating a solid foundation with the core elements of your mix first.
Once you have a strong base to work from, then you can start thinking about how effects can enhance the overall sound. By using effects judiciously, you can create a production that is both powerful and clear.
As anyone who has ever tried to create a complex audio production knows, achieving the perfect sound can be a challenge. One way to achieve greater control over the sound of your production is to use automation clips. Automation clips allow you to control when and how long certain effects, like delay or reverb, are activated.
Automation is a great way to add movement and interest to your tracks. Unlike MIDI, which is triggered by the user, automation is typically set up to run on its own, making it ideal for creating evolving soundscapes or for adding dynamic changes to a track.
A wide range of parameters can be automated, from simple things like volume and panning to more complex effects like filters and modulation. In most cases, automation is performed using a hardware controller, such as a fader box or an XY pad.
However, it is also possible to automate parameters within third-party plugins. This can be a great way to add interest and texture to your tracks without having to invest in any new hardware.
This means that you can create more sophisticated progressions by carefully controlling when these effects are used. Additionally, using automation clips can help reduce unwanted echoes and provide a better overall auditory experience for the listener. So if you’re looking for greater control over your sound, consider using automation clips.
Automate Equalization (EQ)
In music production, equalization (EQ) is a powerful tool that can be used to shape the sound of a track. By reducing the low-end frequencies in certain parts of a song, EQ can help to create more space for other instruments to come in. This can be especially effective during the drop, when the low-end spectrum is often crowded with sub-bass and other bass-heavy sounds.
By applying EQ to melodic elements like guitars and pianos, you can minimize the low-end frequencies and free up space for the sub-bass to shine through. In addition to shaping the sound of a track, EQ can also be used to fix problem areas. For example, if a track sounds muddy or cluttered, reducing the low-end frequencies can help to clean up the mix and make it sound more open and spacious.
EQ is an essential tool for any producer, so it’s important to learn how to use it effectively. With a little practice, you’ll be able to use EQ to create cleaner, more polished mixes that will sound great on any system.
There are a number of ways to use EQ to shape your sound, and one of the most effective is using an automation clip with an exponentially shaped curve. This allows you to gradually bring in the EQ filter, and let the natural low-end frequencies come out at different parts of your track.
For instance, you could use this technique in the intro to let the bassline slowly build-up, or in the chorus to add emphasis to the rhythm section. Experiment with different automation curves and see how they impact your sound. With a little bit of trial and error, you’ll be able to find the perfect EQ settings for your track.
Mixing Vocals with Automation
In addition to providing a clearer and more polished sound, automation can also be used to control the dynamics of a mix. By carefully reducing and boosting the volume of specific words and phrases, it is possible to add feeling and emotion to the vocal, which can help the listener connect with the music on a deeper level.
Syllables and words that might otherwise be lost in the mix can be brought to the forefront, ensuring that every element of the vocal is heard. With careful use of automation, it is possible to create a mix that is both technologically sophisticated and emotionally engaging.
Building up The Tension
The use of a low pass filter or high pass filter is a common technique used by mixers to create tension in a new track. By automating the frequencies that are cut out or introduced, the mixer is able to build up the tension until it reaches a particular moment in the audio, known as the drop.
This technique can be used to control specific parameters on all kinds of plug-ins, giving the mixer a lot of flexibility in terms of how they want to mix the track. In EDM production, for example, the use of a low pass filter or high pass filter can help to create a sense of anticipation and excitement leading up to the drop. By carefully manipulating these frequencies, the mixer is able to create a track that is both dynamic and exciting.
Automate Manual Compression
In the world of audio engineering, a compression is an essential tool for achieving a polished sound. Compression can be used to even out volume levels, reduce background noise, and add punch and clarity to a track.
While compression can be achieved using a variety of methods, many engineers prefer to use automation. Automation allows for more precise control over the compression process, which can result in a more natural sound.
By manually taking the volume peaks off your instrument tracks, you can claim more control over your mix which results in a better overall sound. In the hands of a skilled engineer, automation can be a powerful tool for achieving sonic excellence.
How to Write Automation
In the mixing process, automation can refer to when an adjustment to volume, panning or a variety of FX parameters is designed to change or move throughout the duration of sections of the song in order to achieve desired sounds.
This could be anything from a slow swell at the beginning of a verse to a quick stutter effect during the chorus. By programming these changes in advance, it allows the mix engineer to focus on other aspects of the song while still having control over how the sound evolves over time.
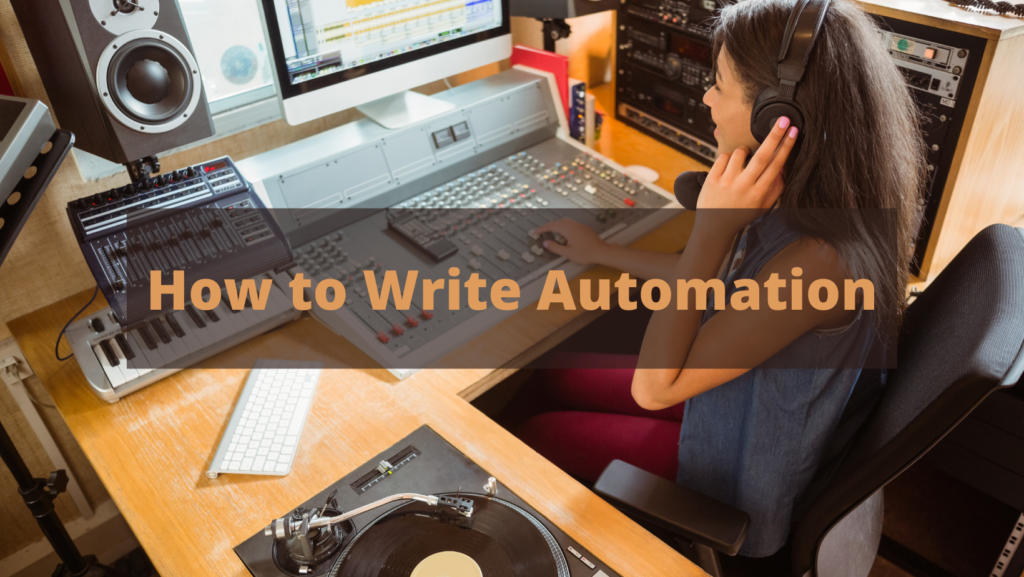
Automation can also be used as a way to correct mistakes or compensate for performance inconsistencies. For example, if a vocalist misses a note during tracking, the mixer can use automation to correct the pitch in post-production. Automation is an important tool in the mixing process that can be used to create a wide range of sonic results.
The simplest way to get started with automation is to mimic how it was originally done in the analog era. This can be done by engaging the write, touch, or latch modes on the desired tracks and making adjustments to the faders in real-time during playback.
Your DAW will record the changes you make to the automation timeline. If you don’t use a control surface, you can still use this technique by dragging the fader with the mouse, though this can get pretty frustrating. Automation can be a great way to add interest and dynamic changes to your music, so experiment with different approaches and see what works best for you!
This method produces a breakpoint at every instance of change. The more dynamic your automation changes are, the more breakpoints you’ll see on your automation timeline. In some cases, this can be useful for debugging purposes.
However, in other cases, it can make your automation timeline difficult to read and understand. If you find that your DAW timeline is cluttered with too many breakpoints, you may want to consider using a different method.
Conclusion
As any audio engineer knows, getting a mix to sound just right can be a daunting task. There are so many different factors to consider, and even the slightest change can have a significant impact on the overall sound. One of the most common problems that engineers face is a lack of dynamic range.
In other words, the mix sounds too busy or too loud at certain points and then gets too quiet or even fades away entirely at others. This can be a tricky problem to solve, but there are a few things that you can do to try to fix it.
First, make sure that your EQ is dialed incorrectly. Second, check your compression settings and see if you can make any adjustments to even out the levels. Finally, play around with your send effects and see if you can find a balance that sounds good.
With a little trial and error, you should be able to get your mix sounding just the way you want it.
If you’re experiencing dialing in your plugins, never fear – there is a solution. Introducing musical interaction between all your tracks can really liven up a mix that’s starting to sound stale.
But how do you do it when it seems like you’ve already done so much? The answer is mixed automation. By automating different aspects of each track, you can create endless possibilities for interactions and build a mix that is truly unique. So don’t be afraid to experiment with automation – it might just be the key to taking your mix to the next level.
Automation clips can be extremely helpful in shaping the sound of a track. By automating effects, volume, panning, and other parameters, you can create more dynamic and interesting tracks. EQ is also a powerful tool that can be used to fix problem areas or to emphasize certain elements of a song.
With a little practice, you’ll be able to use these techniques to create professional-sounding mixes that will sound great on any system. So don’t be afraid to experiment with automation and EQ in your next project.
Automation in Audio Mixing FAQ
What is Automation in Audio Mixing?
Automation in audio mixing is the process of using a DAW to automatically adjust and control various parameters throughout the progression of a track. This can include changes to effects, volume, panning, and other elements.
Why is Automation in Audio Mixing important?
Automation can help elevate a static mix and infuse sparks of creative movement and transition. It can also be used to fix problem areas or emphasize certain elements of a song.
How do I get started with Automation in Audio Mixing?
The simplest way to get started with automation is to mimic how it was originally done in the analog era. This can be done by engaging the write, touch, or latch mode on your DAW. Once you have your desired settings, you can then record the automation as it plays back.
Another way to get started with automation is to use breakpoints. This method produces a breakpoint at every instance of change. The more dynamic your automation changes are, the more breakpoints you’ll see on your automation timeline. In some cases, this can be useful for debugging purposes.
However, in other cases, it can make your automation timeline difficult to read and understand. If you find that your DAW timeline is cluttered with too many breakpoints, you may want to consider using a different method.
Finally, another way to get started with automation is by using mixed clips. This method allows you to automate multiple tracks at the same time. This can be helpful if you want to create interactions between different tracks in your mix.
To do this, simply select the track that you want to automate and then choose the parameters that you want to automate. Once you’ve done this, you can record your automation changes as they happen.
Remember, there is no right or wrong way to get started with automation in audio mixing. The important thing is that you experiment and find what works best for you and your project.
What are some Automation in Audio Mixing tips?
Here are a few tips to help you get the most out of automation in audio mixing:
-First, make sure that you understand what each parameter does. This will help you know which ones to automate and how to do it.
-Second, start with small changes and then build up from there. Automation can be a powerful tool, but it’s important to use it wisely.
-Third, don’t be afraid to experiment. The only way to learn is by doing. So try out different techniques and see what works best for you.
-Finally, remember that automation is not a replacement for good mixing technique. It should be used as a supplement to your existing skills.
What are some common mistakes made when using Automation in Audio Mixing?
One of the most common mistakes made when using automation is trying to do too much at once. This can lead to a cluttered automation timeline and an overall messy sound. Another common mistake is not being aware of what each parameter does. This can lead to automating the wrong things or doing it in a way that doesn’t achieve the desired results.
EQ
The Best EQ Plugins to Shape Your Mix
Best EQ VST Plugins 2022
Make sure the recording starts from a source of your liking. You’ll have to modify the rest. Using this method you can create a sound for recording. The Equalizer plugin supports it. It can help you reduce frequencies you want and add frequencies you need and allow you to create vocal wells.
EQs can be used as a single track mix, full mix, or even in a mastering session to achieve desired results. It is common for engineers to not have EQ on track!
Analog EQ
Analog EQ uses electronic filters to boost or attenuate certain frequencies in an audio signal. This can be used to achieve a variety of results, from correcting tonal imbalances to creating unique sonic textures.
Unlike digital EQ, which relies on computer algorithms to process the signal, analog EQ uses physical components to shape the sound. This gives it a more natural and musical quality, making it a popular choice among engineers and producers. While it requires more initial setup time than digital EQ, analog EQ can produce more musical and transparent results.
EQ Plugin
There are many different types of EQ plugins available, each with its own set of features and capabilities. When choosing an EQ plugin, it is important to consider the specific needs of your project. For instance, if you are working on a mixing project, you will want an EQ plugin that offers a wide range of frequencies and options for shaping the sound.
On the other hand, if you are looking for a way to add some color to your tracks, you may want an EQ plugin that offers more limited options but produces a warm, vintage sound. Ultimately, the best EQ plugin for you is the one that best meets the needs of your particular project.
Intelligent EQ Plugin
When looking for an EQ plugin, it is important to consider the specific needs of your project. If you are working on a mixing project, you will want an EQ plugin that offers a wide range of frequencies and options for shaping the sound. On the other hand, if you are looking for a way to add some color to your tracks, you may want an EQ plugin that offers more limited options but produces a warm, vintage sound.
One particularly useful type of EQ plugin is the intelligent EQ, which uses artificial intelligence algorithms to automatically process the audio signal and produce better results than traditional EQ plugins. These plugins are typically more complex than standard EQ plugins, but they can help save time and effort in the mixing process.
A perfect example of an intelligent EQ Plugin is smart:EQ 3 (See our smart:EQ live by Sonible Review)
In the world of audio production, having a strong EQ is essential to getting a professional-sounding mix. The smart:EQ 3 from is a powerful EQ by Sonible plugin that can help you achieve just that.
With its ability to enhance detail, clarity and transparency in single tracks and arrangements of up to six channels, the smart:EQ 3 is perfect for those who want to establish spectral balance in their sound. In addition, the smart:EQ 3 features a built-in spectrum analyzer so you can see exactly what frequencies are being affected by the plugin. Whether you’re a beginner or a seasoned pro, the smart:EQ 3 is an invaluable tool for anyone looking to take their audio production to the next level.
Multiband EQ Plugin
A multiband EQ plugin is a type of EQ that allows you to split the audio signal into multiple frequency bands and process each band separately. This can be useful for correcting specific problems with certain frequencies, or for creating unique sonic effects. Multiband EQ plugins typically offer more control and flexibility than standard EQ plugins, making them a popular choice for mixing and mastering engineers.
In Search Of The Best Free EQ Plugins
If you want to get into sound, the idea of equalization is difficult. The sound equalization tool is an indispensable component in an audio engineer’s toolbox; nothing else will be able to change the audio’s tone with such exactitude. This is crucial for mixing so there is absolutely no stretch saying we’ll never hear any of our favorite music.
For more information take a look at our article The Best Free EQ Plugins for 2022: Audio Frequency Sculpting Essentials. In this blog post, we did focus on the best free EQ plugins for 2022. These plugins are all high quality and can be used to achieve professional results.
There are several free alternatives for equalizers if you’re searching for one but don’t want to spend anything. Some of these plugins are surprisingly effective and flexible, comparable to paid tools.
However, it’s vital to remember that free plugins aren’t always as reliable or well-supported as paid ones, so do your homework before downloading anything. Experiment with a few of your favorite free EQ plugins to see what they’re capable of. You could be shocked at how much better your mixes can sound after you try them.
The Best Free EQ Plugins in 2022
If you’re looking for a powerful and easy-to-use EQ plugin, the TDR Slick EQ is a great option. With its four distinct EQ models, variable slope technology, and saturation control, it offers a wealth of options for shaping your sound.
Another excellent free EQ plugin is .lKJB – Luftikus. This mastering-quality EQ offers three sensibly chosen EQ types, an analog mode, and an output trim control for precise gain adjustment.
While there are many commercial options available, the following list includes only the best free EQ plugins for 2022:
Let’s take a look at FREE equalizer plugins in Detail
Blue Cat’s Triple EQ is a powerful and versatile free equalizer plugin that offers a wide range of possibilities for tonal shaping. The three bands each have their own character and can be used to achieve a wide variety of sounds, from subtlety enhancing an existing track to completely transforming it. Its is the first FREE plugin out of list of FREE VST plugin.
Looking for an exceptional graphic equalizer plugin to give your music that final touch of brilliance? Look no further than Voxengo’s Marvel GEQ. Also, a Free EQ is ready to use.
The TDR Nova is a high-end audio processor that offers parametric equalization, dynamic equalization, frequency-selective compression, multi-band compression, and wideband compression. The TDR Nova from Tokyo Dawn NOVA is a parallel dynamic equalizer. A parallel dynamic equalizer is a type of audio processing equipment that is used to improve the sound quality of recorded or live music. It does this by modifying the frequency response of the audio signal, making it more musical and enjoyable to listen to.
Parallel dynamic equalizers can be used to correct for deficiencies in the original recording or to enhance the sound of live music. They are also commonly used in mastering studios, where they can be used to fine-tune the sound of a recording before it is released commercially. While they are not essential for every music lover, they can make a big difference in the quality of the listening experience.
If you’re looking for an EQ that’s both intuitive and flexible, look no further than the TDR Slick EQ. With a modern user interface and outstanding usability, it’s perfect for any producer or engineer.
The Luftikus is an EQ modeled after hardware that allows you to achieve mastering-quality sound. With its analog mode and “keep-gain” option, the Luftikus keeps your sound consistent, even when you’re making drastic changes to your EQ settings.
Dynamic EQ
At its core, mixing is all about creating balance. You want to find the right level for each element in the song so that nothing is too loud or too quiet. But of course, that’s easier said than done.
There are a million different variables to consider, and it can be difficult to know where to start. That’s why it’s so important to take your time and experiment with different levels until you find something that works. It might take a few tries, but when you finally get that perfect mix, it will be worth it.
Dynamic Eq Is an Incredibly Powerful Tool
Mixing audio can be a tricky business. One of the biggest problems is dealing with changes in volume. For example, sometimes you’ll have a track that’s too loud relative to the rest of the mix, or one that’s too quiet. Conventional EQ can solve some of these problems, but oftentimes it creates unwanted holes or bumps elsewhere in the mix.
That’s where the Dynamic EQ comes in! Dynamic EQ is an incredibly powerful tool that allows you to make precise adjustments to the level of each frequency, without affecting the rest of the mix. As a result, you can achieve a much more balanced and natural-sounding mix. If you’re serious about mixing, then Dynamic EQ is an essential tool that you need in your arsenal.
As any mixing or mastering engineer knows, the sound is a complex and ever-changing phenomenon. In order to create a polished and professional-sounding mix, it is essential to have a toolbox full of different effects and processors.
Multiband Compressors and Dynamic EQ
Multiband compressors and Dynamic EQs are two of the most versatile and useful tools available. Multiband compressors allow you to target specific frequency ranges with different compression ratios, making them ideal for taming unruly frequencies.
Dynamic EQs are also extremely flexible, allowing you to adjust the gain, Q, and frequency of each band on the fly. As a result, these two devices are essential for any engineer looking to produce professional sounding mixes.
Tell Me the Best EQ for Me?
The answer depends on many factors. This guides your purchase decision. It will help you determine which EQ suits your needs.
The first thing you need to consider is the type of music you play. If you’re a metalhead, you’ll need an EQ that can handle heavy distortion. If you’re a jazz musician, you’ll need an EQ that can create warm, round tones.
Second, you’ll need to consider the size of your amp. If you have a small amp, you won’t need as much EQ as someone with a large amp. Third, you’ll need to consider your budget.
Finally, you’ll need to decide which features are most important to you. Do you want an EQ with a lot of different settings, or do you want something simple and easy to use? Once you’ve considered all of these factors, you’ll be able to narrow down your choices and find the best EQ for your needs.
FabFilter Pro-Q 3 by FabFilter – Premium Option
Fab Filter ProQ3 (FabFilter Pro-Q3 Review – an Equalizer Plugin with Dynamic EQ) gives off luxurious alien atmospheres as its Plugins do. How good are the materials used? No flaws. Are there interfaces? Unconventional yet futuristic and surprisingly smooth.
Is it functional? Very pleased. While it is as applicable on Pro-Q3 as any other device, let’s go deeper and give it an easy test run, shall we? What is the best way to improve FabFilter ProQ 3? This plugin is among the most widely popular and widely excellent sound shaping VSTs available.
Fab Filter ProQ3‘s most distinguishing features are its mid/side mode and spectrum analyzer, which set it apart from other EQ plugins. Pro-Q 3 is the equalizer plugin you need whether you’re editing individual tracks or constructing an entire mix.
One of the most powerful new features in Pro-Q 3 is dynamic EQ. While standard EQ lets you boost or cut specific frequencies, dynamic EQ gives you the ability to set thresholds and ratios so that the EQ is only applied when the signal exceeds a certain level.
If you’ve been producing music for long, you’ve undoubtedly come across Fab Filter ProQ3. It’s one of the most popular EQ plugins on the market, and for good reason. Its simple, intuitive design makes it easy to dial in the perfect sound, while its advanced features give you precise control over your EQ.
Fab Filter ProQ3 also sounds great, with a warm, natural tone that is perfect for mixing. And if you’re new to mixing, or just looking for a way to improve your workflow, Pro-Q 3 has a mode that allows you to see exactly how your EQ is affecting the sound of your track. Whether you’re a seasoned pro or just starting out, FabFilter’s Pro-Q 3 is a must-have EQ plugin.
Fab Filter ProQ3 is a digital EQ plugin that has been a mainstay in the industry for years. Its latest update includes some seriously impressive new features, including an improved user interface, new filter types, and more. The updated user interface makes it even easier to dial in the perfect sound, while the new filter types give you even more control over your tone.
In addition, the plugin now supports sidechain input, allowing you to use it with compressors and other plugins. Whether you’re a seasoned engineer or a beginner just getting started, Fab Filter ProQ3 is a plugin that you need in your toolbox.
Electra DSP – ELECTRIFIED TRANSIENT EQ by Kush Audio
The hardware Electra EQ is known for its fast, smooth, punchy equalization. The Electra DSP’s precisely modeled filters embody that spirit flawlessly. With its unique ability to accurately model an analog signal path, the Electra DSP provides the same high-quality sound like the hardware EQ. Additionally, the Electra DSP offers a wide range of parametric controls, making it easy to fine-tune your sound.
Shelving filters are used to shape the overall sound of a recording, and they can have a big impact on the final product. High-shelf filters are typically used to add brightness and clarity, while low-shelf filters can add depth and warmth. But what many people don’t realize is that the high shelf is surprisingly flexible.
By changing the position of the high shelf filter, you can vastly change the sound of a recording. For example, if you move the high shelf filter down, you can add more bass to the mix. Or if you boost the midrange frequencies, you can make drums sound like they were tuned and mic’d differently. So next time you’re setting up your audio equipment, be sure to give some thought to your shelving filters.
With a little experimentation, you may be surprised at how much they can affect the sound of your recordings.
Whether you’re looking for a little extra bass or treble, or you want to completely transform your sound, the Electra DSP is up to the task. In short, the Electra DSP is a powerful tool that any serious musician should have in their arsenal.
The Electra is a powerful EQ that can create a wide range of sounds, but it’s the “analog” character that really sets it apart. The designed software circuits are warm and full, and the filters have a nice resonance that adds depth and richness to the sound.
Even the most aggressive settings sound smooth and musical. If you’re looking for an authentic analog experience, the Electra DSP is definitely worth checking out.
Blyss Master Channel EQ by Kush Audio
Kush Audio has recently released Blyss Mastering Channel EQ. This is a mastering-style EQ with a vibe that feels like it was designed for the analog age. The name comes from “Blessing” and “Elysian Fields” which symbolize paradise in Greek mythology. It has an interesting filter section with filters inspired by vintage analog hardware units as well as different modes of operation to suit many mixing styles.
As anyone who has ever listened to music knows, there is a profound connection between sound and emotion. Certain genres of music have the ability to evoke powerful feelings of happiness, sadness, nostalgia, and more. One quality that all great music shares are warmth.
Warmth can be achieved in many ways, but it usually comes down to creating a sense of emotional closeness between the listener and the musician. This can be done through the use of simple melodies, personal lyrics, or even just a raw and honest delivery. When done well, it creates a bond that can last a lifetime. Great musicians understand this, and they strive to give more warmth to their music. In doing so, they not only create better art, but they also make the world.
Kush Audio’s boutique hardware & plugins are designed to give mix engineers more warmth in their music, and vibe of production style. Compressors, EQ’s preamps provide an excellent foundation for all your mastering needs with ease of use at its core!
The Chain 6-in-1 Mastering EQ is a six-stage processor that can be used in mastering to add additional subtlety and polish. It has three-band equalizers with one high pass filter per band, and a shelving compressor at the end of each channel for vocals or instruments alike which will give you nice controlled compression without any unwanted edges on your track’s dynamics when they are transparent sounding enough already!
Blyss is an enchanting, mystical journey through the stars that makes you feel like this may be where it’s all headed in that great beyond up above us waiting with open arms or maybe just pure silence until our last breath has left us, mortal enemies again then finally free from these burdens known as life and love and the heartache of having both.
With Kush’s new processor, a 6-band EQ and mastering-grade Compressor is what you get. Simpler than ever, it still has all of the classic processing features that make old school sound great!
Slice EQ by Kilohearts
And you may wonder. How can a cut-up EQ help me? Slice EQ is a sophisticated parametric equalizer that allows a user to increase or reduce the frequency at an exacting level. This product is a simple and efficient digital filter and has an intuitive and configurable interface and also features Snapin compatible software.
Slice EQ is a powerful tool for audio engineers and producers. It offers a wide range of filters that can be combined to create custom EQ curves. The software is easy to use and provides a flexible workflow.
With Slice EQ, you can sculpt your sound without having to worry about the technical details. Whether you’re looking for subtle adjustments or radical changes, Slice EQ gives you the power to get your music exactly where you want it to go.
Slice EQ is a great parametric equalizer for anyone looking to get the most out of their sound. With its advanced capabilities, it can really help to shape your sound in new and interesting ways. But where it really shines is when it’s used in conjunction with Snap Heap.
Together, these two plugins can add a whole new dimension to your sound, giving you the ability to create truly unique and fascinating sonic textures. So if you’re looking for a way to take your sound to the next level, be sure to check out Slice EQ and Snap Heap.
In the world of audio production, there are few tools more essential than a good parametric equalizer. And when it comes to parametric EQs, Slice EQ is in a class all its own. With its surgical precision and razor-sharp filters, Slice EQ is capable of cutting or enhancing frequencies with incredible accuracy.
What’s more, its 96 dB/oct filters allow it to produce results that other EQs simply can’t match. Whether you’re looking to fine-tune a mix or shape the sound of an instrument, Slice EQ is the perfect tool for the job. So if you’re serious about audio production, be sure to check out Slice EQ. You won’t be disappointed.
HAMMER DSP TUBE-MODELED EQ by Kush Audio
The Hammer DSP is a digital sound processor plugin that is used to shape the sound of audio files. The processor can be used to change the sound of an audio file by adding effects, such as reverb or echo, to it. The processor can also be used to change the sound of an audio file by Equalizing it.
The processor can also be used to change the sound of an audio file by compressing it. The processor can also be used to change the sound of an audio file by limiting it. The Hammer DSP is a very versatile piece of software that can be used to change the sound of an audio file in many different ways.
Clariphonic DSP MkII – PARALLEL MASTERING EQ by Kush Audio
The Clariphonic DSP MkII is a powerful new plugin that has been entirely re-modeled from the ground up. It features all-new algorithms and filters and sounds markedly smoother than the original plugin.
Thanks to its 3 processing modes (Classic Stereo, Dual Mono, and Mid-Side), it is considerably more powerful than its predecessor. Additionally, its custom oversampling algorithms are specifically designed for shelves whose highest corner is 38k, which allows it to faithfully capture the spirit of analog hardware.
With its superior sound quality and increased power, the Clariphonic DSP MkII is sure to be a valuable addition to any producer’s toolkit.
Blue Cat’s Liny EQ by Blue Cat Audio
BlueCat Audio makes several plugins that serve different applications. This reliable developer has certainly caught the attention of producers who love LinyEQ.
Blue Cat’s Liny EQ is a powerful 8-band equalizer with linear phase processing and low latency. It provides comprehensive visual feedback, allowing you to see the effect of each adjustment in real-time. Thanks to its highly optimized linear phase kernel, it processes the signal without phase distortion, with an unusually short latency (less than 3 milliseconds).
This makes it perfect for live sound applications, where every millisecond counts. But its low latency is not at the expense of sound quality: Blue Cat’s Liny EQ still offers the same high-quality sound that you would expect from a studio-grade equalizer. Whether you’re a live sound engineer or a studio producer, Blue Cat’s Liny EQ is an essential tool for shaping your sound.
The highly customizable user interface of the spectrum analyzer and spectrogram viewer lets you choose the best layout and display options to adapt the plug-in to your own workflow. The plug-in offers a first-class spectrum analyzer that is second to none in terms of features and functionality.
The spectrogram viewer is also highly customizable, offering a wide range of options for adapting the display to your needs. The user interface is designed to be intuitive and easy to use, so you can get the most out of the plugin with minimal effort. Whether you’re a beginner or an experienced user, the spectrum analyzer and spectrogram viewer will help you get the most out of your audio files.
Sie-Q by Soundtoys
SieEQ is a powerful and flexible EQ plugin that can be used to shape the sound of your recordings in any number of ways. If you’re looking for an EQ plugin that will give you maximum control over your sound, then SieEQ is definitely worth checking out.
German engineered SoundToys SieEQ strives for boutique style with classic colors. Soundtoys found an uncommon gem in Siemens W 295b vintage EQ consoles and sought to emulate that device’s best – airy high-quality and smooth curves with an intuitive user interface.
In the world of audio hardware, there are a lot of different companies out there vying for your attention. Each one has its own unique take on what sounds good, and it can be tough to wade through all of the options to find the right piece of equipment for your needs. However, when it comes to EQs, one company that always stands out is Soundtoys. Soundtoys has a long history of producing high-quality EQs that offer unique tones and colors.
Recently, Soundtoys dug deep into their gear museum and unearthed a little-known gem: the Siemens W295b. This impressive piece of hardware impressed Soundtoys so much that it became the inspiration for their first-ever EQ plugin: SoundToys SieEQ SieEQ faithfully captures the hardware’s smooth curves, airy highs, and ease of use, allowing you to get the tone you want fast, without a lot of hassle. So if you’re in the market for a new EQ, be sure to check out SieEQ from Soundtoys.
Soundtoys used the found hardware to develop this fine software EQ plugin. Soundtoys is a company that makes audio software plugins. They are known for developing creative and innovative products that help users get the most out of their audio recordings.
One of their most popular products is the Soundtoys EQ plugin. This plugin is based on hardware that was originally developed for use in studios. Soundtoys has taken this hardware and repurposed it for use in their plugin.
The result is a powerful and flexible EQ tool that can be used to shape the sound of your recordings in any number of ways. If you’re looking for an EQ plugin that will give you maximum control over your sound, then the Soundtoys EQ SieEQ plugin is definitely worth checking out.
smart:EQ live by Sonible
smart:EQ live by Sonible is a powerful tool for live mixing. The zero latency equalizer is designed for live mixing through a pre-defined set of algorithms. This tool is most successfully used when you work with more giant corporations and organizations to help them with the corporate events in-house or at shows.
smart:EQ live is an essential tool for any mixer who wants the best possible sound quality for their live mixes.
Smart:EQ live is a powerful new tool that is helping to improve the sound quality of live performances. The equalizer allows you to mix in real-time, which means you can produce live performances that sound much better than before. This is especially useful for business events, shows, and in-house all-hands meetings where the highest quality is essential.
Overall, smart:EQ is an excellent product that is enhancing live performances. The equalizer works best on single tracks, but it can also be used on multiple tracks to create a more balanced sound.
SPCTRL EQ the Creative Filter For Sound Designers by TONSTURM
SPCTRL EQ by TONSTURM is a powerful tool for sculpting and shaping the frequency spectrum of any sound. The heart of SPCTRL EQ is its highly flexible Curve Editor, which gives you excellent control over the spectrum of any sound. With the Curve Editor, you can easily create custom EQ curves to emphasize or de-emphasize specific frequencies.
SPCTRL EQ is a powerful tool for sculpting and shaping the frequency spectrum of any sound. The heart of SPCTRL EQ is its highly flexible Curve Editor, which gives you excellent control over the spectrum of any sound. With the Curve Editor, you can easily create custom EQ curves to emphasize or de-emphasize specific frequencies.
You can also use the Curve Editor to create completely new sounds by modulating the amplitude of individual frequency bands. In addition to its flexible curve editing capabilities, SPCTRL EQ also features a high-quality signal processing engine that ensures your audio always sounds its best. With SPCTRL EQ, you have everything you need to create custom EQ curves that perfectly shape the sound of any audio signal.
SPCTRL EQ is specifically designed with Sound Designers and Composers in mind. It allows you to sculpt and shape up to 4096 individual frequency bands in a unique and powerful way. The Heart of SPCTRL EQ is its highly flexible Curve Editor that gives you excellent control over the spectrum of any sound.
Using SPCTRL EQ’s Enhanced Tone Control along with TONSTURMs’ cutting-edge modulation system, you can make any sound upside down and extract parts that you never knew were there.
Top EQ VST plugins, Final Thoughts
There are a number of great EQ plugins on the market today. Overall, all of these EQ plugins are excellent choices for shaping the sound of your recordings. If you’re looking for maximum control over your sound, then
EQ is a key component in mixing processes. Choose the right thing. Do not compromise when possible. You can use the same plug-in for many applications, which means the happier you are with it, the better the results. Optimizing the workflow you do is essential for music production as well as engineering.
There are a number of great EQ plugins on the market today. Overall, all of these EQ plugins are excellent choices for shaping the sound of your recordings. If you’re looking for maximum control over your sound, then EQ is a key component in mixing processes. Choose the right thing. Do not compromise when possible. You can use the same plug-in for many applications, which means the happier you are with it, the better the results. Optimizing the workflow you do is essential for music production as well as engineering.
Best EQ Plugins FAQ
What is an EQ plugin?
Equalizers, or simply EQ, can be used in the professional audio realm to control the volume or to change frequency response in an audio.
Do EQ plugins matter?
There’s an endless variety of plug-ins. The decision of using EQs over other EQs is not really important. It’s far more vital to select which cuts you want and whether you want EQ. Using plugins can be distracting when making unimportant choices.
What EQ range are vocals?
The voice-speak of an adult male generally has a frequency ranging in frequency from 80 to 180 Hz.
What is an EQ plug in?
The equalizer is a tool for adjusting sound quality for audio signals that affect a frequency or increase its response to a given frequency.
What is EQ VST?
Equalizers are used to increase stability and to decrease the sound content. VST is an audio Plugin format for use in Digital Audio Workstations (DAWs).
What does VST stand for?
Virtual Studio Technology.
How do I use an EQ plugin?
Equalizer plugins can be used in a number of ways. One way is to use them as insert effects on individual tracks. Another way is to use them as send effects.
What are the best EQ plugins?
The best EQ plugins are the ones that give you the most control over your sound. These EQs give you the ability to sculpt your sound in any way you want.
How do I shape my vocals with EQ?
To shape your vocals with EQ, you need to find the frequencies that are causing problems and then either boost or cut those frequencies.
Do all DAWs come with EQ plugins?
No, not all DAWs come with EQ plugins. However, most DAWs do come with some form of EQ.
Is it better to EQ before or after compression?
It is usually best to EQ before compression. This way you can avoid compressing the frequencies that you are trying to boost or cut.
What is a good EQ for vocals?
A good EQ for vocals is one that gives you a lot of control over the sound of your vocals. These EQs allow you to sculpt your sound in any way you want.
EQ
The Best Free EQ Plugins for 2022: Audio Frequency Sculpting Essentials
Whether you’re a professional music producer or just starting out, you need to know about EQ plugins. In this blog post, we will be discussing the best free EQ plugins for 2022. EQ is an essential tool for audio frequency sculpting and can make a huge difference in your final mix. We will also provide a few tips on how to use EQ plugins effectively!
EQ Plugins
Most people are familiar with the basic idea of equalization, even if they don’t know it by that name. For example, when you turn down the bass on your car stereo, you are effectively EQ’ing the sound. In music production, EQ is used to shape and sculpt individual sounds and create space in a mix by selectively cutting certain frequencies.
While EQ is a relatively simple concept, it is an incredibly powerful tool that can be used in a myriad of ways.
In general, EQ can be used to make a sound louder or quieter, to make it brighter or darker, or to emphasize or deemphasize certain frequencies.
If you’re looking to get the most out of your audio, it’s important to understand EQ. EQ, or equalization, is an essential tool for shaping the sound of individual tracks and entire mixes. By boosting or cutting certain frequencies, you can make a track sit better in the mix, sound more natural, or even completely change its character.
With so many possibilities, EQ can be a bit overwhelming at first. But with a little practice, you’ll be sculpting audio like a pro in no time. So fire up your DAW and let’s get started!
By carefully shaping the EQ of each sound in a track, a producer can achieve a polished, professional-sounding mix. There are a number of different EQ plugins available, both paid and free.
In this blog post, we will be focusing on the best free EQ plugins for 2022. These plugins are all high quality and can be used to achieve professional results.
The Best Free EQ Plugins in 2022
If you’re looking for a great EQ plugin but don’t want to spend any money, there are many free options available. Some of these plugins are surprisingly powerful and versatile and can create great EQ effects similar to commercial plugins.
However, it’s important to remember that free plugins may not be as reliable or well-supported as paid plugins, so it’s worth doing some research before downloading anything. Once you’ve found a few free EQ plugins that you like, experiment with them to see what they’re capable of. You may be surprised at how much they can improve your mixes.
1. Blue Cat’s Triple EQ
Blue Cat’s Triple EQ is a powerful and versatile free equalizer plugin that offers a wide range of possibilities for tonal shaping. The three bands each have their own character and can be used to achieve a wide variety of sounds, from subtlety enhancing an existing track to completely transforming it.
The low-shelf and high-shelf filters are perfect for adding or removing warmth, while the boost/cut peak filter can be used to create anything from gentle resonance to piercing highs. With its intuitive interface and flexible controls, Blue Cat’s Triple EQ is an essential tool for any musician or producer.
You may also independently control the EQ of your tracks’ Left and Right channels, which is a fantastic feature.
The Triple EQ is a versatile and powerful piece of audio equipment that offers a lot of features for its users. One particularly interesting thing about it is the “auto gain” feature. When active, this feature adjusts the gain of your sound so that it stays level regardless of how hard you push certain frequencies.
This can be extremely helpful when trying to get a clear and consistent sound, especially in live settings. Additionally, the Triple EQ also has a built-in compressor that can help to even out your sound even further. With so many features packed into such a small package, it’s no wonder the Triple EQ is one of the most popular pieces of audio equipment on the market today.
Triple EQ is a powerful and versatile free VST plugin that offers a wide range of filter shapes. The interface is also extremely simple and beginner-friendly, making it an ideal choice for those new to filter design.
Triple EQ is especially useful for designing filters for use in electronic music production, as it offers a wide range of resonance modes and filter shapes. It is also capable of self-modulation, which can create some very interesting sound effects. Overall, Triple EQ is a great choice for anyone looking for a powerful and versatile free VST plugin.
2.Voxengo Marvel GEQ
Looking for an exceptional graphic equalizer plugin to give your music that final touch of brilliance? Look no further than Voxengo’s Marvel GEQ. Also a Free EQ is ready to use.
This powerful plugin provides stunning stereo, mid-side, and 5.1 surround sound equalization, along with superb transparency and detail. Whether you’re a professional musician or just starting out, the Marvel GEQ is sure to give your tracks the boost they need.
Marvel GEQ is a free linear-phase 16-band graphic equalizer AudioUnit, AAX, and VST plugin with multi-channel operation support (supporting up to 8 input/output channels, audio host application-dependent) for professional music production applications.
Marvel GEQ offers extensive internal channel routing capabilities and supports mid/side channel processing. Mid/side processing is a powerful technique that allows for separate processing of the middle and sides of the stereo field. This can be useful for emphasizing the center content of a mix (such as vocals) while still providing fullness and spaciousness.
Marvel GEQ is a high-quality audio equalizer that offers linear-phase filtering for superb sound quality. It is suitable for use on both audio tracks and full mixes, making it a versatile tool for audio engineers and musicians.
The linear-phase filtering offered by Marvel GEQ is particularly well-suited for equalization tasks where great sound quality is a priority. With its easy-to-use interface and comprehensive features, Marvel GEQ is an excellent choice for anyone who needs a top-notch equalizer.
3.TDR Nova
The TDR Nova is a high-end audio processor that offers parametric equalization, dynamic equalization, frequency-selective compression, multi-band compression, and wideband compression.
It’s perfect for anyone who wants to get the most out of their audio experience. With so many different ways to customize your sound, the TDR Nova is sure to please even the most discerning audiophile.
At first glance, the NOVA appears to be a typical parametric equalizer. However, each band also includes a dynamics section, giving it an unprecedented level of versatility. Whether you’re trying to add density to a master track or bring out the crispiness in a drum bus, the NOVA has an elegant solution.
The processor is also capable of handling sibilance problems, making it the perfect tool for any audio engineer. In short, the NOVA is a powerful and versatile equalizer that is sure to become a staple in any studio.
The user interface for the NOVA audio plugin is designed to be both user-friendly and powerful. The WYSIWYG drag and drop display paired with a classic “knob” interface gives users quick and smooth access to the various parameters driving NOVA’s processing capabilities.
With its four dynamic EQ bands and additional high-pass and low-pass filter sections, NOVA can meet the most exotic demand. Intuitive equal loudness functions help find the optimal setting without getting distracted by loudness differences. As a result, the NOVA audio plugin provides users with a user-friendly interface that is also powerful and flexible.
4.TDR Slick EQ
If you’re looking for an EQ that’s both intuitive and flexible, look no further than the TDR Slick EQ. With a modern user interface and outstanding usability, it’s perfect for any producer or engineer.
The carefully designed 64bit “delta” multi-rate structure ensures that your signals are accurately reproduced, while the three EQ bands and additional 18dB/Oct high-pass filter give you plenty of control over your sound. And with four distinct EQ models to choose from – “American”, “British”, “German” and “Soviet” – you can dial in the perfect sound for any track. This powerful plugin utilizes VoS’s advanced saturation algorithms for unparalleled sound quality.
But it doesn’t stop there – TDR Slick EQ also features a highly effective and musically pleasing loudness compensated auto gain control, as well as stereo and sum/difference processing options.
TDR VOS SlickEQ is a mixing/mastering equalizer designed for ease of use, musical flexibility and impeccable sound. With its unique combination of features, SlickEQ allows you to easily sculpt the perfect EQ curve for your track.
The three-band EQ offers a wide range of options for shaping your sound, and the Variable Slope Technology allows you to fine-tune the response of each band. In addition, the innovative Saturation control gives you the ability to add analog-style warmth to your tracks.
Whether you’re looking for subtle enhancements or radical sonic transformations, TDR VOS SlickEQ is the perfect EQ for the job.
5.lKJB – Luftikus
The Luftikus is an EQ modeled after hardware that allows you to achieve mastering-quality sound. With its analog mode and “keep-gain” option, the Luftikus keeps your sound consistent, even when you’re making drastic changes to your EQ settings.
And with its output trim control, you can adjust your gain to perfection. Plus, its improved design lets you make deeper cuts for a truly professional sound.
Luftikus is a digital adaptation of an analog EQ with fixed half-octave bands and an additional high-frequency boost. As an improvement to the hardware, it allows deeper cuts and supports a keep-gain mode where overall gain changes are avoided.
Luftikus offers three sensibly chosen EQ types that can be switched on the fly without any zippering: proportional-Q peaking, shelving, and cut filters. Proportional-Q gives you narrower Q at higher boost/cut levels and naturally widens with lower levels, just like the original analog hardware.
As a result, you always get smooth high-end sounds even with very drastic settings.
Conclusion
If you’re looking for a powerful and easy-to-use EQ plugin, the TDR Slick EQ is a great option. With its four distinct EQ models, variable slope technology, and saturation control, it offers a wealth of options for shaping your sound.
Another excellent free EQ plugin is lKJB – Luftikus. This mastering-quality EQ offers three sensibly chosen EQ types, an analog mode, and an output trim control for precise gain adjustment.
While there are many commercial options available, the following list includes only the best free EQ plugins for 2022:
EQ Plugins FAQ
What is an EQ plugin?
An EQ plugin is a software plugin that allows you to equalize (EQ) your audio tracks.
What does an EQ do?
Equalization (EQ) is the process of adjusting the balance of the different frequencies in an audio signal. By boosting or cutting certain frequencies, you can make your track sound fuller, thinner, brighter, darker, etc.
How do I use an EQ plugin?
To use an EQ plugin, simply insert it on your audio track and adjust the various parameters to taste.
Do I need an EQ plugin?
While not strictly necessary, an EQ plugin can be a valuable tool in your mixing and mastering arsenal. By shaping the frequency content of your track, you can achieve a more polished sound.
What are some good EQ plugins?
Some popular EQ plugins include the TDR Slick EQ, lKJB – Luftikus, and Waves Q-Clone.
Do I need to purchase an EQ plugin?
No – there are many excellent free EQ plugins available. Check out our list of the best free EQ plugins for 2022!
EQ
Dynamic EQ and Multiband Compressor: The Mixing Tool You Didn’t Know You Needed
Mixing is hard. There’s no getting around it. But it’s also one of the most rewarding aspects of production, because when you get a mix right, it sounds amazing. However, getting to that perfect mix can be a challenge.
One of the biggest problems in mixing is dealing with changes in volume. For example, sometimes you’ll have a track that’s too loud relative to the rest of the mix, or one that’s too quiet. Conventional EQ can solve some of these problems, but oftentimes it creates unwanted holes or bumps elsewhere in the mix. That’s where the dynamic EQ comes in!
Multiband compressors and dynamic EQs are some of the most useful tools available to mixing and mastering engineers.
By allowing the user to compress or EQ different frequency ranges independently, they offer unparalleled control over the audio signal. multiband compressors are often used to prevent specific frequencies from overwhelming the mix, while dynamic EQs can be used to sculpt the sound of an instrument or vocal track.
In addition, both of these tools can be used to apply corrective processing to tracks that have already been mixed. As a result, they are essential tools for any engineer who wants to achieve professional-sounding results.
Dynamic EQ
Dynamic EQ is a form of audio equalization in which certain frequencies are activated dynamically as the signal amplitude reaches a specified threshold. Dynamic EQ, like a compressor, will have threshold, attack, and release settings to change the tone of a signal dynamically.
An adaptive filter, on the other hand, may be more suited for more general adjustments. A dynamic EQ is typically better at concentrating on a particular frequency—for instance, an especially resonant bass note or a strong snare fundamental—and allowing you to modify or boost it. The absence of crossovers means that a filter’s inaction is more significant.
Difference Between Multiband Compressor and Dynamic EQ
As a mixing or mastering engineer, it’s important to have a wide range of tools at your disposal to help you get the best sound possible.
Two of the most useful tools in your arsenal are multiband compressors and dynamic EQs. Multiband compressors allow you to separately compress different frequency ranges, giving you more control over the overall sound. Dynamic EQs, on the other hand, allow you to adjust the EQ of a track in real-time, which can be really helpful when trying to achieve a particular sound.
Both of these tools can be extremely helpful in getting your tracks to sound just right. Some of the most valuable tools for mixing and mastering engineers are multiband compressors and dynamic EQs.
A dynamic equalizer is similar to an EQ, but with some of the features of a compressor. A multiband compressor, like a regular compressor, acts independently on separate frequency ranges. A dynamic EQ band works similarly to a normal EQ band but processes data non-linearly, similar to a compressor.
Multiband compressors and dynamic EQs are two tools that can be used to achieve a more dynamic sound. Multiband compressors allow for dynamic control of defined frequency ranges, providing some of the functionality and benefits of both EQs and compressors.
Dynamic EQs, on the other hand, provides a way to adjust the level of an entire frequency range at once. Both of these tools can be used to achieve a more polished and professional sound.
Multiband compressors can be particularly useful for taming rogue frequencies that tend to jump out, while dynamic EQs can be used to add definition and clarity to a track.
In the hands of a skilled engineer, these two tools can be used to great effect.
Multiband Compression
Digital multiband compressors are built to perform in the same way as their analog counterparts do. The signal of the entire signal is divided into several bands, usually three or four. These bands allow specific areas of the frequency spectrum to pass through, and on most plug-ins, they appear like band-pass filters on an EQ.
A signal can be split into different bands using a series of crossover filters. Crossover filters are low-pass and high-pass filters that intersect at a certain point. By intersecting the filters, the signal is split into two bands.
The low-pass filter lets the low-frequency signals pass through, while the high-pass filter blocks the high-frequency signals. The two bands are then sent to different speakers. This allows the listener to hear both the high and low-frequency signals.
The slopes, or pole numbers, of the LPF and HPF allow amplitude to remain constant over the crossover. What this means is that the amplitude of the signal near the crossover points will be largely unaffected.
As a result, the sound quality of the audio will be maintained even as the frequencies change. This is an important consideration for anyone who wants to ensure that their audio system sounds its best.
By using a higher quality crossover, with a higher pole number, they can be assured that their music will sound clear and accurate, no matter what frequencies are being reproduced.
Multiband compressors are an essential tool for any engineer or producer. By splitting the signal into multiple frequency bands, each with its own dedicated compressor, they offer much more flexibility and control than a standard compressor.
Each band can be compressed independently, allowing for a wide range of possible sounds. Additionally, most multiband compressors have a knee parameter, which allows for even more shaping of the sound.
In sum, multiband compressors are an incredibly powerful tool that can be used to great effect in any mixing or mastering situation.
Dynamic EQ
Dynamic EQ is a type of multiband compression that uses similar lingo. They have a threshold, attack, and decay settings. These operate in the same way as compressors do for the most part.
Dynamic EQ is a powerful tool that can be used to shape the sound of a track in a number of ways. Unlike compression, which affects the sound by reducing the loudness of the signal, dynamic EQ actually changes the gain of an EQ band in response to the amplitude of the signal. This allows for a more natural sound that can be customized to each individual track. In addition, like compression, dynamic EQ uses a threshold to determine how much the signal should be affected. As a result, dynamic EQ can be used to achieve a wide range of sounds, from subtle to extreme. Whether you’re looking to add some sparkle to your drums or bass, or you want to completely transform the sound of your track, dynamic EQ is essential too.
Digital dynamic EQs offer a number of advantages over their analog counterparts.
First, they are much more precise. This is due to the fact that digital EQs can be designed with very specific filter shapes. Additionally, digital EQs can be updated and changed much more easily than analog EQs.
This means that if you’re not happy with the sound of your EQ, you can simply change it without having to worry about soldering or rewiring.
Digital EQs also offers a number of features that analog EQs simply cannot. For example, many digital EQs have an “undo” function, which allows you to quickly and easily revert back to the original sound.
Additionally, many digital EQs have a “learn” function, which can be used to automatically set the EQ to the desired sound.
In conclusion, dynamic EQ is an essential tool for any engineer or producer. By Splitting the signal into multiple frequency bands, each with its own dedicated compressor, they offer much more flexibility and control than a standard EQ.
Dynamic EQ affects the sound by adding or taking away EQ depending on how loud the sound is. This is similar to compression, which also depends on how loud the sound is.
Dynamic EQ vs Multiband Compression
Audio engineers are always looking for ways to get the best sound possible out of their recordings. One debate that has been going on for some time is whether to use dynamic EQ or multiband compression. Both effects can be used to shape the sound of a track, but they each have their own advantages and disadvantages.
Dynamic EQ is very versatile because it can be used to boost or cut specific frequencies. This can be great for tweaking the sound of a track until it sits just right in the mix. The downside is that dynamic EQ can add unwanted artifacts if it’s not used carefully.
Multiband compression, on the other hand, is very natural sounding and can help to even out the levels of different frequencies. This can be great for making a track sound more polished and professional. The downside is that multiband compression can be difficult to set up and get sounding good.
So, which one should you use? Ultimately, it depends on what you’re trying to achieve. If you’re just looking to add a little bit of polish to your track, then multiband compression may be the way to go. If you’re looking to completely transform the sound of your track, then dynamic EQ is probably a better choice.
Digital dynamic EQs offer a number of advantages over their analog counterparts.
First, they are much more precise. This is due to the fact that digital EQs can be designed with very specific filter shapes. Additionally, digital EQs can be updated and changed much more easily than analog EQs.
This means that if you’re not happy with the sound of your EQ, you can simply change it without having to worry about soldering or rewiring.
Dynamic EQs and Multiband Compressors General Usage
Dynamic EQs and multiband compressors are both designed to control and attenuate specific frequencies at certain times during a signal’s performance. However, they each have a few key differences that set them apart.
Dynamic EQs are typically more versatile and can be used for a wider range of tasks, from correcting problem frequencies to shaping the overall sound of a track. Multiband compressors, on the other hand, are more focused and are typically only used for corrective purposes.
In terms of sound quality, dynamic EQs tend to produce more natural-sounding results, while multiband compressors can sometimes introduce unwanted artifacts into the signal. Ultimately, the choice between a dynamic EQ and a multiband compressor comes down to personal preference and the specific needs of the project.
A standard EQ will attenuate all frequencies that fall below or above the setpoint, regardless of how loud or quiet they are. This can result in a ‘muddy’ sound, as low frequencies are attenuated even when they’re not causing problems.
Dynamic EQs only process signals when they reach a certain threshold, meaning that only problem frequencies will be attenuated. This results in a cleaner sound, as there is no need to attenuate frequencies that are not causing problems. In addition, dynamic EQs are able to adapt to changing conditions, making them ideal for use in live situations. As a result, they offer a significant advantage over standard EQs.
While a standard EQ can be helpful in some situations, it has several drawbacks that make it less than ideal for many purposes. One of the biggest problems is that it affects the entire signal, rather than reacting to the music.
This can lead to a detached and static sound that does not respond well to changes in the music. Additionally, unless you automate the process, it can be quite tedious to set up. This is especially true if you need to make frequent adjustments. Overall, a standard EQ can be useful in some situations, but it is far from being the ideal solution for many purposes.
Dynamic EQs and multiband compressors have the ability to attenuate signals dynamically, meaning that the amount of attenuation is proportional to how far the signal crosses the threshold.
This dynamic attenuation can be very difficult to replicate using static EQ automation, and it allows these processors to sound more musical and connected to the other sounds in your mix. In addition, dynamic EQs and multiband compressors can be used to create gentle and natural-sounding changes in the level of a signal, which can be very difficult to achieve with static EQs.
As a result, these processors can be very useful for shaping the sound of your mix in a more musical and organic way.
When static EQ is applied to an instrument playing a range of notes, attenuation can be an issue. This is because a regular EQ band will not move with the notes, and in turn will be affecting different harmonics in each note. As a result, imbalances can occur between different notes’ frequency contents.
Static EQ can therefore cause problems when trying to achieve a balanced sound. It is often better to use dynamic EQ instead, as this will adapt to the changing harmonics of the notes being played, resulting in a more balanced sound.
When mixing music, it is important to create a balance between the different frequencies. Too much bass can make the track sound muddy, while too much treble can make it sound shrill. Vocals should sit comfortably in the mix, without being buried or sounding thin.
A dynamic EQ or multiband compressor can help to prevent these imbalances, as they will only react when a frequency becomes too loud. This allows the engineer to maintain a clear and balanced mix, without constantly adjusting the levels of each individual track. As a result, dynamic EQs and compressors can be an essential tool for any mixing engineer.
As any sound engineer knows, EQ and compression are two of the most important tools in the audio production toolkit. They can be used to shape the sound of a track during the recording process or to add polish and polish during the mixing and mastering stages.
In general, EQ is used to control the overall balance of a track, while compression is used to even out the levels of individual instruments or vocals. However, these two processors can also be used together to great effect. Dynamic EQ can be used to tame resonances in recordings of real instruments, while multiband compression can be used to even out the level of different frequency ranges. As insert effects, they can be extremely useful in achieving a clean and polished sound.
In a mastering context, multiband compression can be both a boon and a detriment. On the plus side, its ability to assign separate attack and release times to each band allow for more intentional and specific compression.
Attack times for the compression of lower frequencies can be increased—so low transients have time to develop—while higher frequencies can be controlled more precisely with shorter attack times. This can give the audio engineer greater control over the soundscape. However, multiband compression can also result in artifacts and other undesirable effects, particularly when used excessively. As with any tool, proper use is essential for achieving the desired results.
In an ideal world, mastering engineers would be able to work with mixes that are already well balanced and require only minor adjustments. Unfortunately, this is often not the case. In many situations, the mastering engineer needs to take a more active role in shaping the sound of the track.
One way to do this is by using multiband compression. This technique can help to even out the levels across all frequency ranges, resulting in a more cohesive and polished sound. While it can sometimes result in a loss of fidelity, when used judiciously, it can be a powerful tool for achieving sonic perfection.
Dynamic EQs are a type of equalizer that can provide many of the same functions as a traditional EQ, but without posing as much risk to the signal being mastered. Dynamic EQs work by only applying EQ adjustments when they are actually needed, which prevents the sound quality from being degraded by unnecessary processing.
This makes them ideal for mastering applications, where even a small amount of signal degradation can have a big impact on the final product. In addition, dynamic EQs can be very helpful in treating specific problems with a track, such as a sibilance or room resonance. Because they only affect the frequencies that are actually causing problems, they can help to improve the sound quality without affecting the overall tonal balance.
While dynamic EQs and multiband compressors can be very useful tools, they can also be quite demanding on a computer’s CPU. So, when using these processors, it’s best to do so sparingly and only when they’re absolutely necessary. This way, you can avoid overburdening your computer and experiencing any delays or other issues. By using these processors judiciously, you can ensure that you’re getting the most out of them without putting too much strain on your system.
Conclusion
Dynamic EQ is an essential tool for any engineer or producer. By splitting the signal into multiple frequency bands, each with its own dedicated compressor, they offer much more flexibility and control than a standard EQ. Dynamic EQ affects the sound by adding or taking away EQ depending on how loud the sound is. This is similar to compression, which also depends on how loud the sound is.
While dynamic EQ and multiband compression both have their own advantages and disadvantages, it ultimately depends on what you’re trying to achieve as to which one you should use. If you’re just looking to add a little bit of polish to your track, then multi-band compression may be the way to go. If you’re looking to completely transform the sound of your track, then dynamic EQ is probably a better choice.
In conclusion, dynamic EQ is an essential tool for any engineer or producer. By Splitting the signal into multiple frequency bands, each with its own dedicated compressor, they offer much more flexibility and control than a standard EQ.
Dynamic EQ affects the sound by adding or taking away EQ depending on how loud the sound is. This is similar to compression, which also depends on how loud the sound is.
Advise
In the world of audio production, there are two main ways to process frequencies: EQ and compression. Both have their own advantages and disadvantages, and the right choice for a given situation depends on the needs of the mix. However, in recent years, a new type of processor has emerged that combines the best of both EQ and compression: the dynamic EQ.
Dynamic EQs offer the same precision and control as traditional EQs, but with the added ability to compress or expand certain frequency ranges in response to the signal level. This makes them ideal for taming problem frequencies, such as sibilance or boxiness, without affecting the overall sound of the track. In addition, dynamic EQs can be used to achieve creative effects, such as pumping or ducking, that would be difficult or impossible to achieve with a traditional EQ.
While dynamic EQs can be very powerful tools, they are also quite demanding on a computer’s CPU. So, when using these processors, it’s best to do so sparingly and only when they’re absolutely necessary. This way, you can avoid overburdening your computer and experiencing any delays or other issues. By using these processors judiciously, you can ensure that you’re getting the most out of them without putting too much strain on your system.
If you’re serious about music production, then you know that having a reliable and powerful computer is essential. While many computers are capable of handling the basic tasks of music production, if you want to take your productions to the next level, you’ll need a machine that can keep up with your ambitions.
That’s where these processors come in. By giving your computer a boost in processing power, these processors can help you achieve the perfect balance between performance and stability. And by freeing up your computer’s resources, you’ll be able to save time during both the mixing and production process.
Whether you’re just getting started in music production or you’re a seasoned pro, these processors can help you take your productions to the next level.
Dynamic EQ and Multiband Compressor FAQ
What is a dynamic EQ?
A dynamic EQ is an equalizer that can compress or expand certain frequency ranges in response to the signal level. This makes them ideal for taming problem frequencies, such as sibilance or boxiness, without affecting the overall sound of the track. In addition, dynamic EQs can be used to achieve creative effects, such as pumping or ducking, that would be difficult or impossible to achieve with a traditional EQ.
What are the advantages of using a dynamic EQ over a traditional EQ?
Dynamic EQs offer the same precision and control as traditional EQs, but with the added ability to compress or expand certain frequency ranges in response to the signal level. This makes them ideal for taming problem frequencies, such as sibilance or boxiness, without affecting the overall sound of the track. In addition, dynamic EQs can be used to achieve creative effects, such as pumping or ducking, that would be difficult or impossible to achieve with a traditional EQ.
How do I use a dynamic EQ?
Dynamic EQs are typically used to tame problem frequencies, such as sibilance or boxiness, without affecting the overall sound of the track. In addition, dynamic EQs can be used to achieve creative effects, such as pumping or ducking, that would be difficult or impossible to achieve with a traditional EQ. When using these processors judiciously, you can ensure that you’re getting the most out of them without putting too much strain on your system.
How much does a dynamic EQ cost?
Dynamic EQs typically range in price from $100-$500 USD. However, there are some lower-priced options available.
Is a dynamic EQ worth the investment?
If you’re serious about music production, then a dynamic EQ is definitely worth the investment. These processors offer a high degree of precision and control, making them ideal for taming problem frequencies or achieving creative effects. In addition, by freeing up your computer’s resources, you’ll be able to save time during both the mixing and production process.
What is the difference between a multiband compressor and a traditional compressor?
A multiband compressor is an audio processor that can compress multiple frequency ranges independently. This makes them ideal for taming problem frequencies, such as sibilance or boxiness, without affecting the overall sound of the track. In addition, multiband compressors can be used to achieve creative effects, such as pumping or ducking, that would be difficult or impossible to achieve with a traditional compressor.
-
Expert Guides1 week ago
AI in Market Research – Unveiling Insights
-
Expert Guides1 week ago
Corinna Kopf Quits OnlyFans at 28 with $67M Earnings
-
Expert Guides1 week ago
AI in Advertising & Retargeting: Smart Strategies
-
Expert Guides1 week ago
Unlocking Growth: AI in Social Media Marketing
-
Business1 week ago
How to Start a Successful Online Store in 2025
-
Business1 week ago
7 Ways AI Can Speed Up Your Blog Writing Process
-
Expert Guides1 week ago
AI in Product and Content Recommendations Unveiled
-
Business7 days ago
6 Creative Ways AI Enhances Visual Content for Marketers