Reverb
Free Valhalla Supermassive – MASSIVE Delays and Reverbs
2025
Free ValhallaSupermassive – MASSIVE Delays and Reverbs
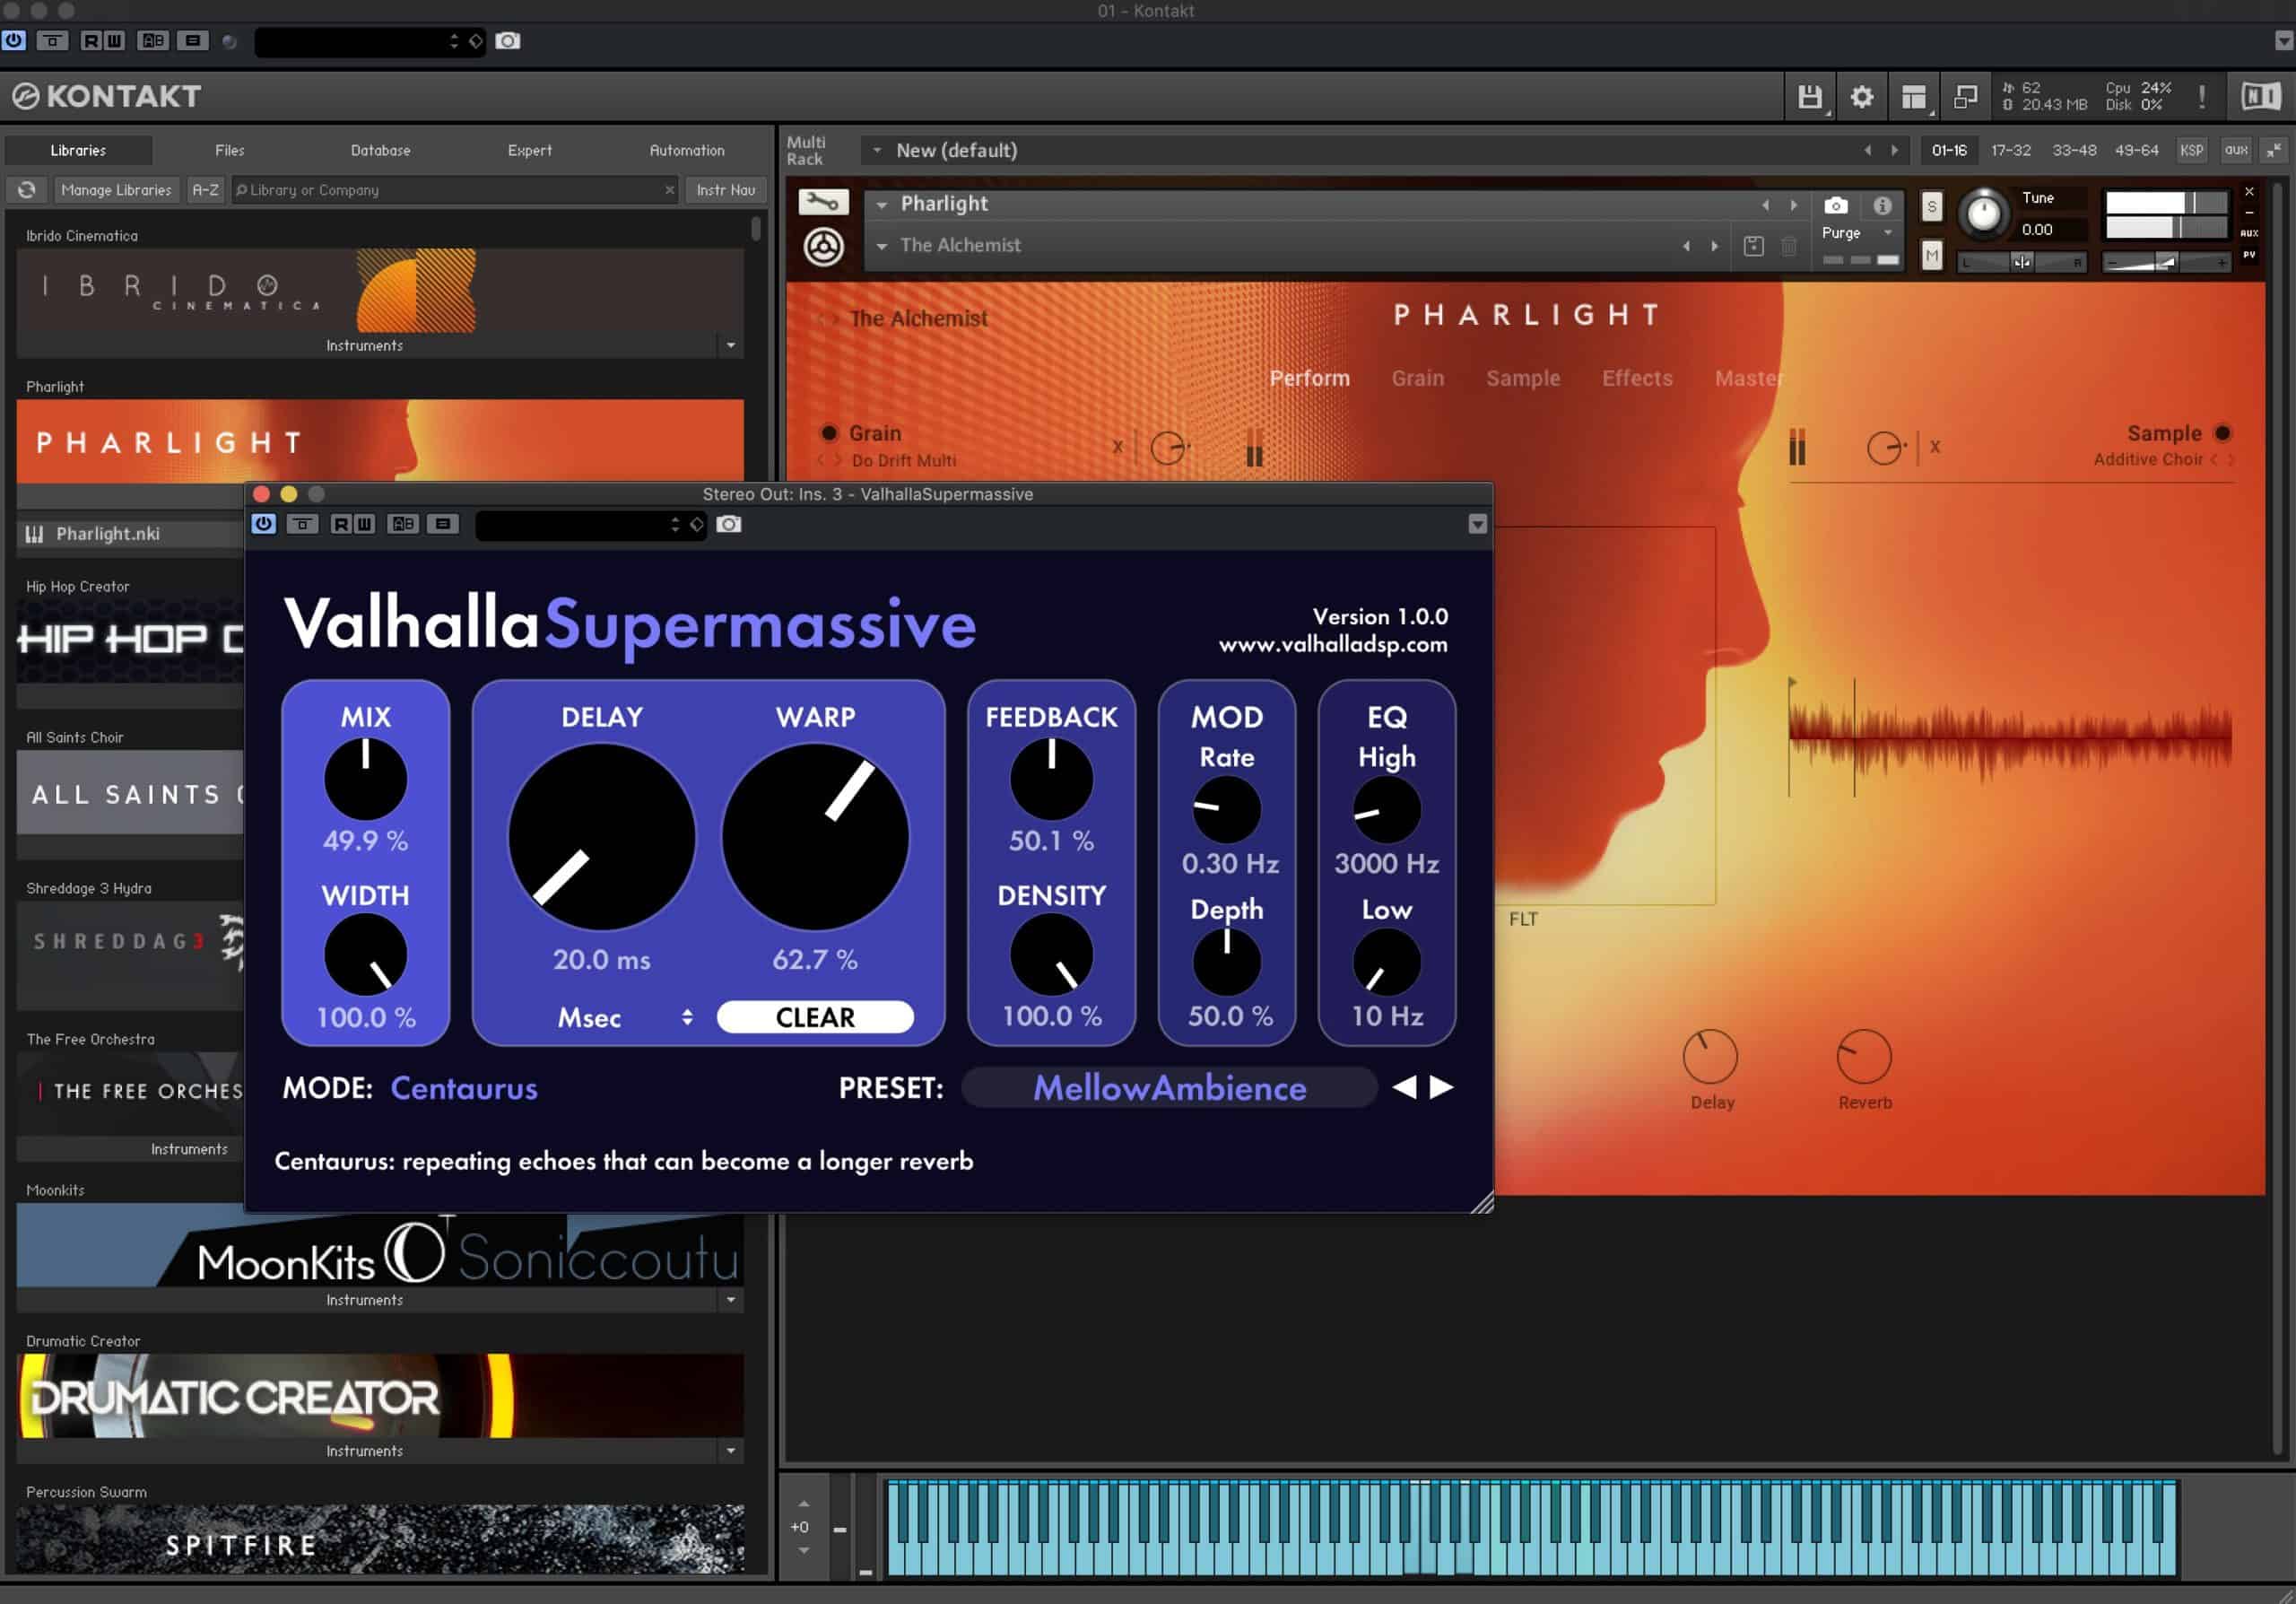
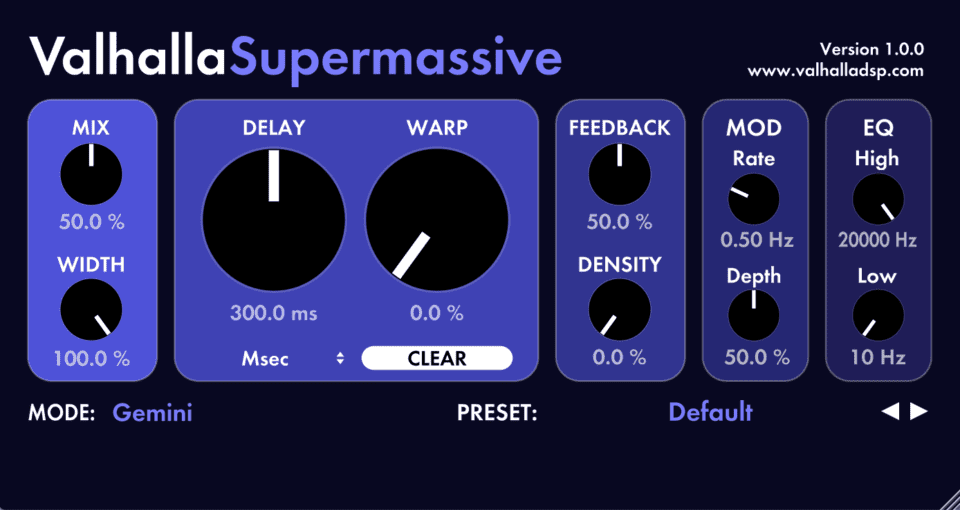
ValhallaSupermassive has been designed from the ground up for MASSIVE delays and reverbs. ValhallaSupermassive is based on feedback delay networks. The individual delays can have up to 2 seconds of delay time, with user control over the delay lengths, the feedback, how the delays mix with each other, and the modulation rate and depth of the delays. The sonic results range from choruses and flangers to echoes that fade in and out over time, to massive lush reverbs, and onwards to weird spatial effects that have to be heard to be believed.
ValhallaSupermassive has a bunch of concepts in it that VALHALLA DSP had in mind over the past decade, that have been looking for a home. Echoes that are too weird for ValhallaDelay, reverbs that are too massive for a general-purpose plugin, strange sounds that defy categorization. We are happy to release these sounds into the world!
ValhallaSupermassive is designed to blow your mind and your music to new levels of consciousness and experience! Luscious clouds of reverb, otherworldly delays, swelling waves of feedback unlike any you’ve heard before.
Valhalla Supermassive Features
- Tempo synced delays, up to 2 seconds
- Multiphase delay modulation
- DENSITY control, that allows you to dial in pointillistic echoes, lush reverbs, echo clusters, and all sorts of sounds in between.
- Eight unique delay/reverb MODES, named after celestial objects:
- Gemini: Fast attack, shorter decay, high echo density.
- Hydra: Fast-ish attack, shorter decay, low to high echo density (depending on the DENSITY control setting)
- Centaurus: Medium attack, longer decay, medium to high echo density (depending on the DENSITY control setting)
- Sagittarius: Slow attack, longer decay, high echo density
- Great Annihilator: Medium attack, very long decay, medium to high echo density (depending on the DENSITY control setting)
- Andromeda: Slowest attack, very long decay, very high echo density
- Lyra: Fast attack, shorter decay, low echo density
- Capricorn: Fast attack, shorter decay, medium echo density
- Cross-platform preset browser
Supermassive uses a variety of feedback delay networks, where each delay in the structure can be up to 2 seconds long. Combine these long delays with the unique WARP control, and the results range from echoes that slowly fade in, to cascading harmonic echoes, to lush reverbs, onwards to reverbs that decay way over the course of minutes.
SEAN COSTELLO talks about The Philosophy Of ValhallaSupermassive
“I started working on reverb algorithm design back in 1998. For the first decade of working on reverbs, I focused on learning various ways of putting together delays, in configurations that fit in the umbrella category of “feedback delay networks.” These algorithms would run digital delay lines in series and/or parallel, in such a way that the echo density would build with time (as found in a real acoustic space). By 2008, I had a huge repertoire of basic reverb topologies.
The next decade (2009-2019) was spent making these topologies sound GOOD. For the most part, “good” was partly shaped by the goals of the product I was working on. The reverb algorithms for ValhallaRoom needed to sound like rooms; the algorithms in ValhallaVintageVerb needed to sound like vintage digital hardware; ValhallaPlate needed to sound like physical plate reverberators. This involved a lot of research into eliminating stray resonances, getting rid of unrealistic high frequencies, shaping the overall frequency response and behavior, and generally “taming” the algorithms into something that sounded natural and would easily fit into a mix.
However, not all of the algorithms that I stumbled across wanted to be tamed. There were some delay configurations that were never going to sound “realistic” or “natural.” I really liked those algorithms, but I had to put them aside, as they weren’t moving towards the goals I was working on at the time. They weren’t behaving.
ValhallaSupermassive is a celebration of those untamed delay algorithms. The ValhallaSupermassive algorithms can be grainy, or overly bright, or metallic, or have weird zapping laser gun resonances or are just too darned huge to sound like anything natural. They haven’t been polished to sound like the “real world.” They are unrepentantly digital and unrepentantly un-natural. The Supermassive algorithms just want to be themselves.
Since the ValhallaSupermassive algorithms don’t correspond to “real world” reverb spaces like halls or rooms, they have been given the names of celestial objects. The original goal was to name each algorithm after a supermassive black hole, but most of these are named a word plus a long number. So the Supermassive algorithms are named after constellations, galaxies, that sort of thing.
ValhallaSupermassive also allows these algorithms to move outside the realm of reverberation. The WARP parameter gives the user direct control over the lengths of individual delays in the algorithms. This allows for all sorts of natural and unnatural echoes, sounds that rotate around your head, strange cascading harmonic delays, clusters of reflections, and reverbs that fade in overtime, hang in space for an uncomfortably long time, and decay in a strange and unnatural way.
Many of the Valhalla reverbs have a fixed, “natural” echo density that builds with time. ValhallaSupermassive features the DENSITY control, which allows for very sparse decaying echoes, as well as “pointillistic” reverbs that get less dense as they decay away,. These are the sorts of artifacts I have avoided in the past, but ValhallaSupermassive embraces these artifacts as weird and wonderful. Want a smooth reverb? Just turn up DENSITY.
Once I took the pressure off of the algorithms to behave like “normal” or natural reverbs, ValhallaSupermassive came together quickly. The initial prototypes were created as Max4Live patches in late February 2020. I started the “proper” plugin (i.e. C++ code, Juce GUI) in mid-March 2020, and it was essentially done by the end of April 2020.
As always, ValhallaSupermassive was a joint project. Kristin came up with the plugin GUI colors, much of the philosophy behind the plugin, and created the amazing logo, animation, and banner ad for Supermassive. Don Gunn takes credit for the plugin name, voicing decisions, presets, and helped sculpt the overall plugin design. The three of us collaborated on the names of the “celestial objects” used for the algorithm names. We hope you enjoy ValhallaSupermassive. Stay safe, and make some music!”
Sean Costello is the “algorithmic reverb plugin wizard” [citation needed] at Valhalla DSP.
Availability
ValhallaSupermassive is available for free from VALHALLA DSP.
Reverb is one of the most important tools in a sound designer’s toolkit. It can be used to create an immersive sonic environment, evoke a sense of place, or add depth and texture to sounds. This article will explore some creative ways to use reverb in your productions. We’ll look at how to create special effects, how to simulate different environments, and how to use reverb for emotional impact. So sit back and let’s take a journey into the world of creative reverb!
Natural Sound or Creative Effect
Reverb is an important part of the sound of many musical instruments, and it can also be used as a creative effect.
The two main types of reverb are natural sound and creative effect. Natural sound reverb is created by the reflections of sound waves off of surfaces in the environment.
This type of reverb can be used to create a sense of space and distance, and it is often used in recording studios to create a realistic environment for recordings.
Creative effect reverb is created by using digital signal processing to artificially create reflections. This type of reverb can be used to create unique sonic effects, and it is often used in live music performances to add interest to the sound.
Reverb is an important part of the sound of many musical instruments, and it can also be used as a creative effect. The two main types of reverb are natural sound and creative effect.
Natural sound reverb is created by the reflections of sound waves off of surfaces in the environment. This type of reverb can be used to create a sense of space and distance, and it is often used in recording studios to create a realistic environment for recordings.
Creative effect reverb is created by using digital signal processing to artificially create reflections. This type of reverb can be used to create unique sonic effects, and it is often used in live music performances to add interest to the sound.
Silky Smooth Reverberation
Plate reverbs have long been favored for their dense, lush sound, but they can be difficult to set up and can take up a lot of space. Algorithmic reverbs are a more recent development, and they offer many of the same benefits as plate reverbs without the hassle.
Goldplate is an algorithmic reverb that sounds indistinguishable from a plate reverb. It is also much smaller and easier to use, making it the perfect tool for any engineer who wants to add depth and dimension to their sound without having to worry about lugging around a huge piece of equipment.
Kush and Relab are two companies that have joined forces to create Goldplate, a new solution for the world of reverb. With this new product, the goal is to provide an effect plugin that sounds just as good no matter how long the reverb is.
This is something that has been lacking in the world of reverb up until now, and it is something that Kush and Relab are confident they can deliver. To achieve this, they have teamed up to develop a product that uses both their algorithms and their hardware.
This way, they can offer a reverb plugin that not only sounds fantastic but also offers a great deal of flexibility. Whether you want a short or long reverb, Goldplate will be able to provide it. Kush and Relab are two companies with a shared passion for audio quality, and Goldplate is the latest manifestation of that passion.
If you are looking for a new reverb plugin, Kush and Relab’s Goldplate is definitely worth checking out.
Goldplate is a new reverb plugin that has been getting a lot of attention lately. What makes it so special is the “secret sauce” that is used to add harmonics.
This gives the plugin a unique sound that is very different from other reverb plugins on the market. The secret sauce is what makes the Goldplate plugin so famous. It is a very important part of the plugin and gives it a distinct sound. When you use this plugin, you will notice that the overall sound is much smoother and more realistic than other plugins.
The secret sauce is what makes this possible. It is a very important part of the plugin and gives it a distinct sound. If you are looking for a new reverb plugin, then you should definitely check out Goldplate.
Reverb for Creative Purposes
First, when using reverb for creative purposes, it’s important to understand the different types of reverb available. Each type of reverb has its own unique character, which can be used to great effect in the right context. For example, plate reverb tends to have a smooth, warm sound that is perfect for creating a lush ambiance.
On the other hand, convolution reverb can be used to create realistic simulations of real-world spaces, or even completely imaginary spaces. Understanding the different types of reverb available will go a long way in helping you achieve the sound you’re looking for.
Second, when using reverb creatively, it’s important to pay attention to the wet/dry mix. The wet/dry mix is the ratio of wet (reverb) to dry (unaffected) signal.
For example, a wet/dry mix of 100% would be completely wet, while a mix of 50% would be half wet and half dry. The Wet/dry mix is an important parameter to consider when using reverb, as it can have a big impact on the overall sound.
Finally, when using reverb creatively, don’t be afraid to experiment! Reverb is a versatile tool, and there are no hard and fast rules about how to use it. So go ahead and experiment with different settings, try out new ideas, and see what sounds you can create.
Reverb for Sound Design
Reverb can be a great tool for sound design, but it’s important to use it wisely. By keeping a few simple tips in mind, you can get the most out of this powerful effect. So go forth and start creating some amazing soundscapes!
Reverb is an enormously powerful tool for creating soundscapes, both in the studio and on the stage. By its very nature, reverb creates a sense of space and openness, which can be used to great effect in a variety of musical contexts.
In the hands of a skilled engineer or producer, reverb can be used to create everything from huge, sprawling soundscapes to intimate and immediate sonic environments. And while there are countless ways to use reverb creatively, here are a few tips to get you started:
- One of the most important things to keep in mind when using reverb is that less is often more. When using reverb for special effects or emotional impact, it’s important to use it sparingly and with intention. A little bit of reverb can go a long way towards making a sound more interesting or evocative.
- Another way to use reverb creatively is to simulate different environments. By using different types of reverb, you can create the illusion of being in a large room, a small space, or even outdoors. This can be a great way to add interest and variety to your productions.
- Finally, don’t be afraid to experiment! Reverb is a versatile tool, and there are no hard and fast rules about how to use it. So go ahead and experiment with different settings, try out new ideas, and see what sounds you can create.
Reverb is a powerful tool that can be used in a variety of ways to enhance your productions. By keeping a few simple tips in mind, you
How to Use Reverb for Sound Design: Creative Tips and Tricks
Reverb can be used to create unique and interesting sounds, simulate different environments, and add depth and realism to your productions. We’ll look at how to create special effects, how to simulate different environments, and how to use reverb for spatialization. So let’s get started!
Intense Pitch Modification
When using reverb, it’s important to keep in mind how the dry signal is affected by the processing. For example, rolling off some top end on a reverb can make the tail sound further away. Similarly, pitch manipulation can also add further tonal interest to sounds.
Dropping the pitch can add extra weight to sounds while raising it can add a presence that is different from other ways of bringing sounds forward in the mix. By understanding how these processes work, you can use them to achieve the desired effect in your mixes.
Gated Reverb
For those unfamiliar with the term, gated reverb is an audio effect created by combining a short, heavily-reverberant signal with a clean signal. A different spin to explain it: Gated reverb is an audio signal processing technique that involves using a loud reverb effect that is cut short by a noise gate instead of allowing it to naturally decay in amplitude over time.
The result is a sharp, percussive sound that has become synonymous with 1980s pop music. While gated reverb was initially developed for use in drumming, it quickly found its way into other genres, thanks in part to Phil Collins.
As a solo artist, Collins made extensive use of gated reverb on tracks like “In the Air Tonight” and “Against All Odds”. His work with Genesis also featured prominently use of the effect, most notably on the track “Land of Confusion”.
In recent years, gated reverb has experienced something of a resurgence in popularity, appearing on tracks by artists such as Rihanna and Kanye West. Whether you love it or hate it, there’s no denying that gated reverb has left a lasting impression on pop music.
The result is a sharp, percussive sound that still has the lush, full-bodied quality of traditional reverb. While gated reverb was initially popularized by ’80s hair metal bands, it has since found its way into a wide range of musical genres, from EDM to pop to rock.
When used tastefully, gated reverb can add depth and texture to a track without overwhelming it. However, when used excessively, it can quickly become cacophonous. As with any effect, it’s important to use gated reverb judiciously in order to achieve the desired results.
Sidechaining the Reverb
One common mixing technique is to sidechain the reverb to the dry sound. This means that the reverb will duck (get quieter) when the dry signal is playing, and swell up (get louder) when the dry signal is not playing.
This can help to create a more tight and focused sound, and can also be useful for helping different elements of the mix stand out from each other. It’s important to experiment with different settings and find what sounds best for your particular track.
But in general, sidechain compression can be a helpful tool for creating a more polished and professional mix.
Ducked Reverb
In music, reverberation is created when sound waves bounce off of surfaces and are heard again by the listener. This can naturally occur in enclosed spaces, like caves or large halls, but it can also be created artificially using electronic devices.
One popular type of artificial reverberation is called ducked reverb. This effect is created by mixing two signals together: the original sound and a delayed, echoed version of the sound.
The delayed signal is then passed through a filter that reduces its volume, or “ducks” it. As a result, the delayed signal is barely audible beneath the original sound. When used sparingly, ducked reverb can add depth and richness to a recording.
However, too much ducked reverb can make a recording sound muddy and cluttered.
Sidechain compression is a powerful tool that can be used to achieve a variety of different sound effects. In the context of reverb, sidechain compression can be used to create a “ducking” effect, wherein the reverb is attenuated whenever the vocal track is active.
This allows the vocal to cut through the mix more effectively, while still allowing the reverb tail to decay naturally. When used judiciously, sidechain compression can help to create a more articulate and inviting mix.
Panned Reverb
As any engineer knows, stereo reverb can be a great way to add depth and dimension to a track. Reverb is an essential part of any mix, providing space and atmosphere. However, too much reverb can quickly muddy up a track, making it sound cluttered and unclear. One way to achieve a more focused reverb sound is to use a technique called “panned reverb.”
This involves sending the signal to a stereo reverb processor and panning the left and right outputs to opposite sides of the mix. This creates a wide, spacious sound that can help to add depth and dimension to a track without overwhelming it.
Panned reverb is a versatile tool that can be used on anything from vocals to drums, so experiment with it and see how it can help add new life to your mixes.
If you’ve ever tried to get a stereo reverb sound by using two different mono reverbs, you know that it can be a real challenge to get them to work together. Instead, try using a mono reverb and panning it opposite the instrument you’re sending it to.
This works especially well on double-tracked instruments like an electric guitar. You can pan the left guitar’s reverb right and the right guitar’s reverb left for a lot more width and dimension.
By using this technique, you’ll be able to create a much more believable stereo image that will add depth and dimension to your tracks.
Reverb Size
Reverb is an essential tool for any audio engineer. It can be used to create a sense of space and atmosphere or to simply add a bit of polish to a track. When setting up a reverb, the first parameter that should be adjusted in size.
The size determines the boundaries of the space in which the reverb will exist. For example, a small room will have a very different reverb than a large hall. Once a size has been set, the other parameters can be adjusted to achieve the desired sound. But regardless of what type of reverb is being used, size will always be the first parameter to adjust.
Ever notice how a small room feels much larger when it’s empty, but feels much smaller when it’s full of furniture?
The reason for this has to do with the way sound behaves in different spaces. When a room is empty, the soundwaves have more space to bounce around before they reach your ears.
As a result, you perceive the room as being larger than it actually is. On the other hand, when a room is full of furniture, the soundwaves have less space to bounce around.
This gives the impression that the room is smaller than it actually is. The same principle applies to early reflections. When early reflections arrive at your ears sooner than the direct sound, you perceive the space as being smaller.
However, if the early reflections arrive in your ears later than the direct sound, you perceive the space as being larger. Therefore, by controlling the timing of early reflections, we can control the perceived size of a space.
Reversed Reverb
Reversing audio can be a great way to create interesting sound effects. By reversing the sound, you create a mirror image of the original track. This can be especially effective when combined with reverb. Reverb is an effect that creates a sense of space and depth.
By applying reverb to the reversed sound, you create a track that sounds as if it’s emanating from another world. The effect can be particularly striking when used on vocals and cymbals.
A classic studio trick for creating an otherworldly vocal sound is to reverse the reverb tail and line it up with the dry signal. This creates an interesting doubling effect that can make vocals sound larger than life.
To create this effect in your DAW, first, send your vocal track to a reverb bus. Next, send the output of the reverb bus to an audio track and record the signal.
Then, resample the reverb as its own audio track, and remove the original, reversed audio clip. Line up the newly created reversed reverb clip to fit the main vocal track and voila! You have a shimmering, ethereal reverse reverb effect!
Bitcrushed Reverb
Bitcrushed reverb is a great way to add interest to a track without overwhelming the rest of the elements. By crushing the bits of the reverb signal, you create a unique effect that can add character and texture to your music.
Bitcrushed reverb can also be used to create spaces that are otherworldly and dreamlike, perfect for ambient or electronica tracks. With a little experimentation, you can find the perfect balance of bit crush and reverb to take your music to the next level.
By processing the reverb with destructive effects like bit crush, it is possible to radically alter the character of the sound. In this setup, the bitcrusher or distortion plugin comes after the reverb unit.
This allows the reverb to be modulated by the plugin, creating new and unexpected sonic results. Of course, it is also important to EQ the results to ensure that only pleasant frequencies are heard. With a little experimentation, it is possible to use bit crushing to create truly unique sounds.
Saturated Reverb
Saturated reverb is achieved by overdriving the input of a reverb unit, giving the resulting sound a unique edge. While it can be used on any instrument, saturated reverb is particularly well-suited for drums and percussion.
By adding saturated reverb to your drum tracks, you can give them more power and presence in the mix.
Saturation is a subtle form of distortion that originates from the analog days. The signal would run through various pieces of hardware, adding pleasant-sounding harmonics. Today, saturation is used to add depth and character to digital recordings.
It can be used to make a sound fuller and warmer or to give it more edge and bite. When used tastefully, saturation can add weight and body to a track without making it sound muddy or overblown.
Because it is such a versatile tool, saturation is found in nearly every style of music production. Whether you’re looking to add some grit to a guitar part or thicken up a synth line, saturation is a powerful tool that can help you achieve your sonic goals.
And because saturation is an artifact of analog gear, using saturated reverb can also help to give your track a vintage feel. If you’re looking for a way to add some extra character to your music, try experimenting with saturated reverb.
Compression and Reverb
When used sparingly, compression can be a powerful tool for shaping the sound of a track. By boosting the level of the quietest parts of a signal, compression can make a sound seem larger and more present. In the case of reverb tails, this can add a sense of power and weight to the tail end of the sound.
Of course, this effect won’t work on every track, but it’s a valuable option to have in your sonic arsenal.
Octavized Reverb
Octavized reverb is a powerful audio effect that can be used to add depth and space to your mix. It works by splitting the signal into two parts: the dry signal and the wet signal.
The dry signal is sent to the usual destination (such as the main output), while the wet signal is sent to a pitch shifter. The pitch shifter shifts the wet signal up or down an octave, and then it is sent to a reverb unit.
The result is a rich, ethereal sound that can help to fill out your mix. Octavized reverb can be used on any type of audio, but it is particularly effective on pads and ambiance.
When it comes to modifying the sound of vocals, there are a few different techniques that can be used to achieve the desired effect.
One common method is to lower or raise the octave of the track. This can be done using a pitch shift tool, and it can have a significant impact on the overall tone of the vocals. Lowering the octave will add thickness and depth to the voice while raising it an octave will give the impression of increased presence in chords.
Of course, these are just two examples of what can be done with pitch-shifting, and there are many other possibilities worth exploring. Ultimately, it all comes down to experimentation and finding what sounds best for the particular track. If you are looking for a way to add some extra depth to your mixes, octave reverb is definitely worth considering.
Automated Reverb
When it comes to mixing music, there are a number of different techniques that can be used to create a more dynamic and engaging sound.
One of these techniques is known as automation. Automation involves making small changes to a track’s volume, EQ, or other parameters over the course of the song. This can be done manually or with the help of specialized software.
When it comes to reverb, automating a boost in wetness or decay length can help to create a more dramatic effect, particularly at key points in the song such as the end of a verse or during a breakdown.
Automatic and keep pushing changes while a track plays add space and depth to a track and can completely change the feel of a song. When used tastefully, reverb can add an element of tension or release at key moments in a production.
In this way, it can be used to accentuate particular moments or introduce different parts of an arrangement. By automating the reverb to behave differently at specific moments, you can create drama in your arrangement without needing to add any extra complexity to the track itself.
With a little creativity, the possibilities are endless. So go ahead and experiment with reverb – you may be surprised at what you can create. By using automation, you can add an extra layer of interest to your mixes and make them sound more professional.
Resampling Frozen Reverb
By adding a subtle sense of echo and decay, reverb can give a track a sense of place and make it sound more natural.
However, setting the perfect amount of reverb can be tricky, and it’s often hard to know how a change will affect the overall sound.
That’s where the Freeze button comes in. By freezing the reverb tail of the input signal, it allows you to make adjustments without having to worry about the effect on the rest of the mix.
As a result, it’s an essential tool for any musician who wants to get the perfect sound out of their reverb plugin.
Experiment, Rinse and Repeat
By adding echoes and reflections, reverb creates a sense of space and depth that can bring your music to life. However, reverb can also be a powerful tool for shaping the sound of your instruments.
By experimenting with different settings, you can create unique sonic effects that add character and interest to your recordings.
For example, by EQing the verb, you can change the tonal balance of the echoes, making them brighter or warmer. Or by widening the verb, you can create a spacious, ambient soundscape. Using deesser effectively can help reduce sibilance and harshness in the reverb, resulting in a smoother and more polished sound. Additionally, by controlling the dynamics of the verb with a compressor, you can further shape its overall impact on the mix. These techniques allow for a more nuanced and controlled approach to manipulating the verb, ultimately enhancing the overall sonic quality of the mix.
By experimenting with your reverb plugin, you can learn how to create unique sonic textures. For example, you can use a short reverb to add depth and space to a snare drum, or a long reverb to create a cavernous soundscape.
With a little practice, you’ll be surprised at the kinds of sounds you can create with reverb. So go ahead and experiment—you just might discover your new favorite sound.
The possibilities are endless, so don’t be afraid to experiment. Experiment with your reverb plugin and see what kinds of sounds you can create. You may be surprised at how much difference a few small changes can make.
Conclusion
Reverb can be used in many creative ways to enhance the sound of a track. By automating the reverb, you can add interest and dynamics to a mix. Additionally, by resampling the frozen reverb, you can make precise adjustments to the sound without affecting the rest of the mix. Finally, by experimenting with different settings, you can create unique sonic effects that add character and interest to your recordings. So go ahead and get creative with reverb—you just might be surprised at what you can create.
Reverb is a powerful tool that every musician should learn to use. By following these tips, you can start using reverb in creative ways to enhance your productions. So don’t be afraid to experiment—you just might discover your new favorite sound.
Reverb Creative Tips and Tricks FAQ
How can I use reverb to add depth and space to a track?
By using the freeze function, you can add depth and space to a track without affecting the rest of the mix.
What are some creative ways to use reverb?
Reverb can be used in many creative ways to enhance the sound of a track. By automating the reverb, you can add interest and dynamics to a mix. Additionally, by resampling the frozen reverb, you can make precise adjustments to the sound without affecting the rest of the mix. Finally, by experimenting with different settings, you can create unique sonic effects that add character and interest to your recordings.
Can I use reverb on vocals?
Yes, reverb can be used on vocals to create a sense of space and depth. Additionally, by experiment with different settings, you can create unique sonic effects that add character and interest to your recordings.
What is the best reverb plugin?
There are many great reverb plugins available, so it really depends on your personal preference. Some popular options include Adaptiverb, FabFilter Pro-R, LiquidSonics Seventh Heaven, SoundToys’ Little Plate, SoundToys’ Echoboy, Valhalla Room, Valhalla Supermassive, and Altiverb.
How do I choose the right reverb for my track?
When choosing a reverb for your track, it’s important to consider the overall sound you’re going for. For example, if you want to add depth and space to a snare drum, you would use a different setting than if you were trying to create a cavernous soundscape. Additionally, it’s important to experiment with different settings to see what sounds best.
What is the difference between reverb and delay?
Reverb is an effect that simulates the natural reverberation of a room, while delay is an effect that creates a repetition of the original signal. Both effects can be used to create a sense of space and depth in a track. However, they are typically used for different purposes. Reverb is typically used to add ambiance, while delay is typically used to add interest and dynamics.
Hopefully these tips have inspired you to start using reverb in new and creative ways. So go ahead and experiment—you just might discover your new favorite sound. Thanks for reading!
In the last few years, there has been a ton of advancements in reverb plugins. Nowadays, you can find FREE Reverb Plugins on the market that are high quality and professional sounding. But with so many options out there, it can be hard to know which one is the best for your needs or budget.
Reverb is a common effect used in vocal recordings, and it can have both positive and negative impacts on the sound of the vocals. On the positive side, reverb can help to fill out the sound of the vocals, giving them more fullness and sustainment.
It can also help to create a more “natural” sound, as it simulates the effect of the vocals being recorded in a larger space. However, reverb can also cause the vocals to lose energy and cohesion, as it overlaps the words and washes them out. As a result, it is important to use reverb sparingly, and only when it will improve the overall sound of the vocals. With careful use, reverb can help to create a more polished and professional-sounding recording.
When using reverb on vocals, it’s important to find the right balance so that the vocals are still clear and powerful in the mix.
When mixing a song, it’s important to use reverb carefully. Too much reverb can make a song sound muddy and unclear. However, use too little and the song will sound dry and lifeless. A good rule of thumb is to use more reverb on the toms and cymbals than on the snare. This will help to create a fuller sound without sacrificing clarity.
Similarly, you should use enough reverb to push guitars and keyboards behind the vocals, but be careful not to obscure the lead singer. Finally, lightly sprinkle the vocals with reverb. This will give them a bit of depth without making them sound fuzzy or washed out. By following these simple tips, you can make your mixes sound polished and professional.
The Top FREE Reverb Plugins in 2022
Below, we have compiled a list of the best free reverb plugins for 2022. These plugins are all high quality and can help you to create better-sounding recordings.
- Super Massive by Valhalla
- Oril River by Denis Tihanov
- Protoverb by U-He
- Teufelsberg by Balance Mastering
- MCharmVerb by Meldaproduction
- TAL-Reverb-4 by TAL-Software
1. SuperMassive by Valhalla
Valhalla Super Massive is a versatile reverb plugin that can also be used as a delay unit. It offers a variety of features that make it ideal for creating huge unending swells, echoes that curve back on themselves, and other effects that bend time and space.
While it is designed for use with huge sounds, it can also be used to create smaller, more subtle effects. Whether you are looking for a way to add depth and dimension to your soundscape or create an otherworldly experience, SuperMassive is an excellent choice.
SuperMassive is a powerful music production tool that allows you to create professional-sounding tracks with ease. It comes with a huge library of sounds and effects, and it’s easy to use, making it ideal for any music producer.
Best of all, it’s free! You can download SuperMassive and start using it right away, no matter what your level of experience. With SuperMassive, you can create high-quality tracks that will impress your friends and family.
2. Oril River by Denis Tihanov
The Oril River is a powerful and versatile virtual space processor that offers 12 variations of early reflections and 5 variations of the reverb tail. With its 3-band equalizer for the wet signal, you can create different shades of virtual space to suit your need. The internal signal processing is a 64-bit floating-point, and the sample rate is from 44100 to 192000 Hz. There are two graphical interfaces included.
Oril River is a free algorithmic stereo reverb that can rival the quality of commercial reverbs. With this plugin it is possible to simulate the reverberation of a small room and great hall. OrilRiver has an intuitive interface thanks to which the user can quickly adjust the desired reverb sound.
The plug-in features four main controls: Size, Damp, Width, and Mix. Size adjusts the overall length of the simulation, while Damp allows the user to control how quickly the sound decays. Width adjusts the stereo spread of the effect, and Mix determines the wet/dry balance
As much as this plugin might excite the ear and eye, Oril River spurs mixed feelings because it is no longer developed and because it is such a good-sounding and versatile device. From tiny rooms to mega-halls, whatever sound reflects against its virtual walls falls back into the ear like a feather on a pillow.
With only minimal CPU usage, it provides an extraordinary stereo widening effect with separate control of the amount of stereo image shift for the left and right channels. The reflections can be filtered by low-pass and high-pass filters in order to darken or brighten the reverberation. Its reverberation time can be adjusted from 0.2s to 60 seconds.
3. Protoverb by U-He
Protoverb is a versatile, natural-sounding reverb based on the concept of a room simulator. Its main strength lies in its ability to create realistic and believable spaces, from small rooms to huge halls. Protoverb is an excellent choice for those who want to add depth and dimension to their music. The plug-in comes with a wide range of presets, covering a wide range of sonic possibilities.
The user interface is simple and easy to use, making it perfect for those who are new to reverbs. Overall, Protoverb is an excellent choice for anyone looking for a high-quality reverb plug-in.
The ProtoVerb is an experimental room simulator that creates an entire body of air with resonances, resulting in naturally-sounding reverberations. The character setting of the ProtoVerb distinguishes it from other reverb units.
For instance, multiple instruments do not wash away in a smear of reverb but remain freakishly distinct. Also, effects like ghost-echoes and resonance-build-ups are attainable with the ProtoVerb. The ProtoVerb is a versatile and unique tool for any musician or sound engineer.
The data-mining approach is chosen to seek the boundaries of what this plugin can do. To facilitate this, an advanced randomizer has also been implemented, with often very interesting results.
With this approach, it is possible to obtain a greater understanding of how the plugin works and what it can do. In addition, this approach can also help to identify any potential errors or bugs. As a result, the data-mining approach is an essential part of the development process for this plugin.
4. Teufelsberg by Balance Mastering
The Teufelsberg Reverb is a unique and powerful tool for creating stunning reverbs. Captured at the famous Berlin surveillance tower, it offers 6 different IR reverb sounds that are accurately modeled on the real world. With fast, zero-latency convolution, it’s perfect for live performance or studio recording. And with the A/B compare and preset saving functions, you can easily create your own custom soundscapes. Linux, Windows & Mac downloads are available, and it’s free and open source.
Teufelsberg Reverb is a new plugin that recreates the unique acoustic environment of the Cold War-era listening station on Teufelsberg Mountain in Berlin. By using impulse responses recorded at the site, the plugin captures the reverberant sound of the surrounding forest and the reflectivity of the station’s massive concrete walls.
The result is a lush, spacious reverb with a distinctly retro character. Whether you’re looking to add a touch of history to your music or simply want a new sonic tool to play with, Teufelsberg Reverb is definitely worth checking out.
5. MCharmVerb by Meldaproduction
MCharmVerb is an excellent sounding algorithmic reverb based on the MTurboReverb engine. It has all of the great features of MTurboReverb, but with a few additional refinements that make it sound even better.
Introducing MCharmVerb – the most versatile and visually stunning audio visualization engine on the market! With classic meters and time graphs, it’s easy to see what’s going on with your audio. And with up to 8 channels of processing, MIDI controllers with MIDI learn, automatic gain compensation (AGC), a safety limiter, multiparameter, and 64-bit processing – you can be sure that MCharmVerb will deliver the quality you need.
6. TAL-Reverb-4 by TAL-Software
Looking for a modulated vintage reverb sound? Look no further than the TAL-Reverb-4 by TAL-Software. This reverb delivers a very diffuse sound, making it perfect for a wide range of audio materials. The fast build-up time is perfect for long reverb sounds, while the easy-to-use interface makes it a breeze to use. However, please note that only stereo channels are supported.
The TAL-Reverb-4 is a great way to get a vintage reverb sound. It is very diffuse, so it works well on almost any audio material. It also has a fast build-up time, so you can use it to create long reverb sounds.
The only downside is that it is not as easy to use as some of the other reverbs on the market. However, if you are looking for a great-sounding vintage reverb, the TAL-Reverb-4 is definitely worth checking out.
No one recording is ever perfect, and sometimes you have to work with what you’ve got. If you’re dealing with reverberant voices in your mix, don’t worry – there are ways to fix them. In this blog post, we will discuss how to salvage soupy voices and improve the quality of your recordings. With the right tools and techniques, you can make your mixes sound great no matter what!
How to Fix Reverberant Voices Fast: Salvaging Soupy Voices in Your Mix
A dry voice recording is a luxury that the mixer seldom has access to. When you have the proper tool, it’s possible to rescue soupy voices in both dialogue and vocals in a music mix.
Noise And Reverberation
The modern audio engineer has a wealth of gear to choose from when it comes to recording the human voice. There is no shortage of options available from high-end microphones to state-of-the-art digital recorders.
This abundance of choices can sometimes make it difficult to decide which gear to use, but in general, the engineer should look for gear that will capture the natural tone and timbre of the voice. In some cases, it may even be necessary to use multiple microphones to capture all the nuances of the performance. However, with the right gear, it is possible to get a great recording of the human voice that will sound natural and lifelike.
Any musician knows that the quality of their recording is only as good as the environment they are recording in. Poor acoustics can quickly ruin takes, and unwanted background noise can easily slip into the mix. In many cases, the best way to combat these problems is to simply find a better location.
A quiet room with good acoustics can make all the difference in the world, and Recordists often go to great lengths to find the perfect spot. However, sometimes the perfect location is simply not available, and in those cases, it’s important to be proactive.
Soundproofing materials can help to dampen unwanted noise, and strategic microphone placement can minimize reflections from hard surfaces. By taking these precautions, Recordists can minimize the impact on environmental
Closer Constructs Finer Sound
It is a simple fact that the further away from the sound source you are, the more ambient noise there will be in the recording. This is why working distance is such an important factor in getting a clean recording. By positioning the microphone closer to the sound source, you can dramatically reduce the amount of ambient noise that is picked up.
This will result in a much cleaner and more focused recording. In addition, working closer to the sound source will also allow you to capture a more intimate and detailed performance. So, next time you are setting up your microphones, be sure to take working distance into account in order to get the best possible recording.
Reverberation plays an important role in the sound of any room, and understanding how it works can help you to achieve a better mix. Essentially, sound waves will bounce around the room until they eventually die out. The larger the room, the longer it will take for the sound to dissipate. This is why small rooms can often sound ‘livelier’ than large ones.
The distance at which reverberation takes over can be affected by several factors, including the size and shape of the room, the materials used in construction, and the number of people present. In general, though, being able to get a bit closer when working generally further away will probably make less of a noticeable difference. Understanding the critical distance at which reverberation takes over can help you to make better decisions about microphone placement and processing.
EQ Can Help
In many cases, the best way to deal with a problem is to simply avoid it altogether. This is often easier said than done, but in the case of reverberant voices, it is possible to use EQ to your advantage. By using a high-pass filter, you can effectively remove the low-frequency content that is most susceptible to being affected by reverberation.
This will result in a cleaner and more focused recording. In addition, using a high-pass filter can also help to reduce the overall level of noise in the recording. So, if you are working with a particularly noisy recording, this can be a great way to clean it up.
By following these simple tips, you can quickly and easily fix reverberant voices in your mix. By taking the time to understand the problem, you can find the best solution for your particular situation. With a little bit of knowledge and the right tools, you can salvage even the soupy-est of recordings.
Fix it in Post / in the Mix
When it comes to audio production, there are a variety of ways to address problems in the mix. However, using conventional techniques is often far from ideal. For example, anyone who has tried to use an expander to ‘fix’ reverb will likely tell you that it’s not the most effective method. Musicians have the luxury of being able to re-take their vocal performance or spend time optimizing mic position when noise strikes.
However, not everyone working in less than ideal conditions has this same luxury. Thankfully, there are other ways to address problems in the mix that can be more effective than using conventional techniques. By taking the time to explore all of your options, you can find a solution that works best for your specific situation.
For film and television mixers, the time-honored technique of improving quality is replacing dialogue in mixes. However, with the ever-expanding arsenal of smart drying-up tools, mixers working in any industry are increasingly able to bring us closer to the action.
These tools help to remove unwanted noise from recordings, allowing the dialogue to be more easily heard. In addition, they can also help to improve the overall sound quality of a mix by reducing reverb and clarifying ambiance. As a result, smart drying-up tools are an essential part of any mixer’s toolkit.
Conclusion
Reverberation can often be a nuisance when recording voices. By understanding the factors that contribute to reverberation, you can make better decisions about microphone placement and processing. EQ can be used to remove the low-frequency content that is most susceptible to being affected by reverberation, resulting in a cleaner and more focused recording.
In addition, high-pass filtering can help to reduce the level of noise in the recording. When it comes to addressing problems in the mix, using conventional techniques is often far from ideal. However, mixers working in any industry are increasingly able to bring us closer to the action by using smart drying-up tools. These tools help to remove unwanted noise from recordings, allowing the dialogue to be more easily heard.
How to Fix Reverberant Voices Fast FAQ
What is the best way to fix reverberant voices in your mix?
The best way to fix reverberant voices in your mix is by using a high-pass filter. This will result in a cleaner and more focused recording.
What is the critical distance at which reverberation takes over?
The critical distance at which reverberation takes over can be affected by several factors, including the size and shape of the room, the materials used in construction, and the number of people present. In general, though, being able to get a bit closer when working generally further away will probably make less of a noticeable difference.
How can I use EQ to my advantage when dealing with reverberant voices?
By using a high-pass filter, you can effectively remove the low-frequency content that is most susceptible to being affected by reverberation. This will result in a cleaner and more focused recording. In addition, using a high-pass filter can also help to reduce the overall level of noise in the recording. So, if you are working with a particularly noisy recording, this can be a great way to clean it up.
Can I fix the reverb in the post?
Yes! There are a number of ways to address problems with reverb in post-production. One common method is to use an expander to ‘fix’ the problem. However, this is often not the most effective method. Another option is to use a smart drying-up tool, which can help to remove unwanted noise from recordings and improve the overall sound quality of a mix.
By following these simple tips, you can quickly and easily fix reverberant voices in your mix. By taking the time to understand the problem, you can find the best solution for your particular situation. With a little bit of knowledge and the right tools, you can salvage even the soupy-est of recordings.
If you’re working with dialogue or vocals that are particularly prone to sounding soupy, one quick tip is to use a high-pass filter. This will help to remove low-frequency content that is most susceptible to being affected by reverb. In addition, using a high-pass filter can also help to reduce the overall level of noise in the recording. So, if you are working with a particularly noisy recording, this can be a great way to clean it up.
Another tip for fixing reverbs is to use a smart drying-up tool. These tools help to remove unwanted noise from recordings, allowing the dialogue to be more easily heard. In addition, they can also help to improve the overall sound quality of a mix by reducing reverb and clarifying ambiance. As a result, smart drying-up tools are an essential part of any mixer’s toolkit.
-
Microphone2 weeks ago
Unleash Your Inner Podcaster: Discover the Best Microphone for Crisp, Clear Audio
-
Composing2 weeks ago
MUTILATED NOISE by SampleTraxx: The Next Generation Sound Collection
-
Audio Production1 week ago
Unleashing Sound Therapy: Incorporating Acoustic Design in a Wellness Centre
-
Vetted20 hours ago
15 Best Commercial Vacuums for Efficient Cleaning Solutions
-
Singing2 weeks ago
What Is Breath Support And Why Is It Important For Singers?
-
Ambient1 week ago
Unleashing Eerie Waves: A Guide on Producing Dark Ambient Music
-
Ambient1 week ago
Mastering the Art of Dark Ambient Synthesizer Music
-
SEO1 week ago
Harmonizing Holistic SEO for Musicians: Crafting a Path to Digital Triumph