Composing
How to Add Songs to Clone Hero: 7 Simple Steps
Hungry for more songs in your Clone Hero library? Follow seven simple steps to easily add new songs and elevate your gaming experience.

Adding songs to Clone Hero is easy with seven simple steps. First, download desired setlists from a reliable source. Next, extract the setlists to your computer desktop. Then, locate the Songs folder on your system. Drag and drop the song files into the folder. After that, launch Clone Hero and enjoy your newly added songs. Remember to scan for songs within the game. Finally, access and play your songs using a Guitar Hero or Clone Hero controller. Try this straightforward process to enhance your gaming experience effortlessly. Find out more about optimizing your song library for Clone Hero.
Key Takeaways
- Download desired setlists and extract song files carefully.
- Locate the Songs folder in Clone Hero.
- Add .chart files by dragging into the Songs folder.
- Organize songs in setlist subfolders for easy access.
- Launch Clone Hero, scan for new songs, and start playing.
Download Desired Setlists
To start adding songs to Clone Hero, we can begin by downloading the desired setlists from the provided Google Drive link. When choosing the setlist you want to download, make sure to select carefully from the available options to meet your preferences. Once you have made your choice, simply click on the download button to save the zip file to your computer. It's crucial to maintain a stable internet connection to avoid any interruptions during the download process.
After the zip file has been successfully downloaded, the next step is to extract its contents. This action will uncover the individual song files that make up the setlist. Remember to follow the instructions provided to add the extracted songs to the Songs folder in your Clone Hero directory. Proper organization within the Songs folder will help you locate and play your desired songs seamlessly in Clone Hero.
Extract Setlists to Desktop

Let's extract the downloaded setlist zip file to the Desktop for convenient access. This step ensures that all files from the setlist are properly extracted and organized in a folder for easy transfer later.
When extracting the setlist, be sure to check for any additional files or instructions that may accompany it. By organizing the extracted setlist files efficiently, you'll streamline the process of transferring them to the Clone Hero songs folder.
It's important to double-check that all songs from the setlist have been successfully extracted before progressing to the next steps. This method not only simplifies the organization of your songs but also guarantees a smooth handover when adding them to Clone Hero.
Locate Songs Folder
When adding custom songs to Clone Hero, understanding how to locate the Songs folder is essential. By finding the Songs folder location, you can easily access the songs directory where custom tracks should be added.
Ensuring that songs are placed correctly in this folder is vital for them to appear in your library and be ready for gameplay.
Find Songs Folder Location
One vital aspect to consider when searching for the songs folder in Clone Hero is knowing the specific locations based on the operating system you're using.
Here are three key locations to find the songs folder in different systems:
- For portable mode on Windows, check inside the games install folder, within the PlayerData folder.
- Mac users will find the songs folder in their home directory, specifically inside the Clone Hero folder (~/Clone Hero).
- Linux users can locate the songs folder inside the ~/.clonehero directory.
Access Songs Directory
To access the songs directory in Clone Hero, navigate to the Songs folder within the Documents directory on a Windows system. For Mac users, the songs folder can be found in the home directory, inside the Clone Hero folder. Linux users will locate the songs folder within the ~/.clonehero directory.
Android users typically find the songs folder in the internal storage, within the Clone Hero folder. In Windows's portable mode, the songs folder is inside the game's install folder, specifically within the PlayerData folder.
Accessing the songs directory is essential for adding new songs to Clone Hero and customizing your gameplay experience. By knowing where to find this folder, you can easily manage and organize your song library to enhance your gaming sessions.
Add Songs Correctly
Finding the songs directory in Clone Hero is the first step to adding songs correctly. Here are three ways to locate the songs folder based on your operating system:
- For Windows users, check within the Documents folder, inside the Clone Hero directory.
- If you're using Portable mode on Windows, look inside the game's install folder, specifically within the PlayerData folder.
- Mac users will find the songs folder in the home directory, inside the Clone Hero folder (typically located at ~/Clone Hero).
Drag and Drop Songs
When adding songs to Clone Hero via drag and drop, understanding the song file format, the song folder structure, and how they appear in the in-game song library is essential.
By recognizing these key points, users can guarantee a smooth experience when expanding their song collection.
This knowledge simplifies the process and enhances the overall enjoyment of playing custom songs in Clone Hero.
Song File Format
We can easily add songs to Clone Hero by dragging and dropping the .chart files into the Songs folder in the game's directory.
When dealing with song file formats, consider these key points:
- .chart Format: Clone Hero supports songs in the .chart file format, containing note patterns and gameplay elements.
- Associated Audio: Alongside the .chart file, make sure to include the corresponding audio file (often in .ogg or .mp3 format) for the music.
- Charting Software: Utilize charting software like Feedback, Moonscraper, or EOF to create .chart files for custom songs, enhancing gameplay experiences.
Song Folder Structure
To maintain an organized song library in Clone Hero, make sure that each song is placed within its corresponding setlist subfolder within the game's directory. This structure guarantees easy access and clear organization of songs.
Naming subfolders accurately based on setlist or pack names is vital for quick identification within the songs directory. Using the drag and drop functionality simplifies the process of adding songs – simply drag the song files into the correct setlist folders.
In-Game Song Library
Adding songs to Clone Hero's in-game library is a straightforward process that involves dragging and dropping the song files into the designated 'songs' folder within the Clone Hero directory. To guarantee a seamless experience, follow these steps:
- File Format: Make sure the song files are in formats like .chart, .mid, or .ogg for Clone Hero to recognize and play them correctly.
- Proper Organization: Name and organize the song files appropriately within the 'songs' folder to prevent any scanning issues.
- Scanning for Songs: After adding the songs, launch Clone Hero and scan for new songs to see your added tracks in the in-game library.
Launch Clone Hero

Upon double-clicking the application icon on your desktop or from the installation directory, Clone Hero will promptly launch, allowing you to explore the world of rhythm gaming. As the game loads, you'll be greeted by the main menu, where various options await your selection.
Using either your keyboard or controller, effortlessly navigate through the menu to locate the 'Songs' section. Here, you can peruse your existing library of songs or opt to scan for new additions if you've recently imported any tracks. Once you've selected your desired songs from the library, plunge into gameplay mode to start rocking out to your favorite tunes.
The seamless launch process sets the stage for an immersive gaming experience, where your musical skills will be put to the test. Get ready to reveal your inner rock star as you engage in a rhythmic journey through the diverse song catalog available in Clone Hero.
Scan for Songs

When scanning for songs in Clone Hero, the game library is efficiently populated with available tracks. Here are three key points to keep in mind during the scanning process:
- Automatic Detection: One of the advantages of scanning for songs in Clone Hero is the automatic detection and addition of new songs to the library for gameplay. This seamless integration saves time and effort, guaranteeing that players can quickly access the latest tracks.
- Essential Routine: It's crucial to scan for songs whenever new songs are added to the songs folder. By regularly scanning for updates, players can make sure that their game library stays current and accurately reflects their music collection.
- Quick Updates: The scan songs feature in settings offers a convenient way to update the library with any new additions swiftly. This feature streamlines the process, allowing players to spend more time enjoying the game and less time managing their song library.
Access and Play Songs
After scanning for songs in Clone Hero to populate the library efficiently, the next step is to access and play the added songs. To access and play songs in Clone Hero, make sure the songs are added to the 'songs' folder within the Clone Hero directory. Once this is done, launch Clone Hero and scan for songs in the library to populate it with the newly added tracks. Navigate through the menu using a Guitar Hero or Clone Hero controller to select songs for gameplay. In quick play mode, choose songs from the library and follow the on-screen prompts to start playing.
| Steps to Access and Play Songs |
|---|
| 1. Add songs to the 'songs' folder in the Clone Hero directory |
| 2. Launch Clone Hero and scan for songs to populate the library |
| 3. Use a Guitar Hero or Clone Hero controller to navigate the menu |
| 4. Select songs from the library and follow on-screen prompts to play |
Frequently Asked Questions
How Do I Add Songs to Clone Hero?
Adding songs to Clone Hero is a breeze! Simply download your preferred setlists from Google Drive or other sources.
After extracting the zip files to a folder on your desktop, locate the songs folder within the Clone Hero directory.
Drag and drop the extracted songs into the Clone Hero songs folder.
Launch the game, scan for songs in the library, and enjoy playing the newly added tracks. Easy as pie!
How Do You Add Songs to Guitar Hero?
Adding songs to Guitar Hero is a straightforward process. Download song files and place them in the 'songs' folder in the Clone Hero directory.
Extract files to your desktop for easy transfer. Verify proper naming and formatting for Clone Hero recognition.
Launch Clone Hero, scan for new songs, and enjoy playing with your Guitar Hero controller. It's a simple way to expand your music library and enhance your gameplay experience.
How Do You Scan for Songs in Clone Hero?
When scanning for songs in Clone Hero, we simply need to open the game and head to the settings menu.
From there, selecting the scan for songs option will search the songs folder for any new additions. This process updates the library with newly added songs for gameplay.
It's essential to have the songs folder set up correctly before scanning to make sure all added songs are accessible.
Happy playing!
How Do You Add Videos to Clone Hero?
Adding videos to Clone Hero isn't supported due to the game's focus on music gameplay. The mechanics are tailored for playing notes on a guitar controller, not for video playback. Custom note charts for songs can be downloaded instead.
Modifying the game for video integration would require substantial changes. It's best to enjoy the game as intended, focusing on the music experience it offers.
Conclusion
To sum up, adding songs to Clone Hero is a straightforward process that can enhance your gaming experience.
Did you know that Clone Hero has over 4,000 custom songs available for download?
By following the 7 steps outlined in this guide, you can easily expand your music library and enjoy playing your favorite tunes in the game.
So why wait? Start adding songs to Clone Hero today and rock out to your favorite tracks!
Composing
Mastering the Art of Putting Songs on a CD in 7 Steps
Finesse the art of CD mastering with 7 expert steps for optimal audio quality – discover the secrets to flawless sound!

Mastering the art of putting songs on a CD in 7 steps involves careful stereo mix evaluation and addressing any issues. Use reference tracks for balance and prevent distortion. Fine-tune with EQ, compression, and automation for a polished outcome. Adjust frequencies for clarity and utilize compression for consistent volume. Apply limiting to prevent peaking and optimize audio levels. Enhance the listening experience by adjusting song spacing. Test compatibility on different devices for quality assurance. These steps guarantee a high-quality, seamless listening experience. Further insights await for those keen on perfecting their CD mastering process.
Key Takeaways
- Evaluate stereo mix for balance and clarity.
- Utilize reference tracks for comparison.
- Address mixing issues with precision.
- Apply compression for consistent volume.
- Optimize audio levels for quality listening experience.
Preparation Stage
During the preparation stage for putting songs on a CD, we begin by using a stereo mix to evaluate the overall sound quality. This initial step is pivotal in identifying any issues, especially in the low end frequencies, that may need attention before finalizing the mastering process.
By carefully listening to the stereo mix, we can assess the balance of elements and guarantee that the levels are consistent across the board. It's essential to pay close attention to the low end to prevent muddiness or lack of definition in this critical range of frequencies.
Addressing any issues at this stage sets a solid foundation for the rest of the mastering process, leading to a high-quality final product that meets industry standards. By focusing on the low end during the preparation stage, we can enhance the overall clarity and impact of the music, creating a dynamic listening experience for the audience.
Utilizing Stereo Mix and Reference Tracks
When mastering songs for a CD, we rely on the stereo mix as the foundation to maintain balance and mix integrity. Reference tracks become essential for comparing our mastered version to professionally mixed songs, setting a benchmark for quality.
Stereo Mix Basics
Starting with a stereo mix sets the foundation for achieving a well-balanced sound during mastering, ensuring all audio elements are combined into a two-channel format. When delving into stereo mix basics, consider these key points:
- Foundation for Balance: Stereo mixes amalgamate all audio components for a cohesive sound.
- Preventing Distortion: Ensuring sufficient headroom in stereo mixes is essential to avoid clipping or distortion.
- Enhanced Sound Quality: Utilizing stereo mixes effectively paves the way for a professional and polished final product.
Mastering the art of stereo mixing is pivotal for creating a harmonious blend of sounds. This step forms the cornerstone for subsequent mastering processes, setting the stage for a remarkable audio experience.
Reference Track Importance
Let's harness the power of reference tracks to elevate our stereo mix and achieve a professional sound in mastering. Reference tracks are like our sonic compass, guiding us towards the desired tonal balance, dynamics, and overall quality.
By comparing our mastered song to a professionally mastered track, we gain valuable insights into areas that may need improvement. These tracks help us make informed decisions on EQ adjustments, compression levels, and overall sound enhancement.
Choosing the right reference track is key to achieving a polished and professional sound in our final mix. Utilizing reference tracks effectively can transform our mastering process, ensuring that our music reaches its full potential and stands out in the competitive music industry.
Addressing Missed Mixing Issues

To achieve a professional and cohesive sound in the final master, it's essential to address any missed mixing issues during the mastering stage. When correcting these overlooked imbalances or flaws in the audio, it's vital to use tools like EQ, compression, and automation for a polished outcome. Here are some key steps to ponder:
- Identify Remaining Issues: Pinpoint harsh frequencies, inconsistent levels, or unwanted artifacts that may have slipped through the mixing process.
- Fine-Tune with Precision: Utilize EQ, compression, and automation to make detailed adjustments that enhance the overall quality of the audio.
- Focus on Details: Pay close attention to adjustments between songs, tonal balance, and dynamic range adjustments to guarantee a seamless listening experience.
Importance of Equalization and Balance
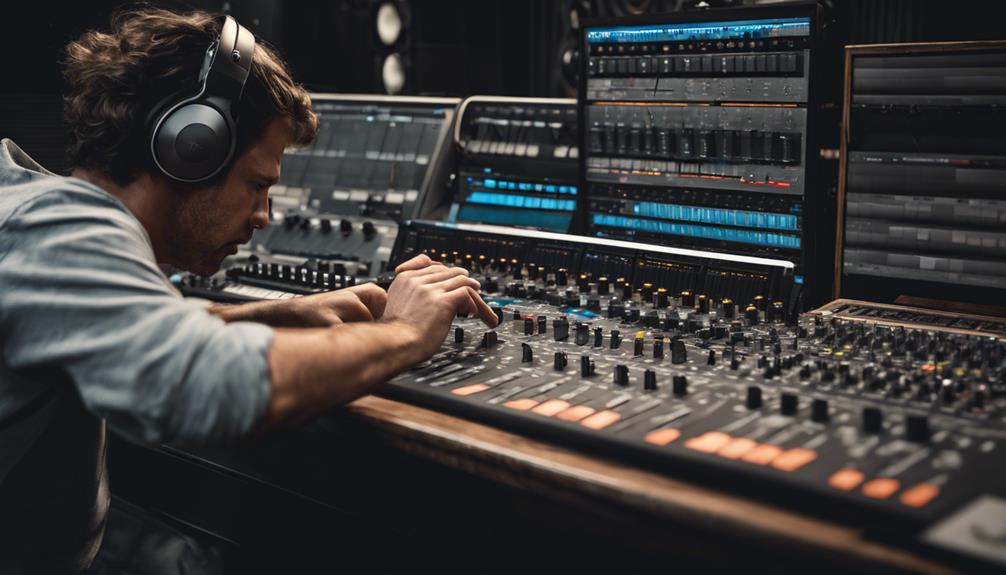
Equalization and balance are crucial elements in the mastering process of a song. By adjusting frequencies, clarity and tonal quality can be enhanced, resulting in a more enjoyable listening experience. Achieving ideal sound through proper EQ settings guarantees a balanced and pleasing frequency response.
Tone Adjustment Techniques
Achieving a balanced and harmonious sound in a music mix involves critically balancing bass, midrange, and treble frequencies. When it comes to tone adjustment techniques, equalization plays a crucial role in sculpting the overall sound. Here are key points to bear in mind:
- Precision Matters: Fine-tuning frequencies with precision enhances the clarity and depth of the music.
- Art of Balance: Balancing different frequency ranges ensures each element shines without overpowering others.
- Enhanced Warmth: Using EQ techniques can add warmth to the audio mix, creating a more inviting listening experience.
Enhancing Audio Clarity
Enhancing audio clarity through precise frequency balancing and equalization techniques is essential for achieving a professional and polished sound. Equalization in mastering helps balance frequencies, preventing muddiness and ensuring each element of the song is heard clearly.
By adjusting the low, mid, and high frequencies, tonal imbalances can be corrected, bringing out the best in each instrument or vocal track. This balanced frequency spectrum is vital for creating a professional sound that translates well on various playback systems.
Proper equalization during mastering guarantees clear, detailed audio optimized for an enjoyable listening experience on CDs and digital platforms. Balancing frequencies meticulously enhances the overall quality of the music, making it more engaging and immersive for the audience seeking innovative sounds.
Achieving Optimal Sound
Enhancing audio clarity and achieving peak sound on a CD involves meticulous frequency balancing and tonal adjustments to guarantee a professional and engaging listening experience. When it comes to achieving peak sound, equalization is key. Here are some key points to take into account:
- Equalization in mastering helps balance frequencies for a consistent sound.
- Proper equalization enhances clarity of vocals, instruments, and mix.
- Balancing frequencies alleviates muddiness or harshness, improving the listening experience.
Utilizing Compression for Consistent Volume
To achieve a consistent volume across a CD track, mastering engineers utilize compression techniques to control the dynamic range effectively. Compression plays an important role in smoothing out the overall sound by reducing the difference between the loudest and softest parts of a song.
By adjusting compression settings, engineers can impact different frequency bands, allowing for precise control over the final mix's sound. This not only helps in preventing audio peaks but also guarantees a balanced and polished listening experience.
Properly applied compression is key to maintaining consistent volume levels throughout the entire track, enhancing the overall quality and making sure the song sounds great on various audio systems.
Utilizing compression in mastering is a powerful tool that contributes to a professional and refined sound, showcasing the importance of attention to detail in the music production process.
Applying Limiting to Prevent Peaking
Limiting in mastering safeguards against audio peaks by establishing a maximum output level. When it comes to preventing peaking in your audio tracks, applying limiting is an important step in the mastering process. Here's why it matters:
- Prevents Distortion: Limiting ensures that your audio doesn't distort or clip when played back on different systems, maintaining the integrity of your sound.
- Controls Dynamic Range: By using limiters, you can control the dynamic range of your music, keeping the volume consistent throughout.
- Protects Equipment: Applying limiting helps protect speakers and amplifiers from damage caused by sudden loud peaks, ensuring your gear lasts longer.
Ensuring Polished Final Product

In order to guarantee a polished final product, we meticulously optimize audio levels to prevent distortion and maintain consistent volume across the entire CD. By carefully fine-tuning the sound levels, we ensure a smooth listening experience without any sudden spikes or drops in volume. After this critical step, we thoroughly check for any imperfections or inconsistencies in the sound before finalizing the master. This meticulous attention to detail helps us deliver a high-quality product that meets the standards of modern audio enthusiasts.
Additionally, adjusting the spacing between songs plays an important role in creating a seamless flow and enhancing the overall listening experience. By embedding metadata such as track titles, artist names, and album information, we provide proper identification and organization for each song on the CD. Finally, testing the CD on various playback devices confirms compatibility and ensures quality across different systems, guaranteeing that your music sounds exceptional no matter where it's played.
Frequently Asked Questions
How Do You Master a Song in 7 Steps?
To master a song in 7 steps, we start by preparing a stereo mix and reference tracks, then address any audio issues not fixed during mixing.
Next, we use equalization to balance frequencies and apply compression for consistent volume levels.
Finally, we limit the audio to prevent peaks and finalize the master for CD or digital distribution.
This process guarantees a clean, polished sound ready for your audience to enjoy.
What Is the Process of Mastering a Cd?
When mastering a CD, we meticulously refine the stereo mix and fix any lingering issues from the mixing stage.
Through equalization, we balance frequencies for a harmonious sound.
Compression is employed to control dynamics and maintain consistent volume levels.
Lastly, limiting prevents audio peaks for a seamless listening experience across various CD players.
What Are the Stages of Mastering Music?
We explore the stages of mastering music with precision. Evaluation of audio quality is essential in preparation.
Fixing unresolved issues from mixing refines the final product. Balancing frequencies and enhancing sound quality is achieved through equalization. Compression and limiting manage dynamics and volume consistency, averting audio peaks.
These stages, when executed diligently, result in a polished masterpiece ready for the world to enjoy.
How Do You Master a Song Easily?
When it comes to mastering a song easily, we focus on key aspects like EQ, compression, and limiting. By balancing frequencies, controlling dynamics, and preventing peaks, we guarantee a consistent and clear sound.
Utilizing plugins such as multiband compressors and limiters allows for precise adjustments. Reference tracks help in comparing and fine-tuning the mix. Following these steps helps us master songs efficiently for top-notch sound quality.
Conclusion
To sum up, mastering the art of putting songs on a CD demands careful attention to detail and a methodical approach. By following the seven steps outlined in this article, you can guarantee that your final product is polished and professional.
Remember, Rome wasn't built in a day, and neither is a perfect mix. Take your time, practice, and soon you'll be creating CDs that sound as smooth as silk.
Composing
Beginner's Guide to Mastering Songs
Take your music to the next level with essential mastering tips for beginners, unlocking the secrets to professional sound quality.

Mastering songs involves refining sound quality and ensuring playback compatibility. It's essential for enhancing music creations. Different from mixing, mastering balances tracks, adjusts volume, panning, and compression to refine the final mix as a whole. DIY mastering offers creative control but may lack professional expertise. Essential equipment includes studio monitors, audio interfaces, and plugins like EQ and compression. Tips for beginners include using reference tracks, avoiding over-processing, and taking breaks to prevent ear fatigue. AI tech offers advanced mastering features. Remember, mastering can't fix a bad mix entirely but aims to enhance sound quality and achieve peak loudness levels.
Key Takeaways
- Use reference tracks for tonal balance and loudness comparisons.
- Avoid over-processing by making subtle and intentional adjustments.
- Take breaks to prevent ear fatigue and maintain objectivity.
- Seek feedback from experienced engineers or utilize online mastering services.
- Focus on tonal balance through effective EQ and compression techniques.
Mastering Vs. Mixing: Key Differences
When we explore the world of music production, mastering and mixing stand out as distinct processes with important differences.
Mixing involves balancing individual tracks to create the final mix, adjusting volume, panning, and compression to achieve the desired sound within a digital audio workstation (DAW).
On the other hand, mastering focuses on refining the final mix as a whole, enhancing clarity, loudness, and preparing tracks for replication and broadcast. Mastering engineers utilize a mastering chain to fine-tune levels, EQ, and dynamic range, ensuring the track is optimized for various playback systems and formats.
Mastering a song is the final step in the music production process, where tracks are arranged in the final sequence and any audio defects are corrected. It's essential to understand the distinctions between mixing and mastering to achieve a polished and professional sound in your music production endeavors.
DIY Vs. Professional Mastering
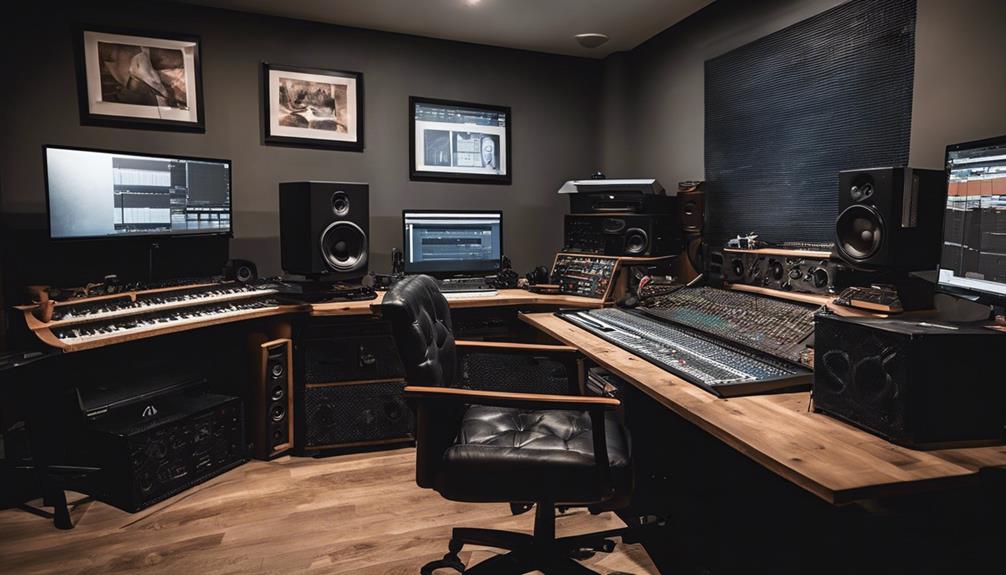
For musicians seeking to release their music, the decision between DIY mastering and professional mastering carries substantial importance in determining the final quality of their tracks.
DIY mastering allows for creative control and cost savings but may lack the expertise and objectivity of a professional mastering engineer. On the other hand, hiring a professional offers the benefit of experienced ears, industry-standard equipment, and a polished final product suitable for commercial release.
Online mastering services can provide a middle ground, with quick turnaround times and affordable pricing. Opting for a professional mastering engineer ensures a fresh perspective, tailored adjustments, and a professional touch that can elevate the quality of the final master.
While DIY mastering can be a valuable learning experience, investing in professional mastering for important releases can greatly enhance the overall quality and impact of the music. Choose wisely to achieve a good and polished outcome that meets industry standards.
Essential Equipment for Mastering
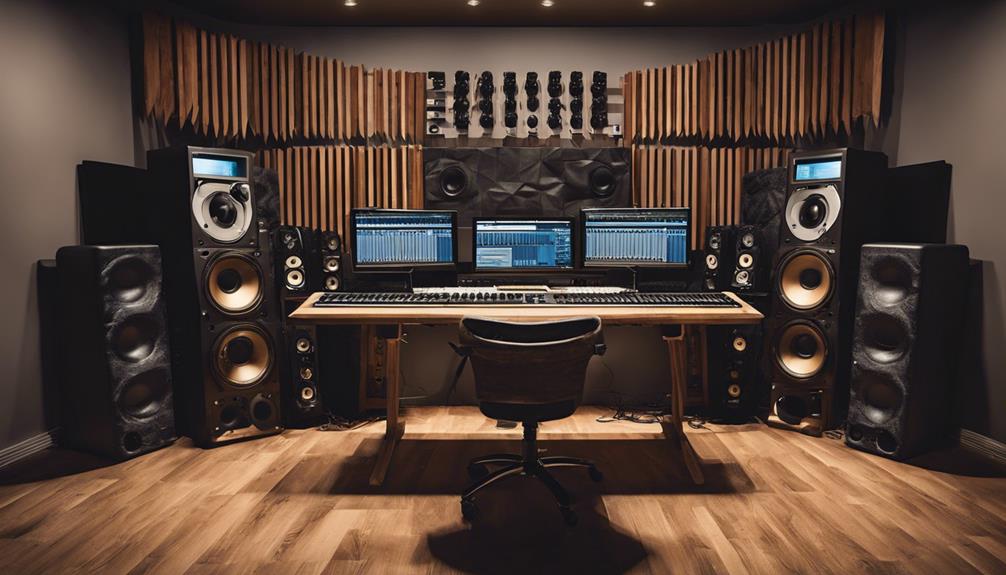
When it comes to mastering music, having the right equipment is essential. High-quality studio monitors allow for accurate sound reproduction, ensuring you can hear every detail in your music.
A dedicated audio interface and quality headphones are also vital components for achieving professional results in your mastering process.
Tools for Mastering
To master songs effectively, one must guarantee they've essential tools such as high-quality studio monitors or headphones to achieve accurate listening. Additionally, utilizing an audio interface for external connections, room treatment materials for a balanced environment, and a digital audio workstation (DAW) software for mastering techniques like EQ and compression are crucial. Incorporating outboard gear such as equalizers, compressors, and limiters can add analog warmth to the process.
Techniques like multiband compression, true peak limiting, and dynamic control using attack and release settings enhance the final product. Widening the stereo image and referencing tracks for comparison further refine the mastering process. Ensuring proper stereo levels and perceived loudness through these tools contributes to achieving professional results.
Studio Monitoring Systems
Investing in reliable studio monitoring systems is imperative for mastering engineers seeking accurate sound reproduction in the mastering process. Calibrated studio monitors are designed to provide a flat frequency response, allowing for detailed analysis of music that may be missed on consumer-grade speakers. These studio monitors play a pivotal role in ensuring that mastering decisions result in professional and consistent outcomes that translate well to various playback systems.
15 Steps to Mastering a Song

Let's begin the process of mastering a song by importing the final mix into a mastering software or DAW. When it comes to mastering in music production, creative decisions play an important role in making sure your song sounds good.
Here are three essential steps to help you master your song effectively:
- Analyze and Adjust: Take a close look at the frequency range and overall level of your mix. Make any necessary fixes like EQ adjustments or dynamic range enhancements to ensure a balanced sound.
- Apply Processing: Utilize tools like compression, EQ, stereo enhancement, and limiting to enhance the quality of your mix. These processes can help achieve a polished and professional sound, bringing your song to its final stage.
- Ensure Consistency: Maintain consistency in tone and level across all tracks in your song. This step is important to make sure that your mastered tracks sound better and translate well across different playback systems and mediums.
Tips for Beginner Song Masters
After understanding the basics of EQ and compression in mastering a song, beginners can benefit from implementing key tips to improve their mastering skills.
Using reference tracks is vital for comparing tonal balance and loudness levels, helping achieve a professional sound.
It's important to avoid over-processing by making subtle adjustments that enhance the mix without drastically altering it.
Taking breaks during mastering sessions prevents ear fatigue and guarantees objectivity in decision-making.
Beginners can also explore online mastering services or seek feedback from experienced engineers to enhance their skills.
By focusing on tonal balance and utilizing EQ and compression effectively, beginners can elevate their mastering capabilities and produce high-quality tracks.
Remember, mastering is a skill that develops over time, so patience and practice are key.
Common Mistakes to Avoid

To enhance mastering skills, beginners must steer clear of common mistakes that can hinder the quality of their final mixes. Here are some key pitfalls to avoid:
- Over-compressing: Resist the urge to squash dynamics excessively during mastering. Maintaining the natural ebb and flow of the music is important for a lively and engaging final mix.
- Excessive EQ Boosts: Be mindful of boosting frequencies excessively. Aim for a balanced frequency spectrum to prevent certain elements from overpowering others in the mix.
- Loudness Maximization: Approach loudness maximization cautiously to avoid introducing distortion. Clarity is vital, so make sure that your master maintains its integrity even at higher volume levels.
Getting Started With Emastered

Upon uploading their songs to eMastered, users can access a range of customizable settings for automated mastering processing using AI technology. eMastered, an online mastering platform, leverages AI technology to enhance audio tracks efficiently. By utilizing eMastered, beginners can achieve professional-grade results without extensive mastering knowledge. The platform allows for tailored adjustments such as intensity, clarity, and wideness, ensuring customized outcomes to suit individual preferences. Additionally, users benefit from instant previews of the mastered tracks, enabling quick review and approval before downloading the final versions. eMastered supports various download formats, facilitating easy distribution and playback of the mastered songs. For beginners looking to dive into the world of mastering songs, eMastered provides a user-friendly interface and advanced AI capabilities to streamline the process and elevate the quality of their music effortlessly.
| eMastered Benefits | Description |
|---|---|
| Customizable Settings | Adjust intensity, clarity, and wideness for personalized results. |
| Instant Previews | Review mastered tracks promptly before finalizing. |
| Download Formats | Choose from various formats for convenient distribution and playback. |
| AI Technology | Utilize advanced AI processing for enhanced audio mastering. |
Mastering Questions Answered
In mastering, understanding key concepts such as the impact of loudness levels and the role of multiband compression can greatly enhance the final quality of a song. Here are some common mastering questions answered:
- Can mastering fix a poorly mixed song?
Mastering can't completely fix a bad mix, but it can enhance the overall sound quality and make it more refined.
- How loud should a mastered song be?
Mastering aims to achieve ideal loudness levels without clipping, ensuring the track is competitive and suitable for different playback systems.
- What is multiband compression in mastering?
Multiband compression is a technique used for mastering the low end of a track, helping to control and enhance the dynamics of specific frequency ranges.
Frequently Asked Questions
How Do You Master a Song for Beginners?
Mastering a song involves refining its sound to achieve a polished final product. We balance frequencies with EQ, control dynamics using compression, and guarantee no distortions with proper levels.
Taking breaks to prevent ear fatigue and fresh listening is essential. Create an ideal listening environment with quality monitors.
These steps will guide beginners in mastering songs effectively.
What Level Should My Song Be Before Mastering?
Before mastering, aim for an average peak level of -6 dB to -3 dB to allow room for processing. Keep the loudest sections below -0.3 dB to prevent clipping.
Avoid excessive loudness to prevent artifacts in mastering. Consistent levels maintain balance and prevent sudden volume changes.
Use reference tracks for perspective.
What to Do Before Mastering a Song?
Before guaranteeing a song, we make sure our mix is well-balanced and free of any issues like clipping or distortion. We check track levels to avoid overpowering elements.
We create an ideal listening environment with high-quality headphones or studio monitors. Taking breaks prevents ear fatigue. Using reference tracks helps compare tonal balance.
These steps guarantee an excellent final master, reflecting our dedication to quality and innovation in music production.
How Hard Is It to Master Songs?
Mastering songs can be challenging, requiring technical skills and critical listening. It takes time and practice to develop the expertise for effective mastering.
Understanding tools like EQ, compression, and limiting is essential. Achieving ideal loudness levels without sacrificing quality is key. Attention to detail, consistency, and enhancing the overall sound without over-processing are indispensable.
It's a demanding process, but with dedication and learning, mastering songs becomes more manageable.
Conclusion
In mastering songs, we're like sculptors shaping a masterpiece from raw materials. With patience and practice, we can refine and polish our creations to perfection.
Remember, mastering is an art form that requires dedication and attention to detail. By following the steps outlined in this guide, you can unleash the full potential of your music and bring it to life in ways you never imagined.
Keep honing your skills and let your creativity flourish.
Composing
7 Pro Steps for Remixing Songs
Open the door to mastering the art of remixing songs with these 7 pro steps – your next hit could be just a remix away!

When remixing songs, start by analyzing popularity, genre suitability, and securing rights. Plan your direction, establish clear goals, and map out your remix approach. Identify key and BPM for seamless integration and musical cohesion. Prepare stems meticulously for manipulation, adjusting pitch and effects for uniqueness. Choose elements wisely to maintain the remix vision and genre consistency. These steps guarantee a dynamic remix that captivates your audience. Master all seven professional steps to enhance your remixing skills and craft music that resonates with listeners. Elevate your remixing game with these expert strategies.
Key Takeaways
- Analyze popularity, genre, and impact of the original song for remix suitability.
- Set clear objectives and goals to guide the remix process effectively.
- Identify key and BPM to ensure harmonious integration in the remix.
- Prepare stems meticulously for efficient manipulation and arrangement.
- Select elements that align with the remix vision, style, and audience preferences.
Track Selection
When selecting tracks for remixing, we prioritize analyzing the popularity, genre, and potential impact of the song. It's essential to take into account the original song's appeal and how it aligns with our target audience's preferences. By evaluating these factors, we can determine the remix's potential success and resonance within its genre. Additionally, obtaining legal permission from rights holders before embarking on the remix process is a necessary step to guarantee a smooth and ethical production journey.
Before choosing a song for remixing, we explore its stems to fully grasp the music's structure and components. This allows us to identify opportunities for creative reinterpretation while staying true to the essence of the original piece. By carefully examining trendy tracks, we can assess the level of competition in remix contests and strategize our approach to stand out in a crowded field. Our aim is to remix songs that not only highlight our innovation and artistry but also deeply connect with our audience, creating a memorable musical experience.
Direction Planning

Before undertaking a remix project, it's essential to establish the direction and vibe you wish to achieve. Planning how to revamp the original track and enhance specific elements will help steer your creative process.
Setting Clear Objectives
In setting clear objectives for a remix, we meticulously outline the specific elements to transform or enhance in the original song. By defining our goals upfront, we steer the remix towards our desired outcome and maintain a sense of direction throughout the process.
This planning stage is vital as it guides our selection and manipulation of stems to craft a unique and innovative remix. Our objectives may involve adding new instruments, adjusting the tempo, or restructuring the song to offer a fresh interpretation.
With a clear roadmap in place, our remix can stay focused and cohesive, resulting in a more successful final product that resonates with our vision for the project.
Structuring Workflow Efficiently
After defining our objectives for the remix, the next step involves structuring our workflow efficiently by outlining the elements to incorporate and creating a timeline for each stage of the process.
- Start by setting a clear direction and vision for your remix to guide your workflow effectively.
- Outline the elements you want to incorporate, such as vocals, instruments, or effects, to stay focused during the remixing process.
- Create a timeline or schedule to allocate time for each stage of remixing, from selecting stems to finalizing the mix.
- Use project management tools or software to organize your workflow, track progress, and make sure all tasks are completed.
- Regularly review and adjust your workflow structure to optimize efficiency and creativity in your remixing projects.
Efficient workflow structuring is key to creative optimization in remixing songs.
Key and BPM Identification

Identifying the key and BPM of a song is essential for remixing, as it forms the foundation for harmonious integration of new elements. The key of a track reveals the scale and chord progressions used in the original song, guiding you to select remix elements that fit seamlessly. Similarly, knowing the BPM (beats per minute) of the original track is pivotal for syncing your remix elements accurately.
Utilizing tools like digital audio workstations (DAWs) and BPM detection software can aid in precisely determining the BPM, ensuring a smooth shift between the original and remixed versions. Matching the key and BPM of the original song in your remix project is crucial for maintaining musical cohesion, integrity, and harmony.
This attention to detail not only enhances the overall quality of your remix but also contributes to the musical integrity and coherence of the final product, elevating the listening experience for your audience.
Stem Preparation
Having successfully identified the key and BPM of the song, the next step in our remixing process is preparing the stems for efficient manipulation and rearrangement. Stems, individual audio tracks extracted from the original project file, provide flexibility in remixing by allowing us to isolate and manipulate specific elements.
When dealing with vocal stems, which are isolated vocal tracks, adjusting pitch, timing, and effects becomes essential for creating a unique remix. Proper stem preparation involves organizing and labeling these audio tracks correctly, ensuring that each element is easily identifiable for manipulation.
Tools like iZotope RX can be invaluable in effectively isolating and working with vocal stems, enhancing the remixing process by providing advanced capabilities for pitch correction and enhancement. By taking the time to prepare and label stems appropriately, remixers can streamline their workflow and have greater control over the individual elements of a song during the manipulation phase.
Element Selection
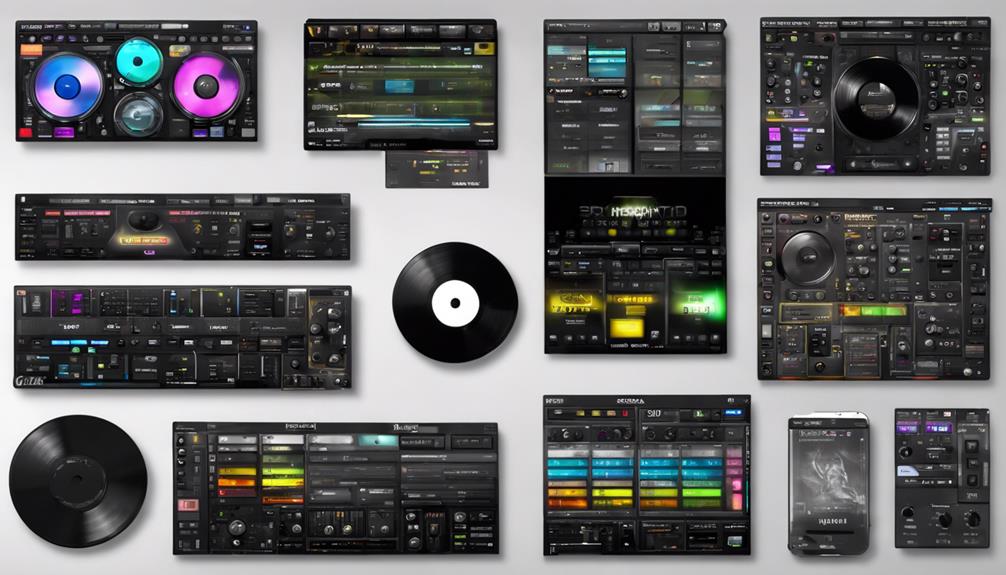
For a successful remix, carefully selecting the elements that align with our remix vision and style is vital. When choosing elements for a remix, it's important to maintain consistency with our creative direction and guarantee that the quality remains paramount. Elements such as vocals, drums, and melodies should be chosen thoughtfully, as these can be manipulated to bring a fresh perspective to the original track.
Considering the genre and mood of the original song is also key in guiding our element selection process. By experimenting with different combinations of elements, we can craft a remix that isn't only unique but also engaging for our audience.
Remix Crafting

Crafting a compelling remix involves skillfully altering the original elements of a song to create a version that's uniquely our own.
In remix crafting, we explore the intricacies of transforming music by changing textures, tones, adding instruments, adjusting the drum beat, and even tweaking the tempo.
Incorporating our own elements, such as distinct drum beats, vocals, or instruments, is vital for breathing new life into the track.
Balancing the levels of various tracks and effects while mastering our remix skills is essential to achieve a polished outcome that captivates listeners.
Infusing our personal style and creativity into the remix is what sets it apart and makes it a true reflection of our artistry.
Through remix crafting, we've the opportunity to showcase our innovation and push the boundaries of musical expression.
Mixing and Mastering

As we progress from remix crafting, our focus now shifts towards the critical elements of mixing and mastering in the remixing process. When it comes to mixing, it's all about blending the individual stems and elements of a remix to achieve a balanced and professional sound. This involves adjusting levels, panning, EQ, and effects to guarantee clarity and cohesion in the final product. On the other hand, mastering is the last step where the overall sonic quality, loudness, and consistency of the remix are polished to stand out on various playback systems. To help you understand the significance of mixing and mastering, let's explore the key aspects in the table below:
| Mixing | Mastering |
|---|---|
| Blending individual stems | Enhancing sonic quality |
| Adjusting levels for balance | Ensuring loudness |
| Using EQ and effects | Providing consistency |
| Achieving professional sound | Polishing the final mix |
Frequently Asked Questions
What Are the Rules for Remixing Songs?
When it comes to remixing songs, understanding copyright rules is essential. Without permission, remixing can lead to legal issues.
Artists may offer stems or host remix contests to encourage lawful remixes. Following guidelines protects the original work and guarantees a smooth remixing process.
What Are the Rules for Remixing?
When remixing songs, our top priority is respecting copyright laws. Obtaining permission from the original artist or rights holders is essential. Failure to do so can lead to legal consequences like takedown notices or lawsuits.
Properly crediting the original artist and obtaining licenses are vital steps. By following guidelines and obtaining clearance, we guarantee a legal and ethical approach to remixing songs.
It's like maneuvering through a musical legal labyrinth to create something new and exciting!
How Do You Make an Official Remix of a Song?
To make an official remix of a song, we secure permission from the original artist or label. This typically involves working directly with stems or parts of the original song provided by them.
Labels may also reach out to established producers or artists for official remixes. These remixes are released with proper licensing and credits, ensuring fair royalty distribution.
Creating an official remix can greatly enhance our visibility, credibility, and opportunities in the music industry.
What Makes a Great Remix?
When crafting a great remix, it's all about infusing new elements while honoring the original vibe. By adding a unique twist and creative arrangements, we can engage listeners with fresh sounds and emotions.
A successful remix evokes excitement, inspires movement, and breathes new life into the original track. Through innovative instrumentation and effects, we elevate the remix to greatness, offering an engaging experience that resonates with the audience.
Conclusion
To sum up, mastering the art of remixing songs takes time, practice, and dedication.
While it may seem overwhelming at first, following these seven pro steps can help streamline the process and elevate your remixes to the next level.
One common objection may be the amount of technical knowledge required, but with patience and perseverance, anyone can learn to remix songs like a pro.
Keep experimenting, stay creative, and most importantly, have fun with it!
-
 Microphone1 month ago
Unleash Your Inner Podcaster: Discover the Best Microphone for Crisp, Clear Audio
-

 Music Theory1 month ago
Unlocking Nature’s Harmony: The Power of 432 Hz Frequency in Sound & Music for Enhanced Living and Well-Being
-
 Sound Design1 month ago
What Is the Difference Between a Sound Engineer and A Sound Designer?
-

 Native Instruments Kontakt1 month ago
VOCAL AI – Animated Intelligence: The Ultimate Vocal Playground
-

 Sound Design1 month ago
Why Sound Engineer
-

 Composing1 month ago
MUTILATED NOISE by SampleTraxx: The Next Generation Sound Collection
-

 Audio Production3 weeks ago
Unleashing Sound Therapy: Incorporating Acoustic Design in a Wellness Centre
-

 Expert Guides1 month ago
How Do You Become a Sound Designer


