Connect with us

Composing

How to Add Songs on Spotify

Discover how to add songs on Spotify with local files effortlessly, unlocking endless possibilities for crafting your perfect playlist.

Published

on

adding songs to spotify

To include songs on Spotify, make sure to enable local files in settings. Select the source folder where your desired tracks are located. Navigate to ‘Library’ to organize playlists, liked songs, and more. seamlessly integrate local files into your Spotify library for personalized playlists. Adding songs is a breeze – simply click on the three dots, then select ‘Add to Playlist’. Mix your favorite local and Spotify songs to create personalized playlists. Make themed playlists or utilize ‘Liked Songs’ for quick access. Collaborate, share, and enhance playlists with friends. Access songs in ‘Your Library’, search, and utilize custom features. Keep exploring to become a master at curating the ultimate music collection.

Key Takeaways

  • Find desired song in Spotify.
  • Click on three dots next to song.
  • Select 'Add to Playlist' option.
  • Choose the playlist to add the song.
  • Repeat steps to add more songs.

Enabling Local Files Feature

How can we activate the local files feature on Spotify to incorporate our personal music collection seamlessly into our playlists?

By accessing the Spotify settings, we can enable the local files option, allowing us to add songs from our computer directly to our Spotify playlists.

This feature empowers us to specify the source folder accurately, ensuring that the music folder containing our desired songs is selected and added correctly.

By activating local files, we open up the opportunity to seamlessly integrate non-Spotify songs into our playlists, expanding our music library and personalizing our listening experience.

This innovative feature enables us to curate playlists that blend our favorite tracks from Spotify with our unique music collection, creating a truly personalized listening journey.

Advertisement
Meet the all new Kndle Family scaled

Embracing local files on Spotify reveals a new level of creativity and customization, bridging the gap between our personal music preferences and the vast selection available on the platform.

Selecting Source Folder
choosing source folder location

To seamlessly integrate our personal music collection with Spotify, we need to accurately designate the source folder where our desired audio files are stored. By selecting the correct source folder, we enable Spotify to access and import the audio files we want to add to our library. This step is vital in ensuring a smooth integration between our local files and Spotify's platform.

When choosing the source folder, make sure it contains the specific audio files you wish to import. Spotify gives us the flexibility to specify the location of this folder on our computer, allowing for easy access to our chosen songs. Accurately designating the source folder is necessary for Spotify to recognize and incorporate our local files seamlessly.

Navigating to Library Section
exploring the library aisles

When we access Spotify, we simply click on the 'Library' tab located at the bottom of the app to reach our playlists, liked songs, albums, artists, and podcasts. The Library section acts as a gateway to our musical haven, housing all our favorite artists, playlists, and albums in one convenient location. By moving to this section, we gain easy entry to our music library, enabling us to manage our musical collection with precision and ease. Whether you want to create custom playlists, save entire albums, or explore new podcasts, the Library section on Spotify offers a seamless experience for music lovers.

To visually represent the content available in the Library section, here's a handy table:

Music Library Features Description
Playlists Curated collections of songs
Liked Songs Songs you have liked
Albums Saved albums for easy access
Artists Follow and explore favorite artists

Accessing the Library section simplifies the way we interact with our music, making it effortless to enjoy and manage our favorite tunes.

Viewing Local Files
accessing nearby files easily

After delving into our music library in the Library section of Spotify, we can now seamlessly view and access our local files within the app. Here's how you can make the most of this feature:

  • Enable Local Files: Explore your app settings and toggle on the option to include local files. This opens up a world of music beyond what Spotify offers.
  • Seamless Integration: Your local files will be integrated into your Spotify library, seamlessly blending with the platform's vast collection.
  • Custom Playlists: Mix and match your favorite tracks from Spotify with your personal local files to curate unique playlists that cater to your specific tastes.

With the ability to incorporate your own music into Spotify, the possibilities for creating personalized listening experiences are endless. Delve into your local files and discover a whole new dimension to your music library.

Adding Songs to Playlists
creating personalized music playlists

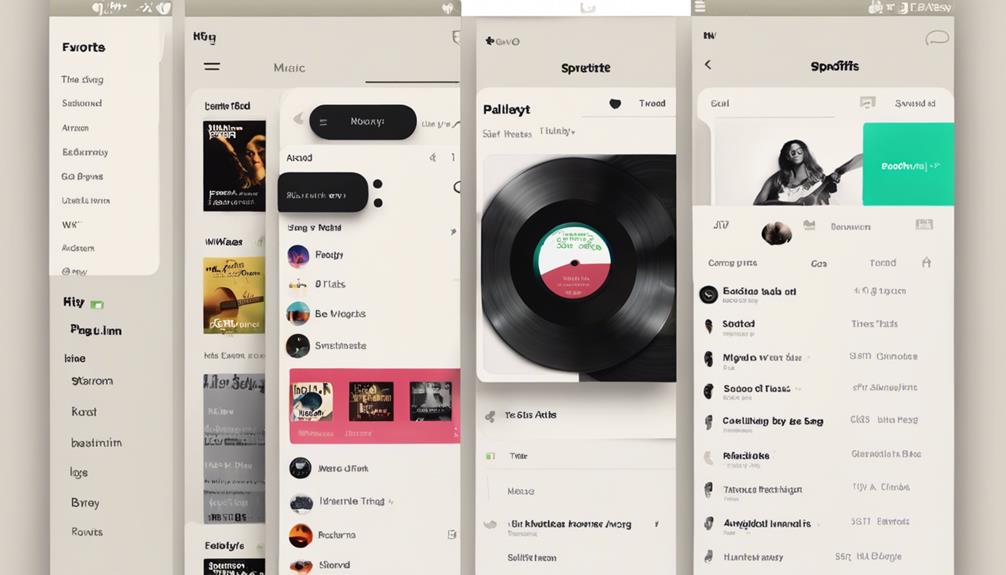
Let's enhance your Spotify experience by incorporating your favorite songs into playlists for easy access and enjoyment. When it comes to Spotify features, adding songs to playlists is a breeze. Simply find the song you love, click on the three dots next to it, and choose 'Add to Playlist' to include it in your desired playlist. Whether you want to create a new playlist or add songs to an existing one, Spotify makes it simple and convenient. You can organize your playlists based on mood, genre, or any other category to easily locate and enjoy your preferred tracks.

To make it easier to understand, here is a table showing the steps to add songs to playlists on Spotify:

Advertisement
Meet the all new Kndle Family scaled
Steps to Add Songs to Playlists
1. Navigate to the desired song.
2. Click on the three dots.
3. Select 'Add to Playlist'.
4. Choose the playlist to add to.

Integrating Local and Spotify Songs

local and spotify integration

Exploring the seamless integration of local and Spotify songs enhances the versatility of your music library. By incorporating both Spotify tracks and local files, you can create a personalized playlist that transcends boundaries.

Here are some key aspects to keep in mind when integrating local and Spotify songs:

  • Diverse Selection: Mix your favorite tracks from Spotify with your own collection of local files, expanding your music choices.
  • Unified Listening Experience: Enjoy a cohesive listening experience by seamlessly blending local and Spotify songs in a single playlist.
  • Customization: Tailor your playlists to reflect your unique taste by adding local files that may not be available on Spotify.

With Spotify's feature to include local files, you have the freedom to curate a playlist that truly represents your musical preferences. Embrace the fusion of local and Spotify songs to open up a world of endless possibilities in your music library.

Organizing Favorite Songs

creating a music playlist

To enhance your Spotify experience, efficiently organize your favorite songs by creating playlists based on genres, moods, or occasions. By curating playlists that cater to specific preferences, you can easily access the music that resonates with you at any given moment. One helpful feature for this purpose is the 'Liked Songs' playlist, where all the songs you have liked on Spotify are conveniently stored for quick retrieval.

Furthermore, collaborating with friends to create playlists adds a social dimension to your music exploration. Sharing playlists and allowing others to contribute songs can lead to a diverse and dynamic collection that reflects different tastes and moods. Additionally, utilizing Spotify's playlist folders enables you to group related playlists together, making navigation smoother and more organized.

Accessing and Playing Songs
listening to music online

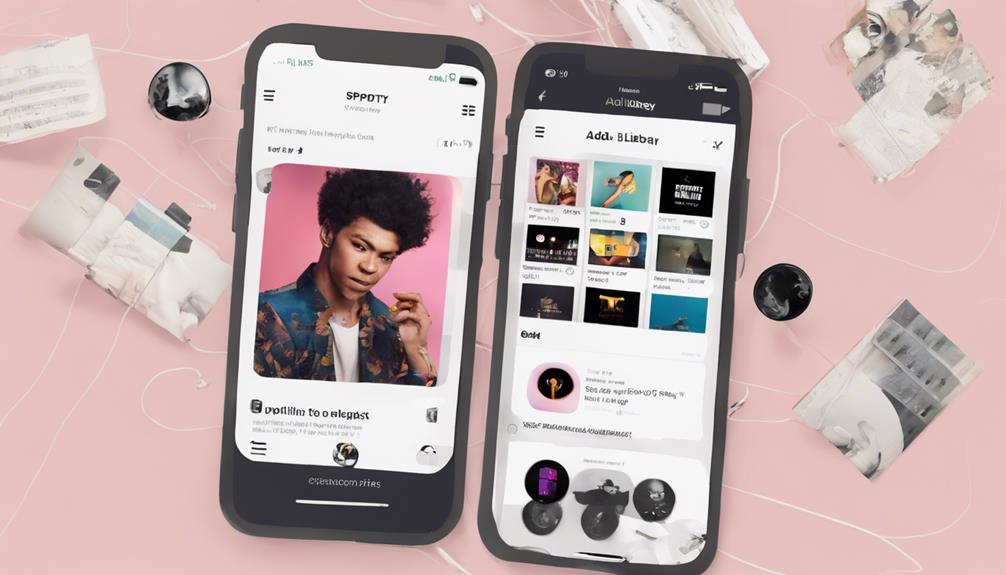
Access your favorite songs effortlessly by opening the Spotify app on your device and heading to the 'Your Library' section. Once you're there, here are a few tips to enhance your listening experience:

  • Search Feature: Utilize the search bar within the Spotify app to find specific songs or artists promptly. This feature guarantees you can access your favorite tunes with just a few keystrokes.
  • Playlist Organization: Create personalized playlists to categorize your favorite songs. This not only aids in organizing your music but also enables easy access for playback, saving you time and effort.
  • Playback Customization: Take advantage of Spotify's shuffle and repeat options to tailor your listening experience. Whether you prefer a mix of songs or looping your favorite track, these features add a touch of personalization to your music journey.

Frequently Asked Questions

How Do I Add My Own Music to Spotify?

To add our music on Spotify, we enable the local files feature in settings. Import audio files from our computer to playlists, ensuring the correct source folder is specified.

Once added, access and play our music alongside Spotify's catalog. Enjoy custom playlists mixing Spotify tracks with our music. It's convenient and enhances our listening experience on the platform.

Is Adding Song to Spotify Free?

Yes, adding songs to Spotify is free for both Spotify Free and Premium users. You can upload your own audio files to Spotify for personal listening at no extra cost. Importing local files and adding them to playlists is a free feature for all users.

Creating custom playlists with local files is easy and doesn't incur any charges. So, go ahead and start building your music library on Spotify without worrying about additional fees.

Advertisement
Meet the all new Kndle Family scaled

How Do I Add Music to My Spotify Library?

Adding music to our Spotify library is simple! Just open the app, find the song or album you want, and tap the '+' icon to add it.

You can also create playlists by clicking 'New Playlist' and organizing your tunes for different vibes.

With our saved music accessible anytime, anywhere, get ready for a personalized listening experience on Spotify.

Enjoy the tunes!

How Do I Install a Song on Spotify?

When installing a song on Spotify, we recommend adding local files from your computer to your playlists. Enable the local files feature in settings to access non-Spotify music. Remember to specify the source folder accurately for seamless integration.

Advertisement
Meet the all new Kndle Family scaled

Navigate to the library section to view and add local files to your playlists. Enjoy the convenience of listening to both Spotify and local files in your custom playlists.

Conclusion

To sum up, adding songs to Spotify is a straightforward process that can enhance your listening experience.

By enabling the Local Files feature, selecting a source folder, and organizing your favorite songs into playlists, you can easily access and play a wide variety of music.

So, why wait? Start adding your favorite songs to Spotify today and enjoy a customized music library at your fingertips!

Advertisement
Meet the all new Kndle Family scaled
Advertisement

Composing

How to Share Your Favorite Spotify Songs in 5 Easy Steps

Begin your musical journey with the letter 'B' as you discover how to share your favorite Spotify songs in 5 easy steps!

Published

on

By

sharing spotify songs easily

Setting up and sharing your favorite Spotify songs is easy. First, create a playlist by tapping the ‘+’ icon and giving it a name. Then, add your favorite songs by clicking on them and selecting ‘Add to Playlist’. Next, invite collaborators to make it a shared experience and add more variety. Share your playlist link with friends and family using messaging apps or social media. Finally, enjoy discovering new music together and keep the playlist updated for a fresh experience. By following these five steps, you can curate, share, and enjoy music seamlessly. Enhance your musical journey with collaborative playlists!

Key Takeaways

  • Create a new playlist with your favorite songs.
  • Click on a song and select 'Add to Playlist'.
  • Share the playlist link with friends and family.
  • Invite collaborators to enhance the playlist.
  • Keep the playlist updated with fresh tracks.

Set up a New Playlist

Setting up a new playlist on Spotify is a simple process that allows you to curate and share your favorite songs effortlessly.

When creating your playlist, make sure to tap the '+' icon at the top right corner of the app and select 'Playlist.' Naming your playlist something memorable, like 'My Favorite Jams' or 'Best of 2022,' can help you easily identify it among your collection.

To populate your playlist with your Liked Songs, tap the plus icon next to each track you want to include. This step guarantees that your playlist is filled with the songs you love.

Once your playlist is ready, you can share it with friends, family, or even on social media platforms to spread the musical joy. By following these steps, you can swiftly set up a playlist full of your favorite tunes, ready to be enjoyed and shared with others.

Add Favorite Songs

discover new favorite songs

To maintain enhancing your playlist on Spotify, start by adding your favorite songs to create a personalized musical collection that reflects your unique taste. Adding favorite songs is easy; simply click on the song you love, then select 'Add to Playlist' and choose the playlist you want to add it to.

Be creative when naming your playlist, as a catchy title can make it more appealing to others. Think of titles that represent the mood or theme of your playlist, making it easier for listeners to connect with your music selection.

Advertisement
Meet the all new Kndle Family scaled

Once you've added your favorite songs and named your playlist, it's time to share it with friends and family. Sharing your playlist link allows others to enjoy the music you love. By adding collaborators to your playlist, you can create a shared music space where everyone can contribute their favorite tracks.

Remember to keep your playlist updated with new favorite songs to maintain a continuous music sharing experience that stays fresh and engaging.

Invite Collaborators

connect with others creatively

Let's bring more music enthusiasts into the mix by inviting collaborators to join our playlist-sharing experience. By inviting collaborators, we open up the opportunity for a shared music journey where everyone can contribute their favorite tunes. This collaborative effort not only enriches the playlist but also creates a diverse collection that caters to different tastes and preferences.

Collaborators play a pivotal role in adding their own favorite songs to the playlist, enhancing its variety and introducing new tracks for everyone to enjoy. This interactive process fosters a sense of community and mutual discovery, where each member can explore different genres and artists they may not have encountered otherwise.

Furthermore, collaborating on a playlist allows for a dynamic exchange of music preferences and a fun way to bond over shared musical interests. With the ability to download the playlist for offline listening, the shared music can be enjoyed anytime, anywhere, even without an internet connection. Invite your friends and family to collaborate, and let the music exploration begin!

Share Playlist Link

collaborative playlist sharing link

Sharing your playlist link enables seamless access to your favorite Spotify songs for others to enjoy and add their own musical touch. To share your playlist link, simply navigate to your playlist, click on the three dots next to the playlist name, and select 'Copy Playlist Link.'

You can then share this link via messaging apps, social media platforms, or email to invite friends and collaborators to listen in. This approach fosters a collaborative music experience, allowing others to contribute their favorite tracks to the playlist.

Advertisement
Meet the all new Kndle Family scaled

Additionally, by regularly updating and expanding the playlist with new liked songs, you make sure that it remains fresh and engaging for everyone involved. Embracing the simplicity of sharing a playlist link opens up a world of musical exploration and shared enjoyment, making it easy for friends to join in and discover new tunes effortlessly.

Enjoy and Discover Together

explore the world together

Exploring new music alongside friends and family enhances our collective listening experience and strengthens our bond through shared musical discoveries. By collaborating on a shared playlist of favorite Spotify songs, we invite others to contribute, creating a space for mutual enjoyment and exploration.

Sharing the playlist link allows for easy access across various devices, enabling everyone to discover and appreciate the diverse musical tastes within the group. Keeping the playlist updated with fresh tracks guarantees a continuous flow of new favorites, enriching our listening journey together.

Through interacting with one another via music, we not only share our own preferences but also immerse into the musical worlds of those around us, fostering a deeper connection through the art of sound. Embracing this collaborative approach to music discovery opens up a world of possibilities, where each shared song becomes a thread weaving our collective musical tapestry.

Frequently Asked Questions

How Do You Share Spotify Favorites?

To share Spotify favorites, we create a playlist with our liked songs. This involves tapping the '+' icon, selecting 'Playlist,' naming it, and adding our liked tunes.

To add songs, swipe left on each, or collaborate to keep it fresh. Copy the playlist link to share the musical joy with others.

Advertisement
Meet the all new Kndle Family scaled

How Do You Send Favorite Songs on Spotify?

We facilitate sharing favorite Spotify songs by creating a playlist. Tap the '+' icon, choose 'Playlist,' name it, and add liked songs. Swipe left on each song to include them in the new playlist for sharing.

Collaborate, copy the playlist link, and share it via text or other ways. Keep updating the playlist with new favorites for an enhanced listening experience. This method guarantees seamless sharing and discovery of great music.

How Do I Share a Spotify Playlist Easily?

Sharing a Spotify playlist is simple!

Create a new playlist for your favorite songs, give it a memorable name. Add songs by tapping the plus icon.

Once ready, copy the playlist link to share.

Advertisement
Meet the all new Kndle Family scaled

Collaborate by inviting friends to contribute.

Enjoy seamless music sharing!

How Do I Share My Spotify Songs?

Sharing our favorite Spotify songs is simple. Create a playlist, name it, and add your liked songs.

Collaborate with others by inviting them to contribute or share the playlist link. This method allows seamless sharing and updating of our music preferences.

Stay connected through music with our shared playlist for a fun and engaging experience.

Advertisement
Meet the all new Kndle Family scaled

Conclusion

Now that you know how to share your favorite Spotify songs with others, go ahead and create your playlist masterpiece.

Invite friends, family, or even strangers to join in the musical journey. Discover new tunes, reminisce on old favorites, and bond over the power of music.

The possibilities are endless when you share your favorite songs – so start spreading the musical love today!

Continue Reading

Composing

5 Steps to Change Songs on AirPods Pro

In just 5 steps, learn how to effortlessly control your music on AirPods Pro with ease and precision.

Published

on

By

changing songs on airpods

To ensure that you can control songs on your AirPods Pro, start by enabling double-tap controls in the settings on your device and configuring them for your AirPods. Then, simply double-tap the touch control on the stem to skip to the next track. For the previous song, triple-tap the touch control. Adjust the volume by swiping up or down on the touch control. Finally, you can customize the music playback controls by accessing Bluetooth settings on your device. These five steps will help you achieve effortless and personalized music control. Mastering these steps will enhance your listening experience.

Key Takeaways

  • Enable Double-Tap Controls in AirPods Pro settings.
  • Double-press to skip to the next song.
  • Triple-press to go back to the previous song.
  • Adjust volume by swiping up or down on the Touch control.
  • Customize music playback controls in Bluetooth settings.

Enable Double-Tap Controls on Airpods Pro

To set up double-tap controls on your AirPods Pro, access the Settings on your connected device and navigate to the Bluetooth menu. Once there, locate your AirPods Pro in the list of paired devices and tap the 'i' icon next to them.

Under the Double-Tap on AirPods section, you can choose what action you want the double-tap gesture to perform. Options include activating Siri, controlling Play/Pause, skipping to the Next Track, going back to the Previous Track, or turning the feature Off altogether.

By customizing these settings, you can effortlessly switch between songs on your AirPods Pro with just a simple tap. This feature enhances your listening experience, giving you more control over your music playback directly from your AirPods Pro.

Take advantage of this convenient functionality to tailor your AirPods Pro experience to suit your preferences and streamline your music enjoyment on-the-go.

Skip to the Next Song on Airpods Pro

airpods pro skip track

When skipping to the next song on AirPods Pro, simply double-press the Touch control on the stem. This action allows for a seamless transition to the next track in your playlist or audio content. The intuitive design of the AirPods Pro makes it easy to navigate through your music with just a quick double-press. By utilizing the Touch control on the stem, you can enjoy a smooth and uninterrupted music listening experience. The double-press feature enhances the usability of the AirPods Pro, providing a convenient way to move forward in your playlist without any hassle. Embrace the innovative technology of AirPods Pro and effortlessly skip to the next song with a simple touch.

Key Points Description Benefit
Touch control Double-press on stem Easy navigation
AirPods Pro Innovative technology Seamless usage
Skip to next song Quick and intuitive Convenient

Go Back to the Previous Song

rewind to the last track

Switching back to the previous song on AirPods Pro is as simple as triple-pressing the Touch control on the stem. By employing this action, your AirPods Pro will promptly skip back to the beginning of the current song or switch to the previous one in your music playlist.

The triple-press feature on the Touch control of the AirPods Pro offers a convenient way to navigate through your music selection without the need to access your device directly. To activate the skip back function smoothly, make sure that you press the Touch control on the stem three times in quick succession.

Advertisement
Meet the all new Kndle Family scaled

This method allows you to effortlessly control your music playback and ensures a seamless listening experience with your AirPods Pro. Enjoy the convenience of managing your music flow with just a few taps, making your listening sessions more enjoyable and uninterrupted.

Adjust Volume on Airpods Pro

adjusting volume on airpods

Adjusting the volume levels on your AirPods Pro is as simple as swiping up or down on the Touch control while positioning your thumb on the stem. With these precise touch controls, you can effortlessly customize your listening experience to suit your preferences.

The intuitive Touch controls make adjusting the volume on your AirPods Pro a seamless process, allowing you to focus on enjoying your audio playback without any interruptions.

Whether you're looking to increase the volume for an immersive sound experience or lower it for background listening, the Touch control on your AirPods Pro gives you the flexibility to do so with a simple swipe.

Customize Controls for Music Playback

music playback control customization

To further enhance your music listening experience with AirPods Pro, take advantage of customizing controls for music playback through your device's Bluetooth settings. By accessing the settings for your AirPods Pro on your iPhone or iPad, you can tailor the double-tap and long-press functions to suit your preferences.

Whether you prefer to skip songs, play/pause, activate Siri, or adjust the volume, customizing these control options allows for a personalized interaction with your AirPods Pro during music playback. Experimenting with different configurations enables you to find the setup that aligns best with your listening habits.

Embrace the innovative features of your AirPods Pro by exploring the various ways you can fine-tune your control settings to optimize your music experience. Make the most of your device's capabilities by customizing controls to streamline your interactions and enhance your overall enjoyment of listening to music on AirPods Pro.

Advertisement
Meet the all new Kndle Family scaled

Frequently Asked Questions

How Do You Change Songs on Airpods Pro?

When changing songs on AirPods Pro, we simply double-press the Touch control on the stem to skip to the next track. It's a quick and efficient process that enhances our listening experience.

With the Touch control feature, moving through our music playlist is a breeze. Utilizing the double-press gesture on the AirPods Pro guarantees seamless music control.

Enjoy the convenience of easily skipping songs with this intuitive function.

How Do You Control Music on Airpods Pro?

To control music on AirPods Pro, simply tap the stem to play/pause or mute calls.

Double press to skip forward and triple press to skip back.

Advertisement
Meet the all new Kndle Family scaled

Adjust volume by swiping on the Touch control while placing your thumb on the stem.

These intuitive controls make managing your audio seamless and convenient.

Enjoy a hands-free experience that lets you focus on your music or calls effortlessly.

Why Won T My Airpod Pros Let Me Skip?

If your AirPods Pro won't let you skip songs, check if the double-tap or touch controls are working correctly and if the battery is charged. Resetting them might help.

Make sure your device and AirPods Pro have the latest software updates. If issues persist, contact Apple Support for assistance.

Advertisement
Meet the all new Kndle Family scaled

It's crucial to troubleshoot these problems to enjoy uninterrupted music sessions.

How Do I Change the Press on My Airpod Pros?

To change the press settings on your AirPods Pro, follow these steps:

  • Open the Settings app on your paired device.
  • Navigate to Bluetooth settings and tap on the 'i' icon next to your AirPods Pro.
  • Under 'Press and Hold AirPods,' choose the desired action for each AirPod (left or right) when you press and hold the stem.
  • Options include Siri, Noise Control, and Off (no action).
  • Customize the press settings to control music playback, access Siri, or toggle noise cancellation.

Conclusion

To sum up, changing songs on Airpods Pro is a simple and convenient process that can enhance your listening experience. By following the five steps outlined above, you can easily navigate through your music library with just a few taps.

Just like tuning a radio dial to find your favorite station, adjusting your Airpods Pro settings can help you fine-tune your music experience to suit your preferences.

So don't be afraid to explore and customize your controls for a seamless and enjoyable listening session.

Advertisement
Meet the all new Kndle Family scaled
Continue Reading

Composing

How to Unhide Songs on Spotify in 5 Easy Steps

Get ready to uncover hidden tunes on Spotify with just a few taps – discover how to reveal your favorite songs in 5 easy steps!

Published

on

By

unhiding spotify songs guide

To uncover songs on Spotify in 5 simple steps, first access the app settings by tapping the gear icon at the top-right corner. Enable ‘Show Unplayable Songs’ in settings to reveal hidden tunes. Next, locate and tap on the song by selecting the three dots icon. Then, choose the ‘Hidden’ option to conveniently manage hidden songs. Finally, make the song playable again by selecting it and restoring playability. Enhance your music library effortlessly by following these steps. Discover hidden gems in your Spotify playlists with a few simple taps. Explore more about managing your music collection with this guide.

Key Takeaways

  • Access Spotify settings and enable 'Show Unplayable Songs'.
  • Locate the hidden song in your library or playlists.
  • Tap the three dots icon next to the track.
  • Select the 'Hidden' option to reveal the song.
  • Make the song playable again with a few taps.

Access Spotify App Settings

To access Spotify app settings, simply tap on the gear icon in the top-right corner of the app. Once you've reached the settings menu, you can easily unhide a song that may have been hidden.

Unhiding a song on Spotify is a simple process that allows you to rediscover hidden gems in your music library. By exploring the settings and making a few adjustments, you can guarantee that your favorite tunes are always at your fingertips.

Whether you accidentally hid a song or simply want to explore all your music options, unhiding a song is a useful feature that enhances your listening experience. Remember, the key to unhide a song lies in accessing the app settings and toggling the necessary options.

Enable 'Show Unplayable Songs'

display unavailable tracks option

Enabling the 'Show Unplayable Songs' setting in Spotify allows us to uncover and access hidden tracks within our music library. Here's how to make the most of this feature:

  1. Navigate to Settings: Locate the settings menu within the Spotify app. This can usually be found by tapping on your profile icon in the top right corner of the screen.
  2. Find the 'Show Unplayable Songs' Option: Scroll down within the settings menu until you find the 'Show Unplayable Songs' option. It may be located under the Playback section.
  3. Toggle the Button Next to It: Once you've located the 'Show Unplayable Songs' setting, simply toggle the button next to it to enable this feature. This action will reveal any hidden songs in your library or playlists that were previously unplayable.

Locate and Tap on Song

find and select music

Upon discovering a hidden song within your Spotify playlists or library, proceed to tap on the three dots icon next to the track to reveal additional options. The three dots symbolize a menu of possibilities, offering a gateway to manage and customize your music experience effortlessly. By tapping on these three dots, you reveal a world of choices, including the ability to unhide songs that were once tucked away from view. This simple action initiates a process of rediscovery, bringing back into the spotlight those hidden gems you may have forgotten about.

In the domain of music exploration, the three dots serve as a key to revealing hidden treasures within your digital library. They symbolize empowerment, granting you the authority to tailor your listening experience to your preferences. With just a tap, you can expose the secrets of your Spotify collection, showcasing songs waiting to be heard once again. So, embrace the power of the three dots and set off on a journey of musical rediscovery within your Spotify account.

Select 'Hidden' Option

capture specific text details

When browsing through Spotify settings, users can easily locate the 'Hidden' option to access all hidden songs. This feature on the mobile app allows users to manage and view songs that have been hidden from playlists. Here's how to navigate the 'Hidden' option efficiently:

  1. Effortless Access: Find the 'Hidden' option within the Spotify settings menu on your mobile app interface.
  2. Organize Hidden Songs: Once in the 'Hidden' section, conveniently browse through all your hidden songs for easy management.
  3. Restore with Ease: Select any hidden song from the list and opt to 'Unhide' it, making it playable again in your playlists.

Accessing the 'Hidden' option streamlines the process of managing your hidden songs on Spotify, providing you with a user-friendly interface to curate your music library effortlessly.

Make Song Playable Again

revive old music player

To bring back a hidden song and make it playable again on Spotify, just make sure the 'Show unplayable songs' option is enabled in your settings. This simple step allows you to rediscover and enjoy songs that were once concealed within your library or playlists.

By ensuring this setting is activated, you empower yourself to access a treasure trove of music that may have slipped out of sight. Once you have located the hidden song you wish to make playable again, tap on the three dots icon next to it to expose the options menu.

Advertisement
Meet the all new Kndle Family scaled

From there, select the 'Hidden' option to reveal the song and restore its playability. With just a few taps, you can revitalize your listening experience and rediscover the joy of tunes that were temporarily obscured.

Embrace the power to control your music collection effortlessly, ensuring that every song you love is readily accessible for your listening pleasure.

Frequently Asked Questions

How Do I Unhide Songs on Spotify?

When we want to unhide songs on Spotify, we simply need to enable the 'Show unplayable songs' option in settings. This action reveals hidden songs in playlists as greyed-out.

Tapping on the three dots next to a hidden song and selecting 'Hidden' will unhide it. Once completed, the song becomes playable in our playlists again.

Managing and unhiding songs on Spotify is straightforward and efficient with these steps.

Advertisement
Meet the all new Kndle Family scaled

How Do I Unblock a Song on Spotify?

When unblocking a song on Spotify, locate it in your playlist or library. Click the three dots icon next to the song to reveal the options menu. Choose 'Unhide' or 'Remove from Hidden Songs' to unblock it.

Make sure the 'Show unplayable songs' option in your Spotify settings is on. The unblocked song will now be visible and playable in your library or playlist.

Enjoy your tunes!

What Happens if You Hide a Song on Spotify Blend?

When you hide a song on Spotify Blend, it's removed from the collaborative playlist, impacting the shared listening experience. The hidden song won't show up for both users involved in the blend.

However, by un-hiding a song on Spotify Blend, you can restore it to the playlist and continue sharing music. This action enables both users to enjoy the previously hidden track together, enhancing the collaborative music discovery process.

Advertisement
Meet the all new Kndle Family scaled

How Do I Show Unavailable Songs on Spotify?

When we want to reveal unavailable songs on Spotify, we can easily do so by toggling the 'Show unavailable songs' option in the settings.

This simple step allows us to unhide songs that were previously hidden in our playlists, giving us more control over our music collection.

Conclusion

In just five easy steps, you can unhide songs on Spotify and enjoy all your favorite tracks again.

By accessing the app settings, enabling 'Show Unplayable Songs', locating the hidden song, selecting the 'Hidden' option, and making it playable again, you can bring your music back to life.

So go ahead, uncover those hidden gems and let the music play! Remember, sometimes the best tunes are just waiting to be rediscovered.

Advertisement
Meet the all new Kndle Family scaled
Continue Reading
Advertisement

Affiliate disclaimer

As an affiliate, we may earn a commission from qualifying purchases. We get commissions for purchases made through links on this website from Amazon and other third parties.

Advertisement

Vetted

About us

Established in 2007 and headquartered near Munich, Germany, StrongMocha News Group is a leading online publication providing in-depth content across diverse interests. Our mission is to inform, educate, and inspire readers through high-quality, detailed articles and reviews. With over 150 brands and magazines under our umbrella, we are committed to serving niche communities with specialized content tailored to their unique passions and needs.

Trending

Copyright © 2024 StrongMocha Affiliate disclaimer As an affiliate, we may earn a commission from qualifying purchases. We get commissions for purchases made through links on this website from Amazon and other third parties.