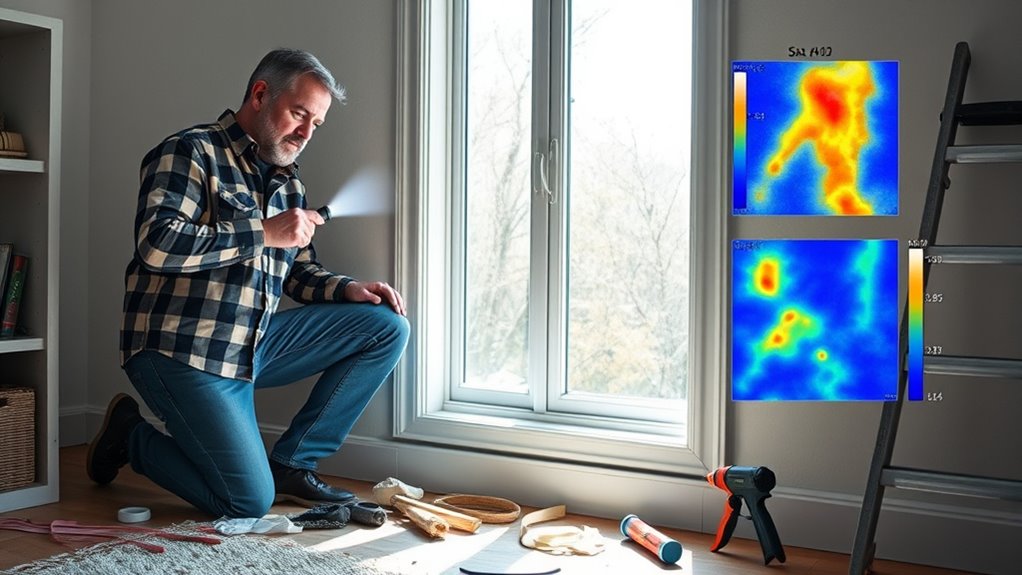
Start your DIY home energy audit by inspecting common leak areas like windows, doors, and electrical outlets. Use a smoke stick or incense to detect drafts or perform a blower door test for unseen leaks. Seal leaks with weatherstripping or caulk, and check your insulation and HVAC system for efficiency. Keep an eye on utility bills for spikes in energy use. If you want more tips on finding and fixing energy leaks, continue exploring this guide.
Key Takeaways
- Conduct a blower door test or use incense sticks to identify air leaks around windows, doors, and electrical outlets.
- Seal leaks with weatherstripping, caulk, or spray foam to improve energy efficiency and reduce drafts.
- Inspect attic, basement, and walls for missing or compressed insulation; upgrade as needed.
- Use thermal imaging tools to detect heat loss spots and pinpoint insulation gaps or leaks.
- Regularly check and maintain HVAC systems and ductwork for leaks, proper operation, and energy savings.

A DIY home energy audit is a practical way to identify areas where your house wastes energy and find opportunities to save on utility bills. To start, gather basic tools like a flashlight, screwdriver, caulk gun, weatherstripping materials, and an infrared thermometer or thermal camera if you have one. Collect recent utility bills so you can analyze your home’s historical energy use and spot patterns or spikes that indicate inefficiency. Before diving into detailed inspections, do a quick walk-through of your home. Take note of obvious issues like drafts around windows and doors, staining on walls or ceilings that might suggest air leaks, or damaged insulation in accessible areas. Always prioritize safety by turning off major appliances during inspections and checking for hazards such as exposed wiring or gas leaks. Choose a day with moderate weather, which makes it easier to detect heat loss or gain during your audit.
Perform a quick walk-through to identify drafts, stains, and insulation issues before detailed energy inspections.
When inspecting for air leaks, focus on common trouble spots like windows, doors, electrical outlets, baseboards, attic hatches, and plumbing penetrations. Use a smoke stick or incense to see if the smoke wavers or gets pulled toward leaks, especially during a blower door test or on windy days. Seal identified leaks with weatherstripping, caulk, or spray foam to prevent infiltration, which can account for 10-30% of heating and cooling energy loss. Don’t forget to evaluate your fireplace dampers and vents, making sure they close tightly when not in use. Conduct a blower door test to depressurize the house, revealing even the tiniest leaks that might go unnoticed otherwise. Check attic and basement access points, as these are common leak sources that can markedly impact your home’s energy efficiency.
Next, assess your insulation levels. Look in the attic, exterior walls, floors above unheated spaces, and crawl spaces. Use your flashlight to spot gaps, compressed insulation, or missing areas that cause thermal bridging. Compare your insulation’s R-value with regional recommendations to determine if upgrades are needed. Insulate exposed ductwork and pipes, which often lose heat or cooling, to boost system efficiency. Adding insulation to accessible spaces like the attic floor can improve comfort and reduce energy bills further. Additionally, consider high-performance projector technology that can help create a more energy-efficient entertainment setup if integrating with your home theater.
Finally, evaluate your HVAC system. Change filters regularly—every 1-3 months—to maintain airflow and efficiency. Check the age and condition of your furnace, boiler, or air conditioner; older models tend to operate less efficiently. Inspect ductwork for leaks, disconnected joints, or poor insulation, sealing any leaks to enhance HVAC efficiency by 20% or more. Review your thermostat settings, and consider upgrading to a programmable thermostat to better control energy use. Conduct safety checks on combustion appliances to ensure proper venting and identify any carbon monoxide risks. By systematically inspecting these areas, you’ll identify energy leaks, improve your home’s efficiency, and enjoy lower utility bills.
Frequently Asked Questions
How Often Should I Perform a Home Energy Audit?
You should perform a home energy audit every two to four years to keep your appliances, windows, and doors efficient. Regularly checking helps catch new leaks and issues that may develop over time. It’s especially important after renovations or seasonal changes. Scheduling audits in spring or fall lets you address potential problems before extreme weather hits, saving you money and maintaining your home’s comfort year-round.
What Tools Are Essential for a DIY Energy Audit?
Did you know that up to 30% of energy loss in homes comes from air leaks? To spot these leaks, you’ll need essential tools like an incense stick or candle to detect drafts, a flashlight to check dark corners, and a plastic knitting needle or wooden skewer to probe insulation. Don’t forget a screwdriver for outlet covers and weatherstripping to seal gaps. These tools help you identify and fix energy leaks effectively.
Can I Detect All Leaks Without Professional Help?
You can’t detect all leaks without professional help because DIY tools have limitations. While infrared thermometers, draft detectors, and visual checks can find many issues, they might miss hidden or subtle leaks. Professionals use advanced equipment like blower doors and thermal imaging cameras, offering a detailed assessment. To guarantee you catch every leak and maximize efficiency, consider hiring a professional for a thorough energy audit.
How Long Does a Typical DIY Home Energy Audit Take?
Imagine a quick journey through your home like a vintage film reel. A typical DIY home energy audit can take anywhere from a few hours to a full day, depending on your home’s size and complexity. You’ll need time to inspect doors, windows, & ducts, and to seal leaks. Smaller homes take less time, but larger or more complex ones might require extra hours to guarantee thoroughness and accuracy.
Are There Government Incentives for Energy-Efficient Home Improvements?
Yes, there are government incentives for energy-efficient home improvements. You can benefit from federal tax credits covering up to 30% of costs for upgrades like insulation, heat pumps, and solar systems, with a maximum of $3,200 annually. Many states also offer rebates and incentives, managed by local agencies. These programs aim to reduce your energy bills and support renewable energy, making your home more sustainable and affordable.
Conclusion
Now that you’ve identified and sealed those energy leaks, you’re not just saving money—you’re taking control of your home’s comfort and your future. Think of it as forging your own path, like a modern-day explorer discovering hidden treasures. With each fix, you’re empowering yourself to create a more efficient, cozy space. Remember, every small step echoes the wisdom of those who built with care—transforming your home into a sanctuary of energy and peace.


