The article talks about the basics of field recording, what you should bring to your new recordings adventures, and how to take care of your sounds once you get them home.
When field recording, many people are tempted to use their phone instead of an actual field recorder because it is easier or cheaper. However, if you really want professional-sounding results then using a field recorder will give you the best possible chance for success.
If your field recordings have background noise, low-quality audio issues, etc., they may not be usable at all so don’t risk making inferior sounds by going with your smartphone! That being said there are some situations where using your phone might make sense but only if it’s absolutely necessary and you know what problems to expect beforehand (see below).
You can also bring other equipment depending on what kind of sounds you’re looking for such as wind protection gear if it’s windy outside.
Getting Started with Field Recording
The first step in learning field recording is understanding the basic principles. Field recordings can be used in many different types of productions including films, documentaries, soundtracks for video games and more! This blog post will give you an overview of these concepts so that you can start exploring this wonderful art form on your own terms.
You’ll need to consider what type of microphone you want to use when doing field recordings. There are three main types: dynamic, condenser, and ribbon microphones. Dynamic mics are good for capturing louder sounds such as drums and they also handle noise well.
Condenser mics are good for recording softer sounds and they’re good for field recording because they don’t pick up as much background noise. Ribbon mics are also useful if you want to capture a wide range of sounds and their high-frequency response is excellent.
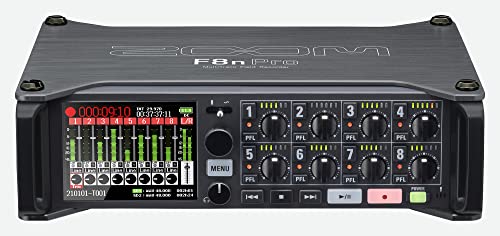
Zoom F8n Pro Professional Field Recorder/Mixer, Audio for Video, 32-bit/192 kHz Recording, 10 Channel Recorder, 8 XLR/TRS Inputs, Timecode, Ambisonics Mode, Battery Powered, Dual SD Card Slots
SUPERIOR SOUND QUALITY – Experience pristine audio with the F8n Pro's advanced preamps, offering an incredibly low noise…
As an affiliate, we earn on qualifying purchases.
As an affiliate, we earn on qualifying purchases.
What is Field Recordings?
Field recording is the term for an audio recording created outside the recording studio that includes natural and human recordings. It also applies to sound recordings such as electromagnetic waves and vibrations utilizing various microphone equipment including passive magnetic antennas for electromagnetic recordings.
In underwater field recordings, field records use hydrophones to capture the sound and movement of marine mammals. This recording has been very useful for sound engineers.

Microphone Wind Shield Pop Filter Microphone Isolation Ball, Acoustic Filter for Record Studios Mic, Sound-Absorbing Foam Five-sided Seal Design to Effectively Reduces Noise and Reflections
Suitable for Microphones: The penypeal microphone windshield is suitable for most XLR /USB microphones, condenser microphones with a…
As an affiliate, we earn on qualifying purchases.
As an affiliate, we earn on qualifying purchases.
Do I need a Field Recorder?
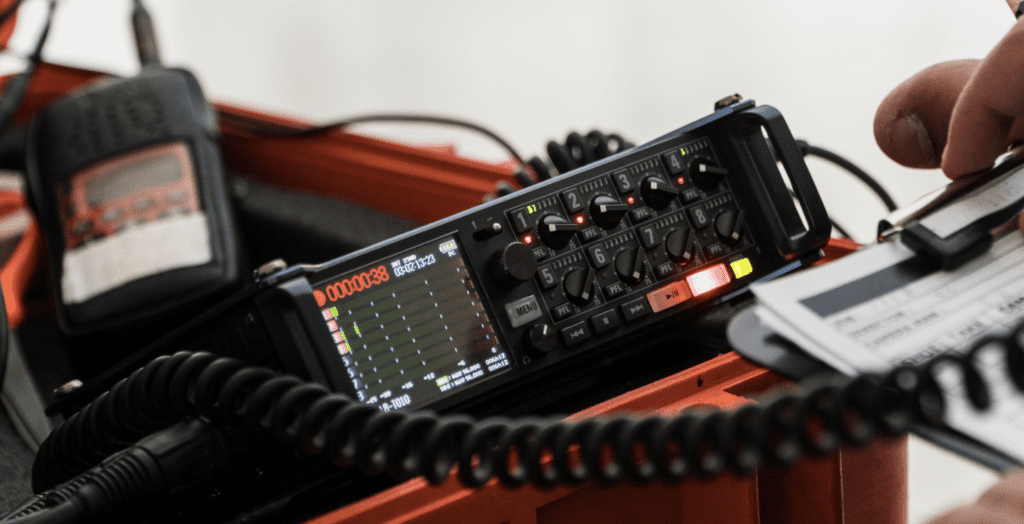
There’s been an explosion of digital recorders in recent decades, so there’s a buyer’s market here. Several good stereo recorders are available for around 500 bucks. As prices increase, you will have better preamplification, more channels, e.g. ambisonic compression capability. For an entry-level device, this minimum specification is suggested: Many recording devices possess this attribute. This is the Zoom H4N. The more advanced devices are below pictured. Audio Instruments. 16 channels mixing with 20 tracks recording Zoom 8N multi-track recording equipment.
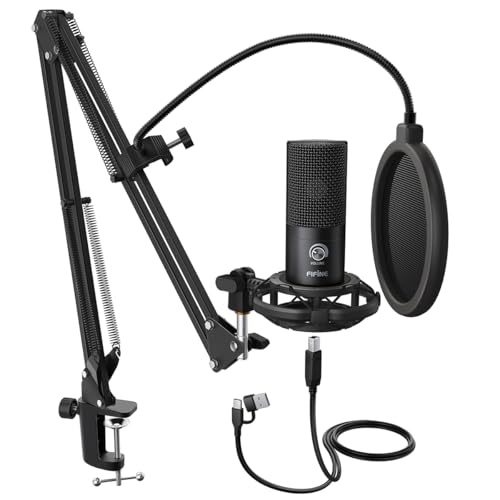
FIFINE Studio Condenser USB Microphone Computer PC Microphone Kit with Adjustable Boom Arm Stand Shock Mount for Instruments Voice Overs Recording Podcasting YouTube Vocal Gaming Streaming-T669
[USB Output] Enables simple setup. USB studio recording microphone kit provides a direct convenient plug-and-play connection to pc…
As an affiliate, we earn on qualifying purchases.
As an affiliate, we earn on qualifying purchases.
Microphones
You can use the built-in mics on field recorders or you can use an external mic. When it comes to microphones, there are a few things that you need to consider. The most important thing is the type of microphone that you are using. There are three main types of microphones: dynamic, condenser, and ribbon.
Some microphones will require phantom power such as field recorders, and others may require batteries such as lavalier microphones.
Dynamic mics are good for capturing louder sounds such as drums and they also handle noise well. Condenser mics are good for recording softer sounds and they have a wider range than a dynamic mic. Ribbon mics are used for capturing sound in stereo and they’re not as common as the other two types of microphones.
When choosing a microphone, you also need to consider the directionality of the mic. There are four different directional patterns: cardioid, omnidirectional, bidirectional, and shotgun. Cardioid mics are the most common type of microphone and they are good for capturing sound from in front of the mic. Omnidirectional mics capture sound from all directions and they’re good for recording groups of people or nature sounds. Bidirectional mics capture sound from two directions and they’re good for interviews or dialogue. Shotgun mics are used to capture sound from a specific direction and they’re good for capturing audio from far away.

Microphones are the key to the production and processing of audio. Almost every microphone can be used on the ground, but some are especially useful. Good for pinpointing sonic places in which it’s easier to concentrate in ambient settings. The Sennheiser MKH416 YY condensing microphone is usually found in the portable. These offer the best method of recording the ambiance and are useful for close-miking where needed. Zoom H4N binaural mics provide real-time recording of spaces by mimicking the biological features of human heads.

Underwater Hydrophones Sounds
The best free sounds!
As an affiliate, we earn on qualifying purchases.
As an affiliate, we earn on qualifying purchases.
What Type of Microphone Is Best for Field Recording?
There is no one definitive answer to this question, as different microphones are better suited for different applications. However, a good starting point would be to use either a dynamic or condenser microphone, depending on the type of sound you want to capture. Cardioid-patterned mics are also generally well-suited for field recordings.
When choosing a microphone, it’s important to consider the directionality of the mic in order to get the most accurate recording possible. Shotgun microphones are particularly well-suited for capturing audio from a specific direction, while bidirectional mics can be useful for interviews or dialogue. Omnidirectional mics are also great for capturing sounds from all directions, making them ideal for nature recordings or groups of people.
A field recorder will typically be used for capturing field recordings or sound effects rather than dialogue. It’s important to note that some field recorders come with built-in microphones, while others require the use of external mics in order to capture audio. External microphones can be plugged directly into the field recorder via XLR cables, but many models also support wireless connectivity so you don’t have to worry about tripping on cords while recording your sounds.
Field recorders are often outfitted with batteries and memory card slots so they can work without being connected to a computer, making them well-suited for outdoor use where there aren’t any outlets nearby–perfect for Camping Trip. I found Tips for Packing Light when Going on A Camping Trip very helpful to prepare for my recent trip. Overall I am busy preparing the tech site and tent to forget what I need besides my Camping Cooler.
Which Microphone Is Best for Outdoor Recording?
Again, there is no one definitive answer to this question. However, dynamic microphones are often a good choice for outdoor recordings as they can handle louder sounds and are less susceptible to noise interference than condenser microphones.
Additionally, shotgun microphones can be great for capturing audio from a specific direction, making them ideal for nature recordings or interviews. Bidirectional microphones can also be useful in certain situations, such as recording a band playing live. Ultimately, it’s important to choose the microphone that best suits the particular application you have in mind.
What Is the Best Way to Record Ambient Sound?
When capturing ambient sound, it’s important to use a microphone that is able to capture a wide range of frequencies. This will ensure that you capture all of the nuances and details of the soundscape you’re recording. Omnidirectional microphones are generally well-suited for this task, as they can capture sounds from all directions.
However, shotgun mics can also be useful for capturing audio from a specific direction. When choosing a field recorder, it’s important to make sure that it has an adjustable gain level so that you can properly adjust the input signal depending on the noise levels present in the environment. Finally, always remember to use wind protection when recording outdoors to prevent unwanted noise from entering into your recordings.
What Is the Best Stereo Microphone on A Budget?
The Audio-Technica BP4025 is the microphone that I recommend.
What Is an Ambient Microphone?
An ambient microphone is a type of field recorder that can be used for recording field sounds. Ambient microphones are typically less expensive than traditional field recorders, but they do not have the same level of directional accuracy or frequency range as purpose-built sound recorders do.
What are Ambisonic Field Recordings?
Ambisonic’s 360deg surround sound format is a more conventional stereo surround sound that captures full directional information when sound waves hit the microphone, find out more here.
Windscreens
If you’re going to be doing recordings outside, then you’ll need to protect your microphones from the wind. There are a few different types of windscreens that you can use: foam, furry, and plastic. Foam windscreens are good for blocking out low frequencies like wind noise or heavy breathing.
Furry windscreens reduce high-frequency sound and they’re useful if you want to eliminate the rustle of leaves or tree branches rubbing together. Plastic screens can be used in some cases but it depends on how loud your field recording is going to be because they muffle sounds a bit too much sometimes.
Wind shield are essential as they protect the microphone from wind noise and other environmental factors.
Shock Mounts
If you’re using external microphones, then you’ll need to use a shock mount to protect the mic from getting shaken around. Shock mounts are usually made out of rubber or elastic and they hold the microphone in place so that it doesn’t move around when you’re recording.
Pop Filters
Another thing that you can use to protect your microphones is a pop filter. Pop filters are used to reduce the amount of popping sounds that occur when you say words with a lot of plosives in them like “P” or “B”. They work by trapping the air before it hits the microphone and they come in a variety of different shapes and sizes. They are not relevant for this kind of recording. A pop filter is not for outside they are typically used in a recording studio.
Wind Muffs
Wind muffs are another way to protect your microphones from the wind. They are usually made out of neoprene or foam and they sit around your field recorder or microphone to block out any noise that might occur while you’re recording outside.
Why Do People Do Field Recordings?
Many people are still interested in capturing natural sounds. It’s a way of documenting and preserving the environment, as well as creating new sounds to use in music or sound designers. Field recording can also be used for forensic investigations, such as locating the source of a crime scene or tracking down environmental pollutants.
There are many different reasons why people do field recordings, but the main thing is that it’s a way to capture audio that you wouldn’t normally hear in your everyday life.
Field Recording Golden Rules
As with all things audio-related, there is one way to do something right, and a million ways to do it wrong. There are a few golden rules that you should always remember:
- Always have a backup of your recordings.
- Make sure that your batteries are fully charged.
- Know the environment that you’re going to be working in.
- Start with clean audio and get rid of any unwanted noise in post production.
Why Sound Designer, Producer, and Composer Love it
The great thing about field recording is that there are no real boundaries when it comes to what you can do with the material that you’ve collected. You can use it for music, sound design, or just simply listening to the sounds of nature. There are endless possibilities and the best way to find out what works for you is to just get out there and start recording.
There are a few different reasons why people do field recordings:
- To capture the sound of nature
- To capture the sound of a city or town
- To capture the sound of a specific place
- To capture the sound of an event or performance
- To add ambient sounds to their music tracks
Field recording can be a lot of fun and it’s a great way to get unique sounding audio for your projects. It’s also a great way to learn about how different environments affect the sound, and it’s a great way to experiment with different microphone techniques. If you’re new, then I recommend starting out by recording the natural sounds of your environment.
This will help you get used to using field recorders and microphones before you jump into the field recording more complex sounds.
How Do I Record Ambient Nature Sounds?
When field recording ambient nature sounds, it’s important to find a quiet place where you can work undisturbed. This means finding a place where there is no wind and minimal traffic noise. You also want to make sure that there are no people or animals nearby that might make noise while you’re trying to record. Once you’ve found a suitable location, set up your field recorder and microphone and start recording.
If you’re not sure what to record, then I recommend starting out by recording the sounds of the environment around you. This could include the sound of the wind, rain, leaves rustling in the wind, waves crashing on the shore, and anything else that you might hear in your environment. Be creative and experiment with different types of field recording.
Recording the sounds of a city or town can be a lot more challenging because there will always be some sort of noise in the background. The key to field recording outdoor sources is finding an isolated location, but you’re typically not going to find much isolation when it comes to field recording ambient environmental noises inside your city limits.
This means that you’ll have to try and block out as much external noise as possible while you’re trying to record this type of soundscape material. You might want to consider using insulation on windows and doors, closing curtains over open windows, investing in double-paned glass for better insulation, turning off any appliances that make noise (including computers and cell phones), and even wearing earplugs while you’re recording.

Once you’ve found a good location and have minimized the external noise, start recording by capturing a few minutes of ambiance from your chosen location. This could include the sound of traffic, people talking, horns honking, and any other noises that are typical for that area. Try to capture as much variety as possible so that you’ll have plenty of material to work with in post-production.
If you’re interested in field recording performances or events, then I recommend checking out some local venues and finding out when their next performance is scheduled. Most venues will have a website where you can find information about upcoming events. Once you’ve found an event that interests you, contact the venue and ask if it’s okay to record.
Some venues will not allow you to record their events, but others might be fine with it. If the venue is okay with recording their event, then I recommend contacting them beforehand and finding out if there are any restrictions on where your microphones can be placed or who gets audio from the performance.
If you’re interested in documenting a specific place that’s outside of your local area, then this could mean traveling to another city or country for a few days just so you can capture some unique sounds while you’re away from home. In most cases though, field recordings made at locations other than your own usually mean going on vacation so that it becomes more of a hobby/vacation combo rather than field recording being something work-related.
What Does It Mean to Say Field Recordings Capture Ambient Sound?
Ambient sound is the natural and unintentional sounds that are present in any environment. These could be environmental sounds, such as the sound of rain or leaves rustling in the wind, or they could be man-made sounds, such as the sound of a car driving by or people talking.
When we talk about field recordings capturing ambient sound, this means that we’re trying to capture all of the natural and unintentional sounds that are present in a specific environment. This includes both environmental and man-made noises, as well as any other type of noise that might be present at that time and location.

How Does Wind Affect Field Recording?
Wind can have a significant impact because it can cause unwanted noises in your recording. This could be the sound of leaves rustling, the sound of your microphone cable moving around, or even the sound of your microphone itself blowing in the wind.
In order to minimize the effects of wind, you might want to consider using a windshield for your microphone. This is a piece of equipment that fits over the top of your microphone and helps to reduce or eliminate any unwanted noises caused by wind. If you’re not using a windshield, then you might want to try holding your microphone as close to your source as possible to minimize any noise from the wind.
Another thing you can do is find a location where there’s less wind. This could mean finding an isolated spot away from trees and other obstacles that will cause more movement in the wind. If you’re recording outdoors, then try to find a spot that’s sheltered from the wind.
Why you should leave your studio condenser mics at home?
This AT2020 is the most popular condenser microphone in the market for affordable prices. A characteristic of your condenser microphone is that it can take almost everything. Although this is definitely necessary for an established controlled environment such as a studio, most condensing microphones are insufficient for isolators. Dynamic mics have the ability to make more precise controls on what goes on and what not. The high sensitivity of studio condensers allows them to catch practically any sound from foot movement or a dog barking.
Back in the Recording Studio
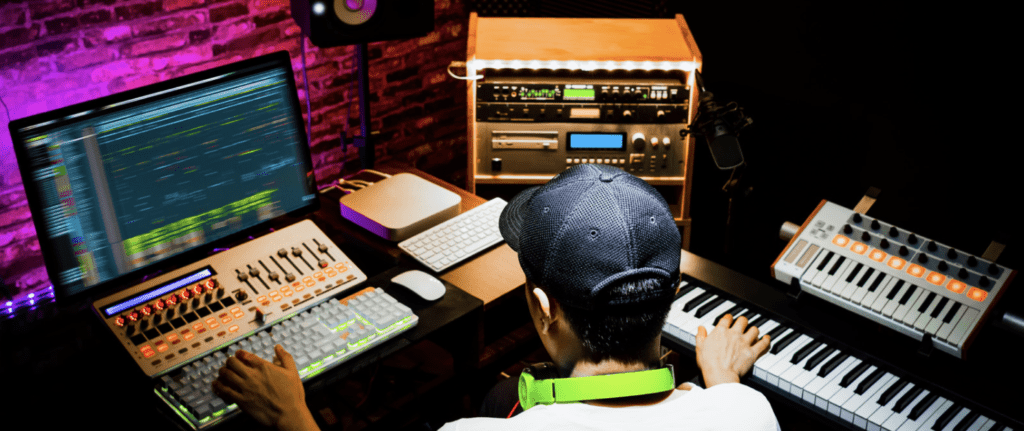
After you spend time outside capturing new sounds and unheard noises, you will want to head back to the recording studio. This is where you will be able to work on and mix your recordings. The first thing you will want to do is import your field recordings into a digital audio workstation (DAW). There are a number of different DAWs available, and the one you choose will largely depend on your personal preferences.
Once your sounds have been imported into the DAW, you can begin editing them. This includes cutting and trimming unwanted sounds, adding effects, and balancing the levels of different elements in the recording. It’s also important to make sure that all of your recordings are in sync with each other before beginning the mixing process.
The final step is to mix all of the elements together to create a cohesive whole. This involves adjusting the volume levels of each sound, adding fades and crossfades where necessary, and applying effects to individual recordings or the entire mix. The final step is exporting your field recording as an audio file, which can be done by either rendering it in real time or creating a virtual copy of the project (if using Pro Tools).
Once you have exported your sounds, you will want to listen back to make sure that everything sounds good before sharing it with other people. If there are any problems, try going through all of the steps again until everything meets your standards.
Now that you know how field recordings work for beginners let’s move on!
Process Field Sounds Recorded (Mainly Stereo Recordings)
Processing field sounds can be a fun and creative way to add dimension and interest to your field recordings. There are a number of ways to process field sounds, and the following are just a few of the most common techniques:
- EQ: Equalization is the process of altering the frequency response of a sound signal. EQ can be used to emphasize or attenuate certain frequencies, making them more or less prominent in the overall sound.
- Compression: Compression is the process of reducing the dynamic range of a sound signal. This can be used to make a sound more consistent in volume or to add more “punch” to certain elements of the recording.
- Reverb: Reverb is the simulation of the natural reverberation of a sound in an acoustic space. This can be used to make a field recording sound more “ambient,” or to add depth and dimension to individual sounds.
- Delay: Delay is the process of adding a timed delay to a sound signal. This can be used to create echoes or to add interest and complexity to otherwise static sounds.
Equalization, compression, reverb, and delay are just a few of the many ways that field recordings can be processed. By experimenting with different combinations of these effects, you can create truly unique sounding recordings that will set your work apart from the rest. When processing sound from the recordings, start by EQ’ing the sounds to remove any unwanted frequencies and then compress them to make them more consistent in volume. Once these basic steps are done, you can begin experimenting with different reverb and delay settings to create unique effects.
Field Recording Tips
Here are a few tips for getting the most out of your field recordings:
- You will get better results if you take your field recorder into the field, rather than using a microphone that’s already in place.
- When recording field sounds, try to keep an open mind and be aware of how different objects sound from various perspectives.
- A good way to start out is by finding a quiet space with very little background noise and doing test recordings. This helps you familiarize yourself with the capabilities of your equipment before trying it out on something more complicated like nature or traffic noises.
Pack It Up!
Now that you have all the gear that you need, what are you waiting for? Get outside there’s no time to waste! Assemble your field recorder with appropriate microphone(s), connect any necessary cables between them then start recording into your field recorder by pressing its record button once before beginning.
When field recording, always keep in mind the environment that you are working in and the type of sounds you want to capture. It’s also important to be aware of your surroundings so that you don’t accidentally record any unwanted sounds. Be patient and experiment with different techniques and microphone placements until you find what works best for you. And most importantly, have fun! 🙂
How Do You Make a Good Field Recording?
Creating sounds is an important part of any field recording. If you are just starting out in field recording, then this article will help you with making the best field recordings for beginners.
When choosing which microphone to use when making a field recording, it really depends on what kind of sound you want and how far away the object or noise that you’re looking to record is from your recorder or microphone. For example, if there’s something outside in front of your house like birds chirping in a tree about twenty feet away, then I would recommend using either shotgun microphone.
- Always have a backup of your recordings.
- Make sure that your batteries are fully charged.
- Know the environment that you’re going to be working in.
- Start with clean audio and get rid of any unwanted noise in post-production with RX.
How Do I Sell a Sound Recording?
If you’ve made a field recording and would like to sell it, there are a few things that you need to do in order to make the sale legal. The first thing is to determine who holds the copyright on the sound recording. This can be either you or the person who recorded the sound. If you hold the copyright, then you are free to sell or license the recording as you see fit. However, if the copyright holder is someone other than yourself, then you will need their permission before selling it.
The next step is to find a buyer for your sound recording. There are many online marketplaces where you can sell field recordings, such as Pond Five and AudioJungle. You can also contact audio libraries or production companies to see if they’re interested in buying field recordings.
Once you’ve found a buyer, make sure that the transaction is legal and binding by reviewing any contracts or agreements carefully before making the sale final. It’s also important to pay royalties on your sound recording after it has been sold. This will ensure that everyone benefits from its use!

Conclusions
You’ll need to decide what type of field recorder you would like to use when field recording outside or in the field. Portable field recorders have built-in microphones, but fixed frame models generally have better preamps and higher quality mic capsules so it’s worth spending some extra money on those types of machines. There are a lot more factors that go into choosing your field recorder depending on how often you plan on doing this type of work.
I find it fascinating to change a sound source with several tools in my DAW to a new specific sound, sometimes a sound that I did not expect from the location where pulled out my recording device.
Field recordings allow us to explore the sonic world surrounding us and give us the freedom to use this content as a tool to enrich creative work. I hope this post has helped demystify some common misconceptions about field recording for beginners! Keep these tips in mind when starting out and happy field recording! Check out some of my articles and review series here on StrongMocha.


