Composing
How to Put Songs on Repeat on Spotify in 7 Easy Steps
Take your Spotify experience to the next level by learning how to put songs on repeat in just 7 easy steps.
To repeat songs on Spotify, open the app, locate the song, and find the repeat button in the playback controls. Simply tap it to enjoy continuous playback. The repeat feature is available for both free and premium users, allowing you to effortlessly loop a single song or an entire playlist on mobile and desktop. Tapping once will loop the entire playlist, while a double tap will focus on a single song. To confirm looping, look for the ‘1’ symbol next to the song title. Enhance your listening experience by playing around with the repeat button. Take your music enjoyment to the next level by exploring our detailed steps.
Key Takeaways
- Open Spotify app and search for desired song.
- Tap on song to start playback.
- Locate repeat button in playback controls.
- Click repeat button once for playlist loop.
- Double tap repeat button for single song loop.
Access Spotify and Select Song
To access Spotify and select a song, simply open the Spotify app on your device. Whether you want to put your favorite tune on repeat or discover a new track to loop endlessly, Spotify offers a seamless experience.
Once inside the app, navigate to your library or use the search function to find the specific song you desire. Make sure the song is playing on your screen, visible and ready for action. When you're all set, look for the repeat button within the playback controls. This handy feature allows you to loop the song without interruptions.
Once you've located the repeat button, just tap on it to activate the looping function. Now, sit back, relax, and enjoy your selected song playing on repeat as many times as your heart desires.
Spotify's user-friendly interface makes it easy to create your personalized playlists and enjoy your favorite tunes with just a tap of a button.
Expand Player and Locate Repeat Button

After expanding the player on Spotify by tapping on the Now Playing bar, you can easily locate the repeat button. Here are some key points to keep in mind when using the Repeat button for your music enjoyment:
- The Repeat button is available for both free and premium users on Spotify.
- By using the Repeat button, you can loop a single song or an entire playlist seamlessly.
- This feature is accessible not only on mobile devices but also on the desktop version of Spotify.
Looping a song can enhance your listening experience by allowing you to focus on your favorite tracks.
Understanding how to use the Repeat button efficiently can elevate your music enjoyment and create a continuous flow of your preferred tunes.
Tap Repeat Button Once or Twice
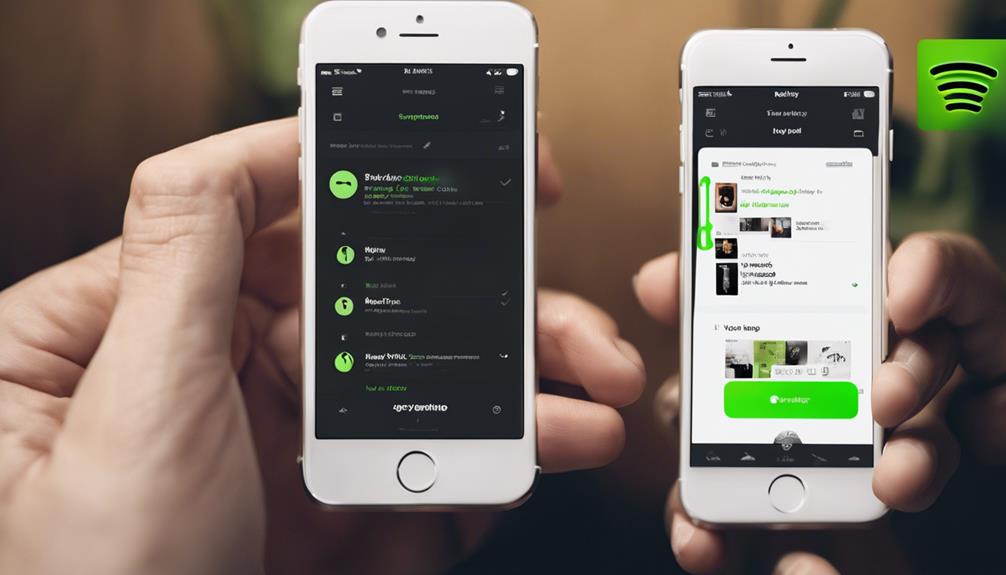
When using Spotify's repeat feature, tapping the repeat button once sets the entire playlist to loop, while a double tap focuses on a single song.
This functionality allows for control over how songs are repeated, enhancing the listening experience.
Repeat Button Functionality
The functionality of the repeat button on Spotify can be activated by either tapping it once or twice. When using this feature, consider the following:
- Tapping once initiates loop mode for the entire playlist.
- Double-tapping sets a single song on repeat until turned off manually.
The loop symbol, two arrows forming a loop, represents the repeat button.
Enhance focused listening or educational purposes by utilizing this feature.
Experiment with the repeat button to optimize your Spotify experience.
Controlling Song Repetition
To control song repetition on Spotify, simply tap the repeat button once for looping the entire playlist or album, or double-tap for looping a single song indefinitely. The Spotify app offers this Repeat option for both Spotify Free and Premium users, allowing for a personalized listening experience. By utilizing the loop button, users can easily set their preferred mode of playback, whether it's to repeat a song for deeper immersion or to loop the playlist for continuous enjoyment. The green indicator on the repeat button provides a visual cue, ensuring users are aware of their current playback settings. This simple yet effective feature enhances the overall listening experience on Spotify, giving users more control over their music preferences.
Spotify Repeat | repeat a song | loop button |
---|---|---|
Repeat option | Spotify app | loop the playlist |
Identify '1' Symbol for Repeat

Spotting the '1' symbol on Spotify signals that a song is set to repeat. When using Spotify, keep an eye out for this symbol next to the song title to easily identify songs set to loop.
Here are five things to note about the '1' symbol for repeat on Spotify:
- The '1' symbol confirms that the song will play in a continuous loop.
- Users can see the '1' symbol next to the song title to make sure it will continuously replay.
- This symbol indicates that the selected song will be on repeat mode.
- When the '1' symbol is present, the song will continuously play without interruption.
- Look for the '1' symbol to quickly spot songs set to repeat on Spotify.
Enjoy Song on Repeat
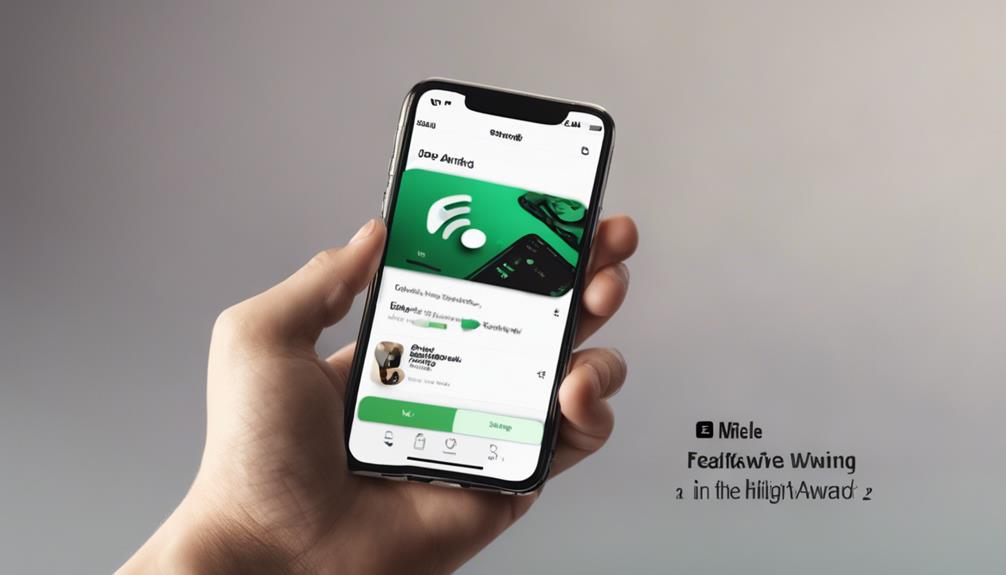
Indulging in our favorite song on repeat can elevate our mood and create a mesmerizing musical experience. To enjoy a song or playlist on repeat using Spotify on Desktop, simply open the app and find the repeat icon located near the playback controls.
Premium users have the advantage of repeating a single track or an entire playlist by clicking the repeat button twice. Once activated, the repeat icon turns green, indicating continuous playback.
Whether you're working out or unwinding, having your favorite tunes on repeat can enhance your listening pleasure and allow you to fully immerse yourself in the music. This feature not only adds convenience but also contributes to a more engaging listening session.
Looping Songs on Spotify: Mobile
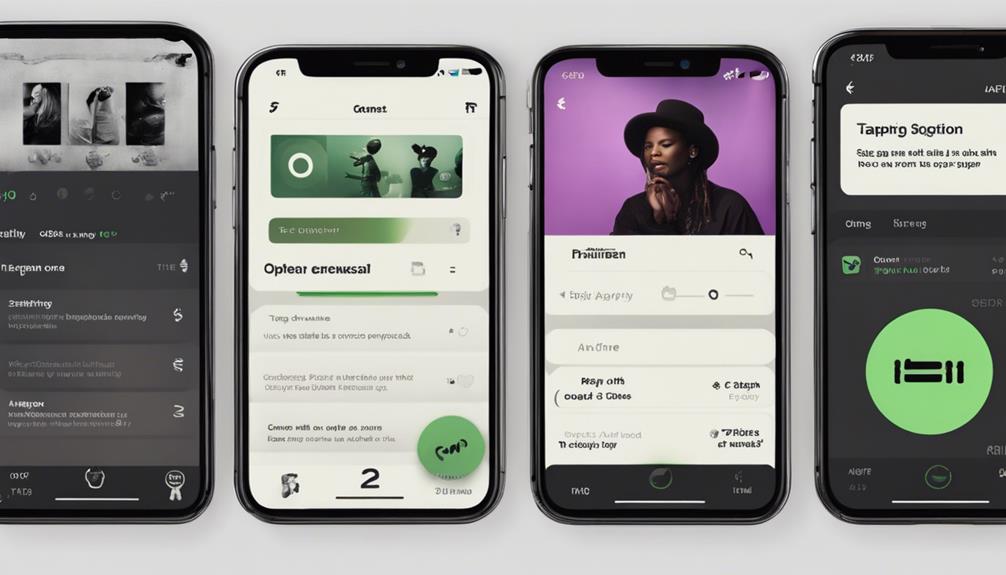
When using Spotify on your mobile device, access the song you wish to loop by opening the app. Here is how you can loop songs on Spotify without premium:
- Tap on the song name to bring up the media controls in the Now Playing screen.
- Look for the repeat button, denoted by two arrows forming a loop icon, and click it.
- For premium users, choose between 'Repeat One' or 'Repeat All' options for looping songs.
- Confirm the song is on repeat by tapping the repeat button again, ensuring continuous playback on your mobile device.
- Start playing the playlist.
With these simple steps, you can listen to your favorite song on repeat on Spotify without the need for a premium subscription. Enjoy the music you love without interruptions by seamlessly looping your chosen tracks.
Looping Songs on Spotify: Desktop
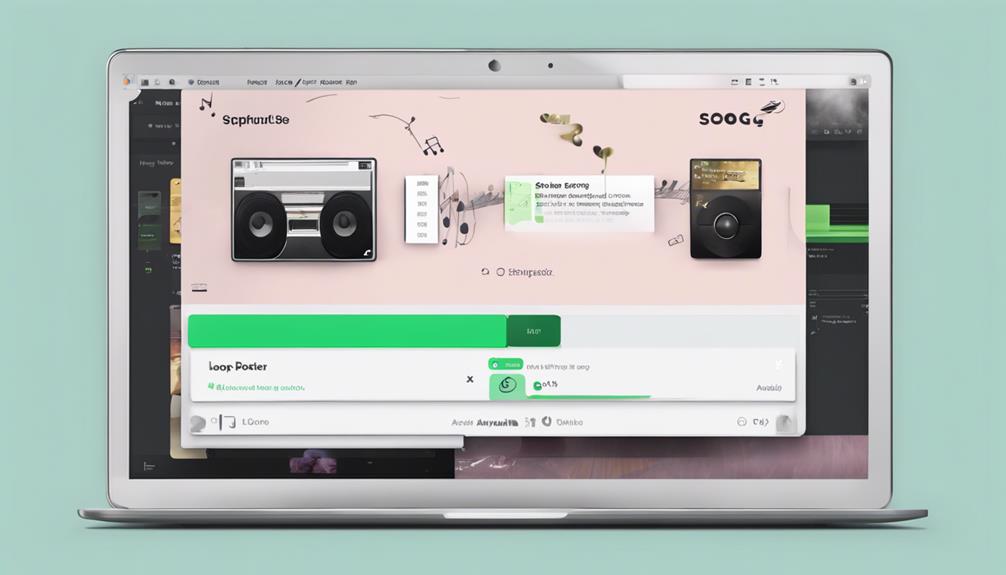
To loop a song on Spotify desktop, simply play the desired track and locate the repeat button in the playback bar. Clicking the repeat button once activates the looping feature, turning it green. Once activated, a small '1' will appear, confirming the song is set to repeat continuously. Enjoy seamless playback of your favorite tunes on loop directly from your desktop.
When you're ready to switch things up, deactivate the loop by clicking the repeat button until it turns grey. This simple process allows you to customize your listening experience, ensuring that your preferred song plays repeatedly without interruption.
With Spotify's repeat feature on desktop, you can effortlessly create a playlist of looping songs to suit your mood or enhance your productivity. Try out this convenient function to keep the music going without the need for manual intervention.
Frequently Asked Questions
How Do I Put a Song on Repeat on Spotify?
We simply tap on the song name, locate the repeat button, and enable it.
Premium users can loop songs easily on Spotify. Just click the repeat button, and voilà – your favorite song on repeat with a single tap.
Enjoy the endless music flow hassle-free.
Why Can't I Loop Songs on Spotify?
We can't loop songs on Spotify without a Premium subscription because the feature is exclusive to paying users. This limitation encourages free users to contemplate upgrading for added benefits.
Premium subscribers enjoy the convenience of looping songs on the mobile app, enhancing their overall listening experience. This disparity motivates users to invest in a Premium account to access the full range of features available on Spotify.
Why Is the Repeat Button Not Showing on Spotify?
If the repeat button isn't appearing on Spotify, it could be because of offline mode or app issues. Verify your device's connectivity and update the app.
Account or device restrictions might also conceal the button. Investigate any song or playlist problems. Reach out to Spotify support if difficulties persist.
Stay connected for more tips!
What Is the Repeat Button on Spotify With a 1?
The repeat button on Spotify with a '1' signifies that the current song is set to play on repeat. Clicking it once marks the song for continuous playback. This '1' indicator is a convenient way to identify the song set to repeat.
To disable the repeat function, simply click the button until the '1' disappears. It means the selected song will loop until manually turned off, providing a seamless listening experience.
Conclusion
To sum up, putting songs on repeat on Spotify is a simple process that can enhance your listening experience. Just a few taps and you can enjoy your favorite song on repeat for as long as you like.
It's like having a never-ending dance party in your living room, with the music playing on a loop to keep the energy flowing.
So go ahead, give it a try and let the music take you on a journey of endless enjoyment.
Composing
Remove Songs From Your Spotify Playlist in 10 Easy Steps
Pondering how to purge unwanted songs from your Spotify playlist?
To ensure the songs from your Spotify playlist in 10 steps, open Spotify and navigate to your Library. Choose the playlist you wish to edit and access Editing Mode. Find the song you want to remove, click on the ellipsis icon, and select either ‘remove’ or ‘delete’. Confirm the removal to delete the song. To handle duplicates, manually monitor and remove them. Review your playlist for theme and mood, add new favorite songs, and maintain a consistent listening experience. Use the search bar to easily find specific songs for removal or to add new favorites. Keep your playlist up to date to align with your changing music preferences. You will find ways to further personalize your music collection.
Key Takeaways
- Access Spotify Library and playlists.
- Enter playlist editing mode.
- Locate and select the song to remove.
- Click on ⋮ icon and choose 'remove.'
- Confirm removal to update the playlist.
Open Spotify and Access Library
To begin removing songs from a Spotify playlist, we open the Spotify app on our device and head to our library. In the Library tab, we can access all our saved songs, playlists, and albums. This is where we've a detailed view of our music collection, making it easy to manage our playlists efficiently.
Within the Library section, we can navigate through our various playlists and select the specific one from which we want to remove songs. By locating the playlist we wish to edit, we set the stage for refining our listening experience on Spotify.
Accessing our library on Spotify sets the foundation for customizing our playlists to suit our preferences. This initial step allows us to streamline our music collection and create a curated listening experience tailored to our current mood or preferences. By starting at the Library tab, we pave the way for a seamless editing process to enhance our Spotify playlists.
Select Playlist to Edit
Browsing through the playlist section in Spotify enables us to pinpoint the specific playlist we wish to edit. Once we're in the right playlist, we can easily make changes like removing songs. Here's how to select a playlist to edit:
- Locate the Playlist Section: Find the playlist you want to modify by accessing the playlist section in your Spotify account. This is where all your playlists are listed for easy access.
- Click on the Playlist Title: To begin editing, select the title of the playlist you want to work on. This action will open up the playlist, displaying all the songs it contains.
- Enter Editing Mode: Ensure you're in the editing mode of the playlist. This mode allows you to make changes to the playlist, such as removing songs. Once you've completed these steps, you're ready to start removing specific songs from your playlist.
Tap on Edit Playlist
When accessing your chosen playlist in Spotify, simply tap on the 'Edit Playlist' option to initiate modifications efficiently. This feature allows for seamless management of your Spotify playlist, offering the flexibility to customize your listening experience. By tapping on 'Edit Playlist,' users can easily remove songs that no longer resonate with their mood or preferences, ensuring a curated collection of tracks tailored to individual tastes.
Through the 'Edit Playlist' function, users gain control over the content and order of songs within their playlist, empowering them to create a personalized musical journey. Whether rearranging the sequence of tracks, adding new favorites, or removing ones that no longer fit the vibe, this tool provides a user-friendly interface for playlist customization. With just a few taps, users can declutter their playlist and fine-tune their listening experience to reflect their current musical interests.
The 'Edit Playlist' feature enhances the overall Spotify experience, offering a convenient way to manage and refine your music collection.
Locate Song to Remove
Browsing through your Spotify playlist, identifying the specific song you wish to remove is the initial step in the process. When searching for the song to delete, follow these steps:
- Scan Through Your Playlist: Scroll through your playlist to locate the particular song you want to remove. Use the search function if needed to find the song quickly.
- Look for Identifying Details: Check for the song title, artist name, or album cover to pinpoint the exact track you wish to delete. Sometimes a quick visual scan can help you spot the song faster.
- Focus on the Three Dots: Once you've found the song, keep an eye out for the three dots located next to it. These dots signify that additional options are available for that specific song, including the option to remove it.
Click on ⋮ Icon
When managing your Spotify playlist, clicking on the ⋮ icon next to each song allows you to access a range of options. This dropdown menu is where you can remove songs, add them to another playlist, or explore additional song management actions.
Click on ⋮ Icon
To access options for managing individual songs in your Spotify playlist, simply click on the ⋮ icon next to the song you wish to edit. When you click on this icon, a world of possibilities opens up to customize your listening experience.
Here are three quick actions you can take using the ⋮ icon:
- Remove: Easily eliminate a song from your playlist with just a click.
- Hide: Keep a song in your library but hide it from your current playlist.
- More Options: Explore further actions like adding to a queue or sharing the song with friends.
The ⋮ icon is your gateway to a tailored playlist, allowing you to refine your music selection effortlessly.
Remove Song From Playlist
Click on the ⋮ icon next to a song in your Spotify playlist to remove it effortlessly. When you click on the icon, a dropdown menu will appear with various options to edit the song. From the menu, select the 'Remove from this Playlist' option, and just like that, the song will be instantly removed from your playlist. To make it easier to visualize, here's a simple table outlining the steps:
Steps | Description |
---|---|
Click on ⋮ icon | Next to the song |
Select | 'Remove from this Playlist' option |
Song Removed | Instantly from the playlist |
Confirm Removal
Ensuring deletion confirmation safeguards against unintended deletions and finalizes the elimination of the selected song from your Spotify playlist. When you reach this step in the process, make sure you don't skip it, as it solidifies your decision to remove the song.
Here's how to confirm removal effectively:
- Select the 'Remove' option: Once you've identified the song you want to delete, locate the 'Remove' button next to it. Clicking on this button initiates the removal process.
- Confirm your action: A prompt will appear asking you to verify the removal of the song. This verification step is important to prevent accidental deletions. Double-check the song title to make sure you're removing the correct track.
- Finalize the removal: After confirming your decision, the song will be permanently removed from your playlist. This step ensures that the playlist reflects your desired content accurately and helps maintain organization.
Remove Songs on Iphone/Android
When using the Spotify app on your iPhone or Android device, navigate to the Your Library tab to manage your playlists. Once there, find the playlist you want to edit and tap on it.
Scroll through the playlist until you locate the song you wish to remove. To delete it, tap on the three dots (···) or options menu next to the song. A menu will pop up, and from there, select 'Remove from this playlist.' The song will then be successfully removed from your playlist.
Repeat these steps for each song you want to eliminate. Remember, this feature is available for both Spotify Premium users and those using the free version on Android or iOS. Enjoy the flexibility and control over your playlists by easily managing your songs directly from your mobile device.
Remove Songs on Computer
To remove songs on your computer from your Spotify playlist, simply click on the song, hit the 'Remove from this playlist' button, and confirm your deletion choice.
This process allows you to efficiently manage your playlist by eliminating unwanted tracks with just a few clicks.
Click on Song
Clicking on a song is the initial step towards removing songs from your Spotify playlist on a computer. Here's how to do it:
- Navigate to your playlist: Locate the playlist you want to edit by using the menu on the left side of the screen.
- Click on the song: Once you've found the song you wish to remove, click on it to select it.
- Access the removal option: A menu will appear, usually with a 'remove' or 'delete' option; click on this to confirm the removal of the selected song.
Hit Remove Button
After selecting the desired song and accessing the removal option, the next step is to hit the remove button to eliminate the song from your Spotify playlist on a computer.
Once you have located the song you want to remove, look for the three dots next to the song title in your playlist. Click on these three dots, and a menu will appear. From the menu that pops up, select the 'Remove' option. By clicking this option, you confirm the deletion of the song from your playlist.
Repeat these steps for any additional songs you wish to remove. Removing songs using this method is a quick and easy way to customize your playlist on Spotify directly from your computer.
Confirm Deletion Choice
When removing songs from your Spotify playlist on a computer, an important step is confirming your deletion choice by selecting 'Remove from this Playlist' after clicking on the three dots next to the song.
- Click on the three dots next to the song you want to remove.
- Select 'Remove from this Playlist' to validate deletion.
- Make sure that the specific song is accurately identified and removed from your playlist.
Validating the deletion choice is vital to maintaining a clean and organized playlist that aligns with your preferences. Efficiently managing your playlist content through this process ensures that only desired songs are included, preventing accidental removals.
Remove Duplicated Songs
To effectively streamline your Spotify playlist, identifying and removing duplicated songs is an important task. Duplicated songs in a Spotify playlist can disrupt the flow of your listening experience by causing unnecessary repetition.
While Spotify's personalized playlists enhance your music discovery, they can sometimes lead to duplicate entries. To maintain an organized and enjoyable playlist, it's essential to regularly check for and remove duplicated songs manually.
Although Spotify doesn't offer an automated feature to detect and remove duplicates, taking the time to review your playlist can greatly improve your music curation process. By actively managing duplicates, you can save space in your playlist for new and diverse tracks while ensuring a seamless listening experience.
Keeping your playlist free from duplicates not only enhances your overall enjoyment but also showcases your favorite songs more effectively. Prioritizing this task will help you maintain a clutter-free and optimized Spotify playlist.
Finalize and Update Playlist
Let's review the current song selection on your playlist to make sure it fits the theme and mood you desire.
Remove any tracks that no longer resonate with your preferences to maintain a curated collection.
Add new favorite songs to keep your playlist fresh and reflective of your evolving musical tastes.
Review Current Song Selection
We need to assess the current song selection in our Spotify playlist to make sure it aligns with our desired theme and enhances the overall listening experience.
- Confirm the songs in the playlist resonate with the intended mood or theme, creating a cohesive listening experience.
- Evaluate the flow and progression between songs to maintain a seamless and enjoyable playlist journey.
- Look out for any duplicate tracks that may disrupt the listening experience or make the playlist feel repetitive.
Remove Irrelevant Tracks
After reviewing the current song selection in our Spotify playlist, it's important to now remove any irrelevant tracks to make sure a streamlined and enjoyable listening experience.
To do this, utilize the search bar to quickly locate specific songs or artists you wish to remove. Once identified, simply choose 'Remove' to eliminate them from your playlist.
Updating your playlist in this manner guarantees that it stays fresh and aligned with your current music preferences. By removing irrelevant tracks, you maintain a cohesive and enjoyable listening experience tailored to your tastes.
Remember to take into account the mood and theme of your playlist when deciding which tracks to remove, replacing them with new additions to keep your music selection innovative and engaging.
Add New Favorite Songs
To enhance our playlist with fresh tunes, consider adding new favorite songs that resonate with our current music preferences. Here are three simple steps to add new songs to your Spotify playlist using the Spotify Desktop App:
- Search for the Song: Use the search bar to find the desired song or artist.
- Add to Playlist: Right-click on the song and select 'Add to Playlist,' then choose the 'Music For My Mind Playlist.'
- Enjoy Easy Access: The selected song will be automatically added to your playlist, ensuring you can easily listen to it whenever you want.
Updating your playlist regularly with new favorite songs keeps it exciting and tailored to your evolving tastes. Enjoy a personalized and enjoyable listening experience by adding fresh tracks.
Frequently Asked Questions
Is There a Quick Way to Remove Songs From Spotify Playlist?
Yes, there's a quick way to remove songs from a Spotify playlist. Access your playlist on the app or desktop, find the song to remove, tap the three dots, and select 'Remove from playlist.' This method swiftly eliminates unwanted tracks, ensuring a curated listening experience.
Why Can't I Remove a Song From My Spotify Playlist?
We can't remove a song from our Spotify playlist if it's part of a collaborative playlist made by someone else. Collaborative playlists limit our ability to delete songs added by others.
The creator of the playlist has full control over song additions and removals. To have complete autonomy over our playlists, we should create our own where we can freely select and edit songs.
Make sure the song isn't in a collaborative playlist with editing restrictions before attempting removal.
How Do You Mass Delete From Spotify Playlist?
When deleting multiple songs from a Spotify playlist, we streamline the process by selecting multiple tracks at once.
On desktop, we hold Ctrl (Command on Mac) and click each desired song. Next, a right-click on one of the selected songs reveals the 'Remove from Playlist' option.
Mobile users tap and hold a song to select multiple, then tap the three dots menu and 'Remove from Playlist'.
This efficient method simplifies managing playlists on Spotify.
How Do I Exclude Songs From My Spotify Playlist?
To exclude songs from your Spotify playlist, simply select the song and choose 'Remove from this playlist.' This action eliminates the song from the playlist without deleting it from your library.
The song won't show up in the playlist but remains accessible in your Liked Songs or other playlists.
Regularly removing songs helps customize your playlist to match your current tastes, offering a more tailored listening experience and avoiding clutter or repetition.
Conclusion
In just 10 easy steps, you can declutter your Spotify playlist and guarantee a seamless listening experience.
By following these simple instructions, you can remove unwanted songs, tidy up your music collection, and create a playlist that truly reflects your taste.
So why wait? Take control of your music library today and enjoy a more organized and personalized listening experience on Spotify.
Composing
How to Delete Songs From Your Spotify Playlist in 5 Easy Steps
Wish to refine your Spotify playlist? Follow five simple steps starting with 'W' to effortlessly delete songs and customize your music collection.
To remove songs from your Spotify playlist in five easy steps, start by accessing your playlist within the app. Choose ‘Your Library‘ and then select the specific playlist you want to edit. Locate the song you want to delete either by using the search bar or scrolling through the playlist. Click on the three dots next to the song, then choose ‘Remove from this Playlist‘. Finally, confirm the removal by clicking ‘Remove’ or ‘Delete’. Easily customize your music collection on Spotify to suit your tastes. Become a playlist management pro with these simple steps.
Key Takeaways
- Open Spotify app and go to 'Your Library' tab.
- Locate the song in the playlist.
- Tap the three dots next to the song.
- Select 'Remove from this Playlist'.
- Confirm the removal by clicking 'Remove'.
Access Your Spotify Playlist
To access our Spotify playlist, open the Spotify app on our device. Once in the app, navigate to the 'Your Library' tab to view all our playlists. From there, select the specific playlist from which we wish to remove songs.
To delete a specific song from the playlist, locate it within the list of songs. Next to the song, options will be available that allow us to remove it from the playlist. By selecting these options, we can effectively delete the chosen song from our Spotify playlist.
This process enables us to curate our playlists to our liking, ensuring that only the songs we enjoy are included. Removing songs from a playlist on Spotify is a simple and efficient way to customize our listening experience.
With just a few taps, we can tailor our playlists to suit our preferences and create a more personalized music collection.
Locate the Song to Remove
After accessing our Spotify playlist, the next step is to locate the specific song we want to remove.
To efficiently remove songs, we can utilize the Search bar within the playlist. Simply type in the song's name, and the Search bar will quickly locate the desired track for deletion.
Alternatively, manually scrolling through the playlist is another method to find the song. Look for the three dots positioned next to the song title; these dots are key indicators for song management options.
By clicking on the three dots, a dropdown menu will appear, providing various choices for song manipulation. From the options presented, select 'Remove from this Playlist' to delete the chosen song effectively.
This streamlined process enhances the user experience by offering intuitive methods to find and eliminate songs from your Spotify playlist swiftly.
Tap the Three Dots
Upon spotting the desired song in our Spotify playlist, we tap the three dots adjacent to the song title for further options. This action triggers a menu to pop up, offering various choices related to the selected song.
In this menu, we can find a 'Remove from this Playlist' option, which allows us to swiftly eliminate the song from our playlist on Spotify. The process is seamless and intuitive, providing a quick way to access and manage our music collection to our liking.
Whether using the Spotify Desktop App or the mobile version, this feature remains consistent, giving us control over our playlists with ease. By tapping these three dots, we open up a world of possibilities to manage our music library efficiently.
This step serves as a gateway to customizing our listening experience, ensuring that our playlist on Spotify reflects our current preferences accurately.
Select 'Remove From Playlist'
When managing our Spotify playlist, we simply select 'Remove From Playlist' to delete unwanted songs effortlessly. This feature is particularly handy when using the Spotify mobile app to curate our music collection.
Here's how it works:
- Open the Spotify mobile app on your device.
- Navigate to the particular song you wish to remove from your playlist.
- Tap on the three dots next to the song and select 'Remove from this Playlist'.
Confirm Song Removal
To confirm the removal of a song from your Spotify playlist, simply click on the designated 'Remove' or 'Delete' option in the pop-up that appears. This step guarantees that you are intentional about removing songs from your playlist. The pop-up serves as a safety net, preventing accidental deletions and giving you a final chance to review your selection before confirming the song removal.
Here is a table illustrating the confirmation process when deleting a song from your Spotify playlist on desktop:
Action | Description |
---|---|
Click on 'Remove' or 'Delete' | Verify the removal of the selected song. |
Review your selection | Double-check the song you are deleting. |
Finalize the deletion | Click to permanently remove the song from your playlist. |
This intuitive process in the Spotify app guarantees that you have full control over the songs in your playlist, allowing you to manage your music collection effortlessly.
Frequently Asked Questions
How Do You Quickly Delete Songs From Spotify Playlist?
We quickly delete songs from our Spotify playlists by opening the playlist in the app. Once we locate the song to remove, we right-click on it to reveal the options menu.
From there, we select 'Remove from this Playlist,' deleting the song instantly.
This efficient method allows us to clean up our playlists in just a few clicks, making playlist management a breeze.
Why Can't I Remove a Song From My Spotify Playlist?
We can't remove a song from a Spotify playlist if another collaborator added it, as their permissions take precedence. It's like trying to edit a document that someone else locked.
To maintain control, consider making a personal playlist where you have full editing rights. Collaborative playlists in Spotify have limitations to guarantee smooth sharing, enforcing the original contributor's rights.
Following these guidelines enhances collaboration and playlist management efficiency.
How Do I Remove Songs From My Spotify Playlist Browser?
To remove songs from your Spotify playlist using a browser, follow these steps:
- Log in to your account.
- Hover over the song you want to delete.
- Click the three dots next to the song.
- Choose 'Remove from this Playlist.'
Is There a Way to Mass Delete Spotify Playlists?
Yes, there's a way to mass delete Spotify playlists by selecting multiple songs at once and removing them in a batch process. This efficient method saves time and effort, allowing users to manage their music collections with ease.
By utilizing key combinations, menu options, or tapping multiple songs simultaneously, users can customize their playlists to suit their preferences.
Community-shared solutions and user tips further enhance the experience of mass deleting songs from Spotify playlists.
Conclusion
To sum up, removing songs from your Spotify playlist is a simple process that can be done in just a few clicks.
By following the five easy steps outlined above, you can easily manage your music library and keep it organized to your liking.
So go ahead and declutter your playlist with a few taps – it's as easy as pie!
Composing
10 Steps to Like Songs on Spotify
Navigate the process of liking songs on Spotify effortlessly with 10 essential steps – discover how to curate your personalized playlist in minutes!
To express your approval of songs on Spotify, follow these instructions: Begin by opening the Spotify app to take advantage of its user-friendly interface. Then, navigate to your library to manage your liked songs. After that, select ‘Like Songs’ to easily organize your playlist. Activate selection mode to efficiently handle your music collection. Long-press on a song to perform actions like adding it to playlists. Use the ‘Edit’ option to effectively manage multiple songs. Follow the on-screen instructions for smooth navigation. Choose your favorite songs by tapping the heart icon. Finally, add songs to playlists and enjoy your handpicked collection. These steps will enhance your Spotify experience by providing a seamless way to create personalized playlists.
Key Takeaways
- Access your Library in the Spotify app.
- Select 'Like Songs' to save favorite tracks.
- Use selection mode for efficient management.
- Press and hold on a song to like it.
- Follow on-screen prompts for smooth navigation.
Launch Spotify App
To begin our journey into liking songs on Spotify, we launch the Spotify app on our device. The Spotify app offers a sleek and user-friendly interface designed for easy navigation.
Once inside the app, we head to the Library section located conveniently at the bottom of the screen. This section is where we can organize our favorite tracks and playlists.
Within the Library, we can easily locate and select the 'Liked Songs' subsection. This area is a curated collection of all the songs we've shown appreciation for by liking them.
To like a song, we can enter selection mode by pressing and holding on the song we enjoy. This action adds the song to our Liked Songs playlist, making it easily accessible for future listening.
The Spotify app's intuitive design makes the process of liking songs a seamless and enjoyable experience for us as music enthusiasts.
Tap on 'library'
When you tap on 'Library' in Spotify, you open the door to managing your liked songs and playlists. This feature acts as a central hub for all your saved music and podcasts.
From here, it's easy to find and organize your liked songs and personalized content.
Accessing the Library
In Spotify, we can easily access the Library by selecting the option labeled 'library' at the bottom of the screen. The Library is where all your favorite songs, playlists, and saved albums reside, serving as a centralized space for managing your music collection efficiently.
By heading to the Liked Songs section within the Library, you can quickly access and manage all the songs you've liked on Spotify. This feature streamlines the process of finding your preferred tracks, allowing for seamless listening experiences.
Whether you're exploring new music or revisiting old favorites, the Library section in Spotify provides a convenient and organized way to enjoy your music collection. Accessing your liked songs has never been easier with Spotify's intuitive interface.
Finding Your Liked Songs
Accessing the Library section in Spotify by tapping on 'library' grants direct access to your Liked Songs collection. When you navigate to your Liked Songs within the Library, you can easily find and enjoy all the songs you have liked on Spotify.
Here are some key points about finding your Liked Songs:
- Tapping on 'Library' at the bottom of the screen reveals your Liked Songs collection.
- Your Liked Songs are conveniently stored alongside other saved content in the Library.
- Accessing your Liked Songs allows for quick and effortless listening to your favorite tracks.
- Your Liked Songs collection on Spotify provides a simple way to access and enjoy your preferred music.
Managing Liked Songs
To manage your Liked Songs on Spotify, simply tap on the 'library' option in the app. In the 'library' section, you'll find all the songs you have liked neatly organized for easy access.
Your Liked Songs are conveniently displayed in a list format, allowing you to browse through them effortlessly. By tapping on Liked Songs, you can play your favorite tracks, shuffle them for a dynamic listening experience, or even create personalized playlists directly from your liked music collection.
This feature in the 'library' section enables you to effectively manage and enjoy your favorite songs on Spotify, ensuring that your music preferences are always at your fingertips for a seamless listening experience.
Select 'Like Songs'
As we explore the Spotify app, selecting 'Like Songs' is a crucial step in curating our personalized music collection. When we tap on the 'Like Songs' option in the Library section, we open up a world of musical possibilities. Here's why liking songs on Spotify is a game-changer:
- Effortless Organization: The 'Like Songs' feature allows us to save and organize our favorite tracks with just a tap, making it a breeze to access them later.
- Personalized Recommendations: Liking songs helps Spotify's algorithm learn our musical tastes, leading to tailored recommendations that suit our preferences.
- Quick Addition: By tapping on the heart symbol next to a track, we can swiftly add it to our Liked Songs playlist for future listening enjoyment.
- Centralized Music Hub: Accessing our Liked Songs playlist provides a convenient way to enjoy all our cherished tracks in one cohesive space, creating a personalized music sanctuary right at our fingertips.
Enter Selection Mode
When using Spotify, engaging with the feature to enter selection mode allows for efficient management of your music library. By simply tapping and holding on a song in your library, you can activate selection mode, which empowers you to choose multiple songs for various actions, such as adding them to playlists. Once you're in selection mode, you can easily select and manage multiple songs at once, streamlining the process of organizing and interacting with your music collection.
This convenient tool is especially handy for efficient playlist management on Spotify. Whether you want to curate a new playlist, rearrange existing ones, or perform bulk actions on songs, selection mode simplifies the process and saves you time. It's a user-friendly feature that enhances your overall experience with the platform, providing a seamless way to handle your music library with ease.
Press and Hold on a Song
Upon exploring further by selecting and holding on a song within your Spotify app, a menu will promptly appear with a selection of actions for you to choose from. This feature opens up a world of possibilities at your fingertips. Here's what you can do:
- Discover More: Delve into related artists or explore the album the song belongs to for a deeper musical journey.
- Add to Playlist: Quickly save the song to one of your playlists for easy access anytime, anywhere.
- Share the Vibes: Spread the melody by sharing the song with friends or on your social media platforms.
- Like the Beat: Show your love for the track by tapping the heart icon to 'Like' the song.
Tap on Other Songs
Browsing through Spotify, we can easily show appreciation for songs by tapping on other tracks within the app. When we tap on a song we like, we not only express our preference but also help Spotify understand our music taste better. By doing this, Spotify can make tailored recommendations, suggesting more songs that align with our musical preferences. Additionally, tapping on songs we enjoy is a simple way to create a personalized music experience.
One fantastic feature that tapping on songs offers is the ability to make playlists. When we tap on a song, we can choose to add it to a playlist we've created or make a new playlist right there on the spot. This empowers us to curate our own music collections based on our mood, activities, or favorite artists. Creating playlists with the songs we tap on allows us to easily access them later for listening sessions tailored to our preferences. Tapping on songs not only enhances our listening experience but also gives us the flexibility to make our music journey unique and enjoyable.
Use 'Select' or 'Edit' Button
When using Spotify, locating the 'Select' or 'Edit' button is essential for managing multiple songs efficiently.
By clicking on 'Select' or tapping on the 'Edit' option, users can enter a selection mode that simplifies the process of liking several songs at once.
Follow the on-screen prompts to easily choose and interact with multiple songs in your playlists.
Click on 'Select'
To like songs on Spotify, simply tap on the 'Select' or 'Edit' button. This action allows us to choose multiple songs for various actions like adding to playlists. When utilizing the 'Select' feature, it becomes easier to efficiently manage our liked songs.
Whether tapping on songs individually or selecting multiple songs at once for liking, the 'Select' or 'Edit' button streamlines the process of interacting with and organizing our music on Spotify.
- Efficiently manage liked songs
- Choose multiple songs for actions like adding to playlists
- Simplifies the process of organizing music
- Allows for individual or batch liking songs
Tap 'Edit' Option
After utilizing the 'Select' or 'Edit' button to choose multiple songs for various actions on Spotify, the next step is to tap on the 'Edit' option for further management and organization of your music library.
The 'Edit' function allows you to efficiently manage your music by selecting multiple songs at once. Look for the 'Select' option or 'Edit' button when performing bulk actions like liking or adding songs to playlists.
Tapping on 'Edit' enables you to interact with numerous songs simultaneously, making adjustments quicker and more convenient. By utilizing the 'Edit' option, you can streamline the process of liking or saving multiple songs on Spotify, enhancing your overall music listening experience with ease.
Follow On-Screen Prompts
Utilizing the 'Select' or 'Edit' button on Spotify initiates the process of following on-screen prompts to effectively manage your selected songs. When engaging with this feature, make sure you follow these steps:
- Look for the 'Plus' button to add songs easily.
- Use the on-screen prompts for smooth navigation.
- Press and hold on a song to activate the selection mode.
- Be sure to finalize your selection by following the prompts to save your liked songs or playlists.
Choose Desired Songs
When using the Spotify app, navigate to your desired song to like by tapping on the three dots next to the song title for options.
As avid users of our favorite streaming service, this step is vital in curating a personalized music library. By selecting the 'Like' or heart icon, you instantly add the song to your Liked Songs collection.
The beauty of this feature lies in its simplicity; a single tap can express your admiration for a track. Once liked, the heart icon turns a vibrant green, making it easy to spot your favorite tunes.
Each selection reflects your unique taste and contributes to a tailored listening experience. Remember, the process is effortless and can be repeated for every song you wish to cherish on Spotify.
Add to Playlist
When adding songs to a playlist on Spotify, we can easily organize our music collection by creating custom playlists.
Collaborative playlist sharing allows us to engage with others and discover new music together.
Custom playlist covers help personalize our listening experience and make our playlists visually appealing.
Playlist Organization Tips
To efficiently organize your liked songs on Spotify, utilize the 'Add to Playlist' option. When creating playlists, consider customizing names and cover images to easily identify different categories.
Here are some innovative playlist organization tips:
- Create Mood-Based Playlists: Sort songs based on moods like 'Chill Vibes' or 'Workout Energy'.
- Organize by Occasion: Make playlists for occasions like 'Study Time' or 'Party Mix'.
- Collaborate with Friends: Share playlists with friends to discover new music together.
- Utilize Playlist Folders: Keep your music library well-organized by grouping related playlists into folders.
These tips will help you keep your music collection structured and tailored to your preferences.
Collaborative Playlist Sharing
Let's explore the collaborative playlist sharing feature on Spotify, where multiple users can contribute songs to a single playlist in real-time.
Collaborative playlist sharing on Spotify enables users to add songs to a shared playlist by following a shared link or invitation. This feature is perfect for group events, parties, or simply discovering new music together.
With collaborative playlists, contributors have the flexibility to add, remove, and rearrange songs in real-time, fostering a sense of shared music curation and enjoyment. Spotify's emphasis on collaborative playlist sharing promotes social interaction and music discovery, making it easier for friends, family, or colleagues to connect through a shared musical experience.
Embrace the collaborative spirit on Spotify and start creating memorable playlists together.
Custom Playlist Covers
Personalizing our playlists with unique images becomes a breeze through Spotify's Custom Playlist Covers feature. This innovative option allows us to enhance our music collections with personalized cover images that reflect the mood or genre of each playlist.
Here are some key points to bear in mind when utilizing Custom Playlist Covers:
- Users can select images from their devices or choose from Spotify's suggested cover art.
- Custom Playlist Covers add a visually appealing touch, making playlists more engaging.
- The cover image can help quickly identify and differentiate playlists in our library.
- Adding a custom cover to a playlist allows us to express the playlist's theme or vibe effectively.
Save and Enjoy Your Playlist
Saving and enjoying your playlist is essential for easy access to your favorite songs on Spotify.
When you like songs on Spotify, they're automatically added to your 'Liked Songs' playlist, creating a convenient hub for all your favorite tracks. This feature allows you to quickly find and play the songs you enjoy the most without having to search for them individually.
Additionally, you can take it a step further by creating custom playlists from your Liked Songs, tailoring your listening experience to suit your mood or occasion.
Frequently Asked Questions
How Do You Like Songs on Spotify?
When liking songs on Spotify, we simply need to tap the heart symbol near the song while playing it in the app.
This action not only enhances our listening experience but also assists Spotify in tailoring recommendations to our tastes.
By engaging with the app in this way, we teach its algorithms our preferences, thereby refining the playlists it generates for us.
How Do I Heart a Song on Spotify?
To heart a song on Spotify, you simply tap the heart symbol next to the song title. This action helps personalize your music recommendations. Once you've liked a song, the heart symbol turns green.
Liked songs are conveniently added to your 'Liked Songs' playlist for easy access. By liking songs, you efficiently curate your listening experience. It's a quick way to tailor your music choices and discover new favorites.
How Come I Can't Like Songs on Spotify Anymore?
We may be unable to like songs on Spotify due to account issues, app glitches, or changes in the interface. Keeping our Spotify app updated can prevent such problems.
If persistent difficulties arise, contacting Spotify support for help is advisable. Staying informed about official announcements and troubleshooting steps from Spotify can also aid in understanding any changes to the like feature.
What Happened to Like Button on Spotify?
The Like button on Spotify has been replaced by a new Plus button. This change allows us to both like songs and add them to playlists with a single tap.
Tapping the Plus button simplifies saving favorite tracks and podcasts to our Liked Songs or playlists. A green checkmark confirms a successful addition after pressing the Plus button.
This update streamlines the process of saving and organizing music on Spotify.
Conclusion
To sum up, liking songs on Spotify is a straightforward process that can improve your music listening experience. By following these 10 steps, you can effortlessly compile a playlist of your favorite songs and listen to them whenever you want.
Remember, 'Music is the universal language of mankind,' so make the most of Spotify's features to create a playlist that resonates with your inner self. Happy listening!
-
Microphone3 days ago
Unleash Your Inner Podcaster: Discover the Best Microphone for Crisp, Clear Audio
-
Composing3 days ago
MUTILATED NOISE by SampleTraxx: The Next Generation Sound Collection
-
Audio Production24 hours ago
Unleashing Sound Therapy: Incorporating Acoustic Design in a Wellness Centre
-
Singing3 days ago
What Is Breath Support And Why Is It Important For Singers?
-
Ambient1 day ago
Unleashing Eerie Waves: A Guide on Producing Dark Ambient Music
-
Ambient4 hours ago
Mastering the Art of Dark Ambient Synthesizer Music
-
Ambient4 hours ago
Unleash Your Creativity: A Complete Guide to Innovating in Dark Ambient Music
-
Audio Production4 hours ago
Unlock the Power of Tranquility: Optimizing Audio Quality in a Wellness Centre