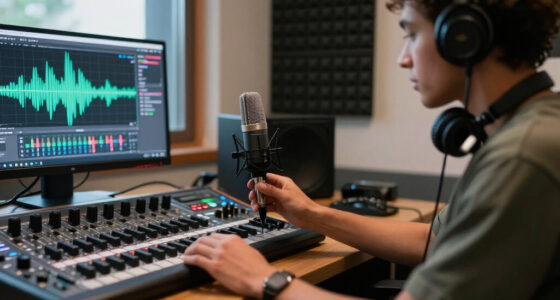


Set up a pair of studio monitor speakers by connecting them to an audio interface or mixer, placing them in a balanced listening position, and checking playback at a safe level. This guide is for beginners building a home or project studio; it takes about 45-90 minutes, depending on your room and cable runs. You will finish with both speakers playing evenly and a practical listening position for recording, editing, or mixing.

Get audio and creator gear delivered free with Prime
- Fast, free delivery on millions of items
- Prime Video, Amazon Music and more included
- Member-only deals all year

JBL 305P MkII 5" 2-Way Active Powered Studio Reference Monitor (Pair)
- ✔ Woofer: 5 inches
- ✔ Tweeter: 25 mm
- ✔ Amplification: Dual 41 W Class-D

PreSonus Eris 3.5 Powered Studio Monitors (Pair)
- ✔ Amplification: 50 watts, Class AB
- ✔ Woofer: 3.5 inches
- ✔ Tweeter: 1-inch silk dome

Ortizan C7 Powered Studio Monitors Pair with Bluetooth 5.3, Black
- ✔ Mid-bass driver: 3.5-inch carbon fiber
- ✔ Tweeter: 0.75-inch silk dome
- ✔ Inputs: 6.35 mm TRS, RCA, AUX, USB
Difficulty: Beginner | Time: 45-90 minutes
What You’ll Need
Tools & Materials:
- Two powered studio monitors, or passive monitors with a compatible stereo amplifier
- Audio interface, mixer, or other suitable line-level audio output
- Two matching audio cables with connectors compatible with the output and speakers
- Stable speaker stands or secure desktop pads
- Tape measure and a level listening seat
- Familiar music or audio recordings for playback checks
Knowledge:
- Basic familiarity with audio output and volume controls
- Ability to identify the audio interface outputs and monitor inputs
Check each monitor’s input type and the interface’s output type before buying or connecting cables. Balanced XLR or TRS connections are common. Powered monitors contain amplifiers; connect them to line-level outputs. Passive monitors need a suitable amplifier and speaker wire. Keep all volume controls low and turn equipment off before connecting cables.
JBL 305P MkII 5" 2-Way Active Powered Studio Reference Monitor (Pair)
The JBL 305P MkII is the most complete monitoring choice here for a producer who can accommodate larger desktop speakers. Its 5-inch woofer gives it an advantage over the 3.5-inch drivers in both the PreSonus Eris 3.5 and Ortizan C7 when listening for low-mid weight. The supplied description also highlights an Image Control Waveguide, designed to keep stereo imaging clear across a wider listening area. That can make it easier to judge panning and placement without having to hold your head in one exact spot.Placement and room response matter as much as driver size, and JBL includes Boundary EQ and HF Trim to help adapt the sound when the monitors sit near a wall or the room needs a treble adjustment. Compared with the Eris 3.5, this is the better fit when mixing takes priority over saving desk space. Compared with the Ortizan, it gives up Bluetooth and USB convenience in favor of a more studio-oriented feature set and balanced XLR/TRS inputs.There are practical compromises. These cabinets are substantially larger than the compact alternatives, and the provided input list is limited to balanced connections. There is no wireless playback, and tabletop mounting may not suit every room layout. The stated 5-inch driver also does not make this a subwoofer replacement; if your work depends on very deep bass, we would still check mixes on headphones or a dedicated subwoofer. For a near-field setup where imaging and room controls matter, however, JBL is the strongest all-around monitor pair in this comparison.
Pros:
- 5-inch woofer offers more low-mid capability than the two 3.5-inch alternatives.
- Image Control Waveguide is intended to provide precise imaging across a wider sweet spot.
- Boundary EQ and HF Trim support room and placement adjustments.
- Balanced XLR and TRS inputs suit common studio interfaces and mixers.
Cons:
- Larger cabinets occupy considerably more desk space than the PreSonus and Ortizan pairs.
- No Bluetooth or USB input for direct wireless or computer playback.
- Very deep bass still calls for another reference, such as headphones or a subwoofer.
Best for: Home-studio producers and editors with desk space who want balanced connectivity, stereo imaging features, and room adjustment controls.
Not ideal for: People who need Bluetooth, compact cabinets, wall mounting, or confident sub-bass monitoring without additional listening references.
Bottom line: Choose the JBL 305P MkII when monitoring capability and room tuning matter more than a compact footprint or wireless convenience.
“Choose the JBL 305P MkII when monitoring capability and room tuning matter more than a compact footprint or wireless convenience.”
PreSonus Eris 3.5 Powered Studio Monitors (Pair)
When desk space is tight but balanced connections and basic room tuning still matter, the PreSonus Eris 3.5 makes a practical middle ground. Its pair of 3.5-inch near-field monitors is smaller than the JBL 305P MkII, and the listed 50 watts of Class AB amplification is aimed at desktop and near-field listening rather than filling a large room. High- and low-frequency controls let us make modest adjustments for a particular desk or room, a useful inclusion that the Ortizan C7’s supplied specification list does not match.For a producer connecting an audio interface, the Eris offers balanced TRS inputs alongside RCA and a front headphone output. That makes switching between speakers and headphones straightforward, and gives it a more traditional studio connection set than the Bluetooth-equipped Ortizan. The listed frequency response begins at 80 Hz, so we should not expect it to reveal the deepest bass as clearly as the larger JBL. It is better suited to editing, voice work, songwriting, and general production where compact monitoring is more valuable than extended low-end reach.Its main tradeoff is physical scale: the small woofer limits deep bass, while the available volume headroom is not meant for a large room. There is no Bluetooth, which is a real convenience gap against the Ortizan if casual wireless listening is part of the setup. Still, the Eris earns its place by balancing small size, balanced inputs, and adjustable tone. Buyers who need a more capable room-filling reference should step up to JBL; buyers who need a computer-friendly wireless speaker may prefer Ortizan.
Pros:
- Compact cabinet is easier to place on a crowded desktop than the JBL pair.
- High- and low-frequency controls provide useful basic room adjustment.
- Balanced TRS, RCA, and auxiliary inputs support several wired sources.
- Front headphone output makes private monitoring easy to access.
Cons:
- 3.5-inch woofer and stated 80 Hz lower response limit constrain deep-bass monitoring.
- Less volume headroom for large spaces than the larger JBL monitors.
- No Bluetooth or wireless input.
Best for: Desktop producers, podcasters, and editors who need compact near-field monitors with balanced inputs and simple room tuning.
Not ideal for: Bass-heavy producers who need to judge sub-bass, listeners monitoring in a large room, or anyone who wants Bluetooth playback.
Bottom line: Pick the Eris 3.5 for a compact, connected production desk where basic room tuning matters more than deep bass extension.
“Pick the Eris 3.5 for a compact, connected production desk where basic room tuning matters more than deep bass extension.”
Ortizan C7 Powered Studio Monitors Pair with Bluetooth 5.3, Black
The Ortizan C7 is the most connection-flexible pair in this lineup. Balanced 6.35 mm TRS, RCA, AUX, USB with a built-in 24-bit DAC, and Bluetooth 5.3 give it several routes from a computer, interface, phone, or other playback device. For a mixed-use desk that moves between editing, casual listening, and production, that breadth is appealing. The PreSonus Eris 3.5 has a headphone output and practical tone controls, but Ortizan is the more convenient option when wireless pairing or USB audio is part of the routine.Its 3.5-inch carbon-fiber mid-bass driver and 0.75-inch silk-dome tweeter are housed in a compact cabinet. That keeps the C7 closer in footprint to the Eris than to the larger JBL 305P MkII, while the supplied description claims lab tuning for a flat response. However, the product information does not list room-adjustment controls comparable to JBL’s Boundary EQ and HF Trim or PreSonus’s high- and low-frequency tuning. Its feature advantage is source flexibility, not a clear win in acoustic adjustability.We would choose the C7 for a small home studio where the same speakers serve several devices, with Bluetooth reserved for convenience and a wired connection used when consistency matters. The small woofer and cabinet may limit deep bass, much like the Eris; the larger JBL is the stronger candidate for mixing where low-mid weight and imaging are higher priorities. Product details also list a maximum range of 10 meters and Bluetooth range of 18 meters, so buyers should treat wireless reach as dependent on conditions. The Ortizan makes sense when connectivity is the deciding factor, but it is not the most focused monitoring choice here.
Pros:
- Bluetooth 5.3 offers convenient wireless pairing for casual playback.
- USB input with built-in 24-bit DAC expands computer connection options.
- Balanced TRS, RCA, and AUX complement wireless and USB sources.
- Compact cabinet works for desktop and small-room setups.
Cons:
- 3.5-inch woofer and compact enclosure may limit deep bass performance.
- No room tuning controls are specified in the supplied product details.
- Bluetooth is convenient, but a wired input is preferable for consistent monitoring.
Best for: Desktop users who want one compact pair for wired studio sources, USB playback, and occasional Bluetooth listening.
Not ideal for: Mix engineers who prioritize room correction features, larger-woofer low-frequency monitoring, or a strictly wired reference setup.
Bottom line: Choose the Ortizan C7 when broad desktop connectivity is the priority and you can accept compact-speaker limits for critical bass work.
“Choose the Ortizan C7 when broad desktop connectivity is the priority and you can accept compact-speaker limits for critical bass work.”
As an Amazon Associate we earn from qualifying purchases.
Before You Start
Choose a listening position where you can sit facing the speakers without blocking them with a screen or other equipment. Avoid placing monitors directly against a wall or in a corner if you have room to move them. Room shape and reflections affect what you hear, so this setup provides a useful starting point rather than a guarantee of perfectly flat sound. Never connect an amplified speaker output to a powered monitor’s line input.
Step-by-Step Instructions
Step 1: Choose a listening position
Place your desk and chair so you can face the speakers directly. Start with the chair near the middle of the room’s width, while avoiding a position exactly halfway between the front and back walls if the room allows. Leave space behind the monitors for their rear panels and ventilation.
Tip:Large reflective surfaces, bare walls, and corners can exaggerate bass or reflections. Start with the most open position available and adjust after listening.
Check: You can sit comfortably facing the intended location of both monitors, with clear space around them.
Step 2: Place the monitors symmetrically
Set one monitor on each side of your listening position, at equal distances from your chair and from the nearest side walls. Aim for a triangle: the distance between the speakers should be close to the distance from each speaker to your head. Point each speaker toward your listening position.
Tip:Keep the left and right speakers at matching heights and distances. If one has to sit closer to a wall or corner, the sound may differ between sides.
Check: From your chair, the speakers appear evenly spaced, with you at the third point of the triangle.
Step 3: Set speaker height and angle
Raise or lower the monitors so their tweeters—the small high-frequency drivers—are near ear height when you are seated. Angle the speakers so their front panels point toward your ears. Use stable stands or isolation pads, and make sure each monitor cannot wobble or slide.
Tip:Do not place monitors on an unstable stack of books or directly on a surface that vibrates strongly. Keep the drivers unobstructed.
Check: Both tweeters are near ear level, and each speaker points toward your seated listening position.
Step 4: Check the connections and controls
Turn off the interface, mixer, and monitors. Connect the left line output to the left monitor and the right line output to the right monitor using compatible cables. For passive monitors, connect the interface or mixer to the amplifier’s inputs, then connect the amplifier’s speaker outputs to the monitors with speaker wire. Set monitor input sensitivity or level controls to their documented starting position, and set EQ switches to neutral or flat.
Tip:Follow the labels in the manuals if the equipment uses different names or control scales. Do not guess when choosing between line-level and speaker-level connections.
Check: Each output reaches the corresponding speaker input, and all cables are firmly seated.
Step 5: Power on in the right order
Turn the interface or mixer output volume down. Switch on source devices first, then the amplifier or powered monitors. To shut down later, turn off the amplifier or monitors before turning off the source devices. This order helps prevent loud pops from reaching the speakers.
Tip:If you hear a strong pop, turn the monitor level down and check the power-up order and connections before continuing.
Check: The equipment powers on quietly, with no persistent hum, buzz, or sharp noise.
Step 6: Set a safe playback level
Play familiar audio and raise the interface or mixer volume gradually until it is comfortably audible. Keep the level low at first. If the monitors have individual level knobs, use the same setting on both, then control normal listening volume from the interface or monitor controller.
Tip:Comfortable listening is enough for placement checks. Avoid prolonged loud playback; reduce the level if listening becomes tiring or uncomfortable.
Check: Playback is clear at a moderate level, with no clipping indicator, rattling, or audible distortion.
Step 7: Check left and right playback
Play a recording with centered vocals or another sound you recognize. Confirm that left and right channels come from the correct speakers. If your interface has a channel test or balance control, use it briefly at a low level to compare both sides, then restore the balance to center.
Tip:Swap left and right cables at the interface only after turning down the volume if you need to diagnose a channel problem.
Check: Centered sounds appear between the speakers, and both sides play at similar loudness.
Step 8: Fine-tune placement and document settings
Listen to several familiar recordings. If the center image seems off, confirm equal distances and angles before changing tone controls. Move both speakers in small matching increments, then listen again. Once the position works, note the distance from each speaker to your chair and record any EQ or boundary settings you changed.
Tip:Do not use EQ switches to compensate for an obvious placement mismatch. Correct the physical position first.
Check: Vocals and centered instruments sound stable in the middle, and your placement and control settings are recorded.
Common Mistakes to Avoid
- Placing one speaker closer to the chair or a side wall than the other. — Measure the distances from each speaker to your listening position and compare their spacing from nearby walls.
- Connecting a powered monitor to an amplifier’s speaker output. — Use line-level outputs for powered monitors. Connect passive monitors to an amplifier’s speaker outputs.
- Setting the speakers too low or pointing them away from the listener. — Align the tweeters near seated ear height and angle both monitors toward your listening position.
- Turning the volume up quickly during setup. — Start with the interface and monitor levels low, then increase playback gradually.
Troubleshooting
Problem: One monitor is silent.
Solution:
Turn the volume down. Check that the cable is firmly connected at both ends, that the interface output is active, and that the monitor’s input selection matches the connection. Test the cable and output with the other speaker at a low level to find which part is at fault.
Problem: A steady hum or buzz comes from the speakers.
Solution:
Lower the monitor volume and check that audio cables are fully seated and separated from power cables where possible. Disconnect nonessential audio connections one at a time to locate the source. If the noise persists, consult the equipment manuals or a qualified technician.
Problem: The center image sounds off to one side.
Solution:
Check that the interface balance is centered and that left and right connections are not reversed. Measure speaker-to-listener distances, match speaker angles, and confirm that obstructions or nearby walls do not affect only one side.
Problem: Bass sounds boomy or weak.
Solution:
Move both monitors away from corners or walls in small increments and listen again. Check the monitors’ boundary or EQ settings and consult their manuals. Room acoustics also affect bass, so avoid making large EQ changes based on one listening position alone.
What Success Looks Like
The setup is ready when both monitors play the correct channels at a comfortable level, centered sounds appear between them, and the speakers are stable, similarly placed, and aimed at your ears. You should hear no persistent hum or distortion at normal listening levels. Keep the position and control settings recorded so you can restore them after moving equipment.
Next Steps
Use the monitors for routine listening and compare mixes with familiar recordings at a moderate volume. If you move the desk, speakers, or chair, recheck the distances and center image. For persistent room-related bass problems, consider acoustic treatment or measurement tools, and consult the monitor manual before applying room correction.
Frequently Asked Questions
Do I need an audio interface to use studio monitors?
No. You need a suitable line-level source, such as an audio interface, mixer, monitor controller, or compatible audio output. Check the connectors and output levels before connecting.
Can I put studio monitors directly on my desk?
Yes, if they sit securely and the tweeters are near ear height. Isolation pads can reduce vibration through the desk. Stands may help you position the speakers more precisely.
How far should studio monitors be from the wall?
There is no single distance for every monitor or room. Start with the spacing recommended in the monitor manual, leave room for rear ports and ventilation, and adjust by listening. Use boundary settings only as described by the manufacturer.
Should I leave the monitor EQ switches flat?
Start with flat or neutral settings. Use boundary compensation only when the placement calls for it and follow the manual. Record any changes so you can repeat the setup.